Official User Guide
తెలుగు వెర్షన్

WinEntry
Specialized Retail Inventory & Accountability · Daily Stock · Sales · Purchases
Specialized Retail Inventory & Accountability · Daily Stock · Sales · Purchases
Originally designed and engineered by Simhadri Systems to meet the rigorous daily stock reconciliation requirements of licensed retail wine and liquor businesses in Telugu states, WinEntry is a robust, versatile inventory management tool suitable for any retail business that relies on precise, unit-based stock tracking.
WinEntry automates the essential daily reconciliation process — the "opening vs. closing" balance — that is critical for high-volume retail environments.
Built by the industry, for the industry. Born from the unique needs of retail licensees, WinEntry is offered as a collaborative tool. Since licensees operate in exclusive geographic zones, the app serves as a professional-grade solution shared among peers to foster a community of feedback and continuous improvement.
Eliminates human error. By replacing tedious manual paper entries with automated digital logging, the app significantly reduces the risk of mathematical errors and financial discrepancies.
Highly customizable. While it excels in the licensed retail trade, the underlying logic is code-neutral. It can be adapted to any retail sector — such as Dairy, Hardware or Cosmetics — without requiring code changes.
| Sector | Example Use |
|---|---|
| Licensed retailer (current deployment) | Bottles by brand and pack size — daily reconciliation and generation of daily account reports for regulatory compliance |
| Dairy & Beverage | Crates and individual bottles with high daily turnover |
| Construction & Hardware | Bags of cement, boxes of tiles, plumbing fixtures |
| Personal Care & Cosmetics | Multiple brands across SKU sizes (ml / grams) |
| Pet Supply | Packaged food bags and accessories by unit |
The app supports up to five size variants per product. In the current licensed retail configuration these are:
| Size Code | Description | Typical Volume | Units per Case |
|---|---|---|---|
| Full / Big | 551–900 ml (usually 750 ml or 650 ml Beer) | 12 per case | |
| Litre | 1000 ml (by suffixing "L" to the brand code) | 9 per case | |
| PP | Half / Pint | 201–550 ml (usually 375 ml or Can Beer) | 24 per case |
| NN | Quarter / Nip | 101–200 ml (usually 180 ml) | 48 per case |
| DD | Dip / Miniature | ≤ 100 ml (usually 90 ml or 60 ml) | 96 per case |
For other business types, size codes and their descriptions are configured when the app is set up for that deployment.
Requirements: Android 8.0 (Oreo) or later · A Google account for sign-in
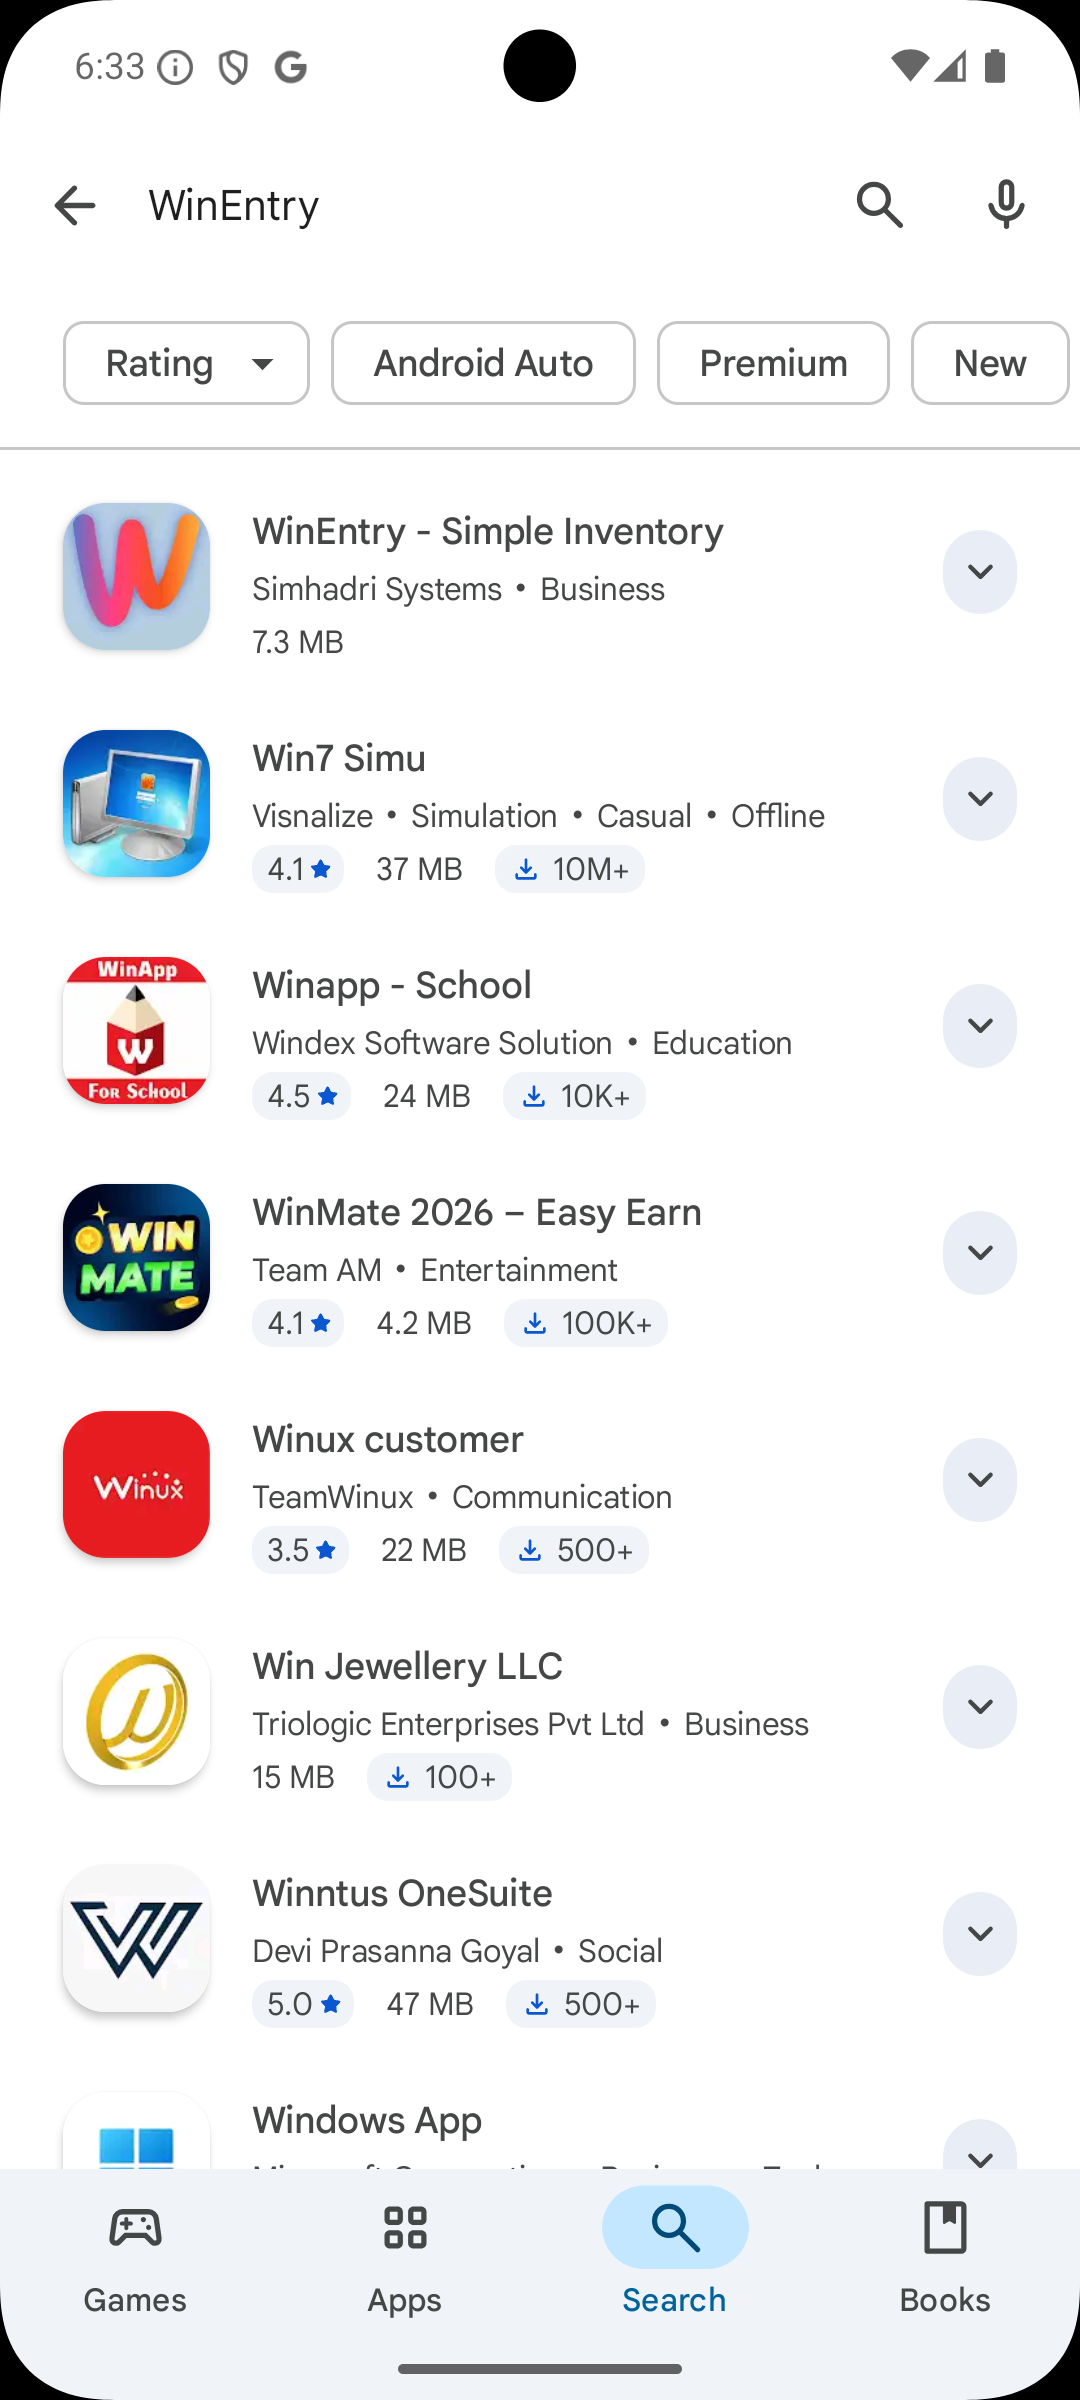
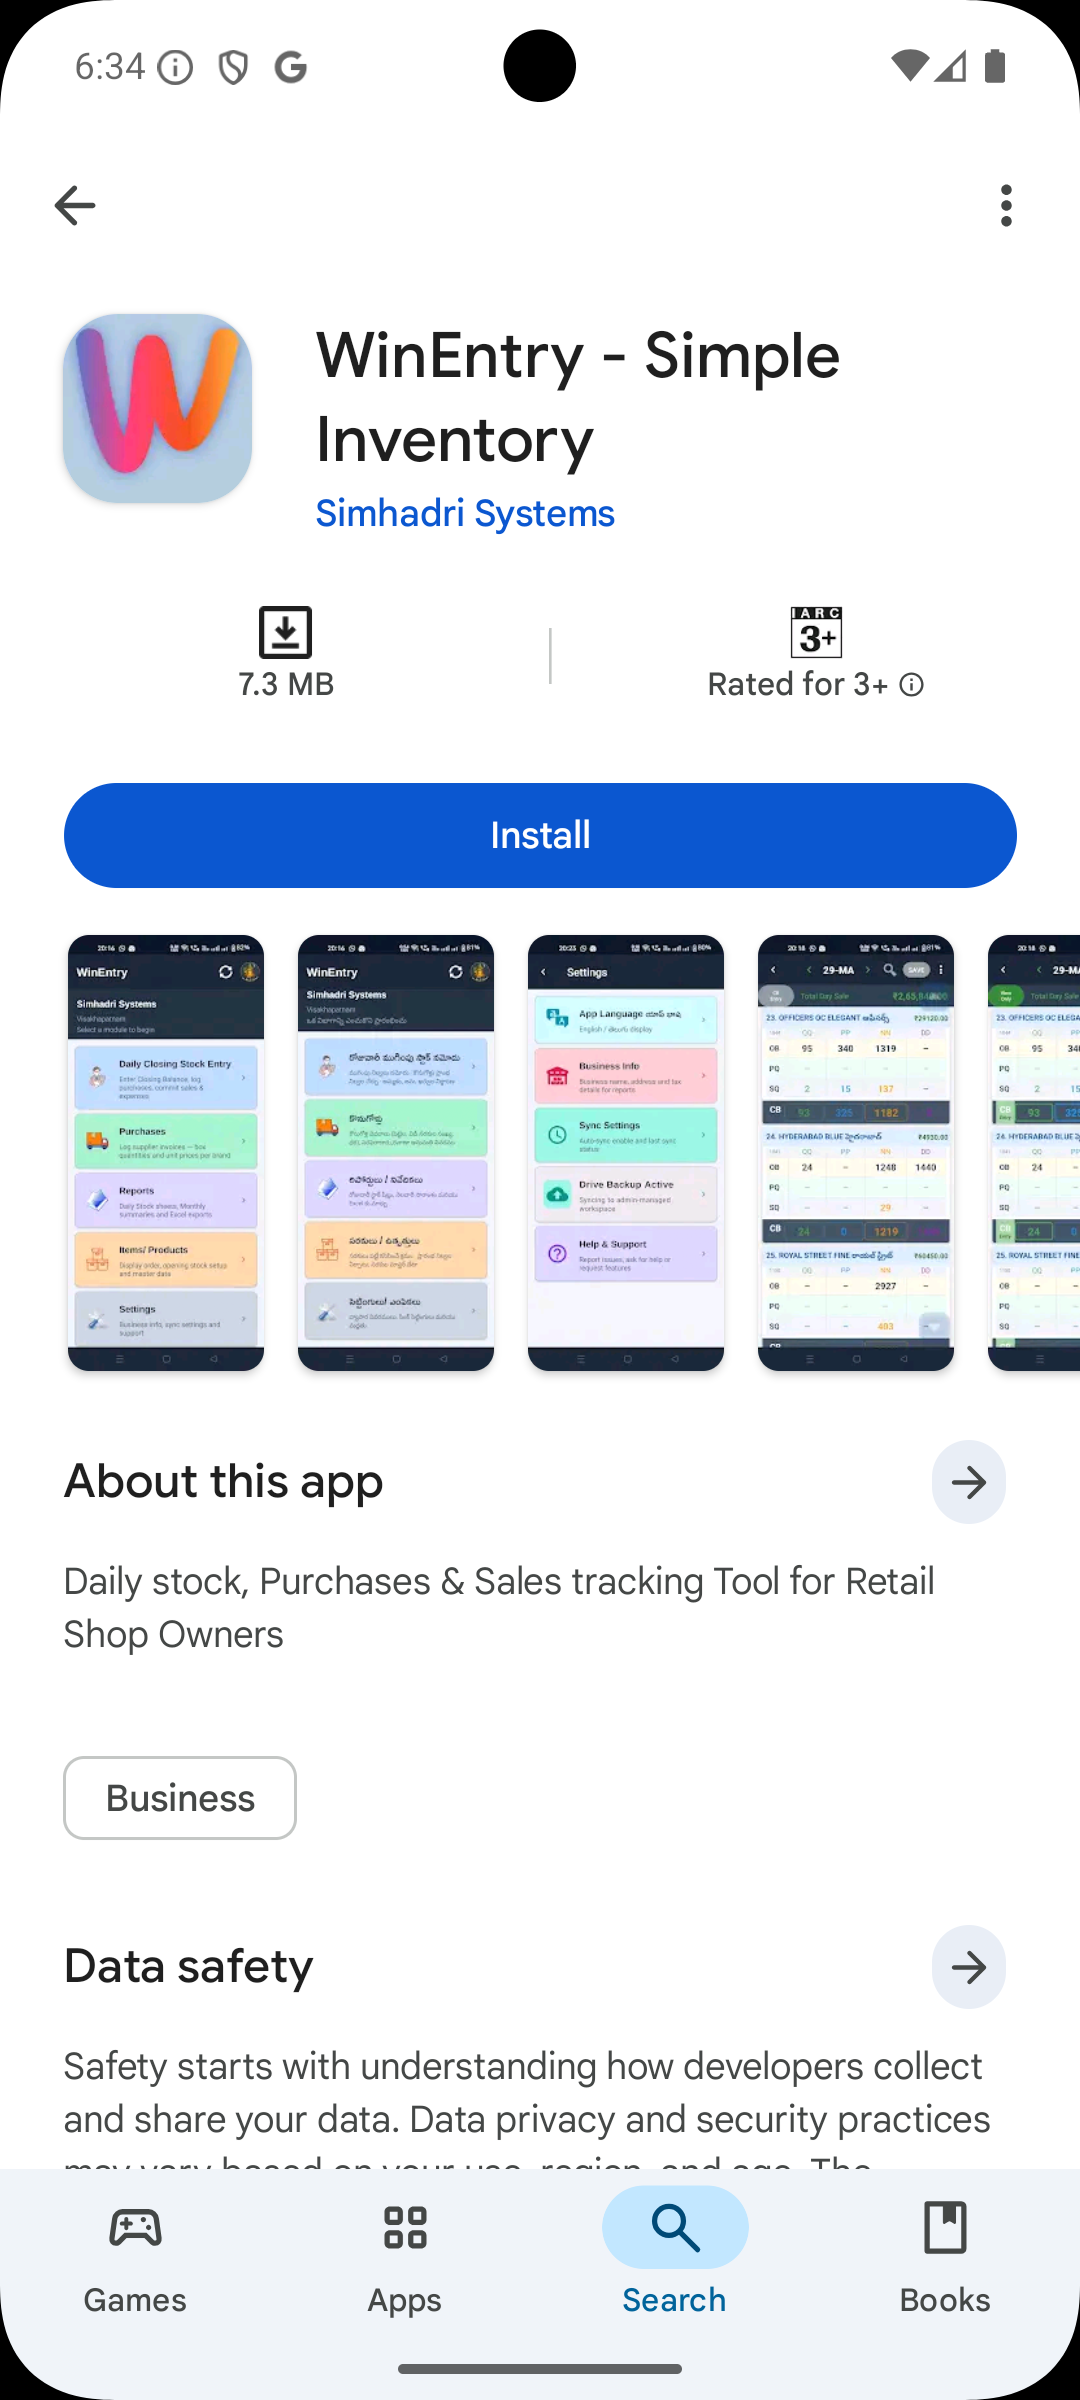
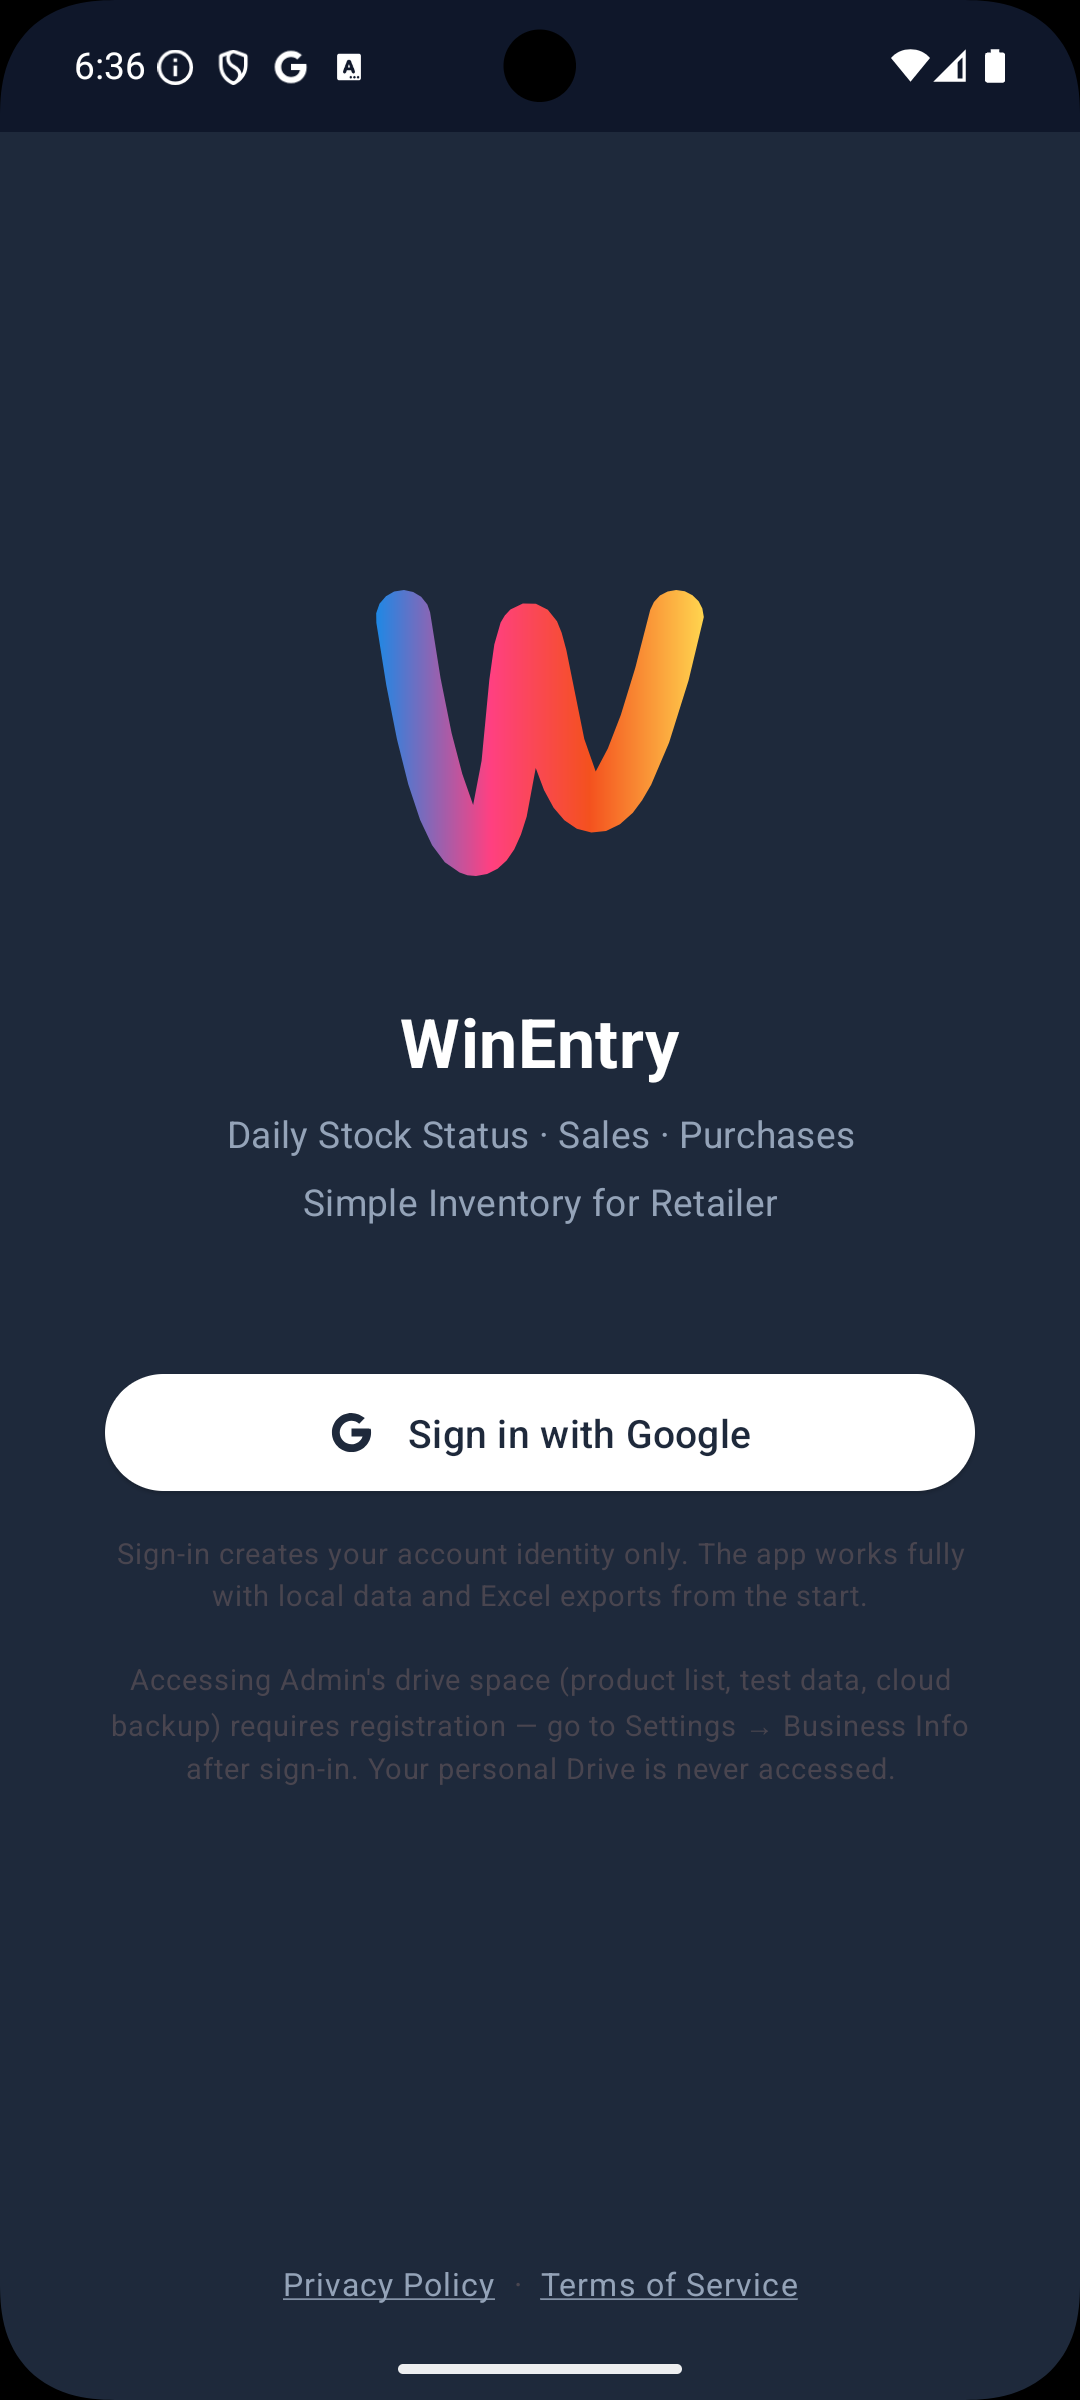
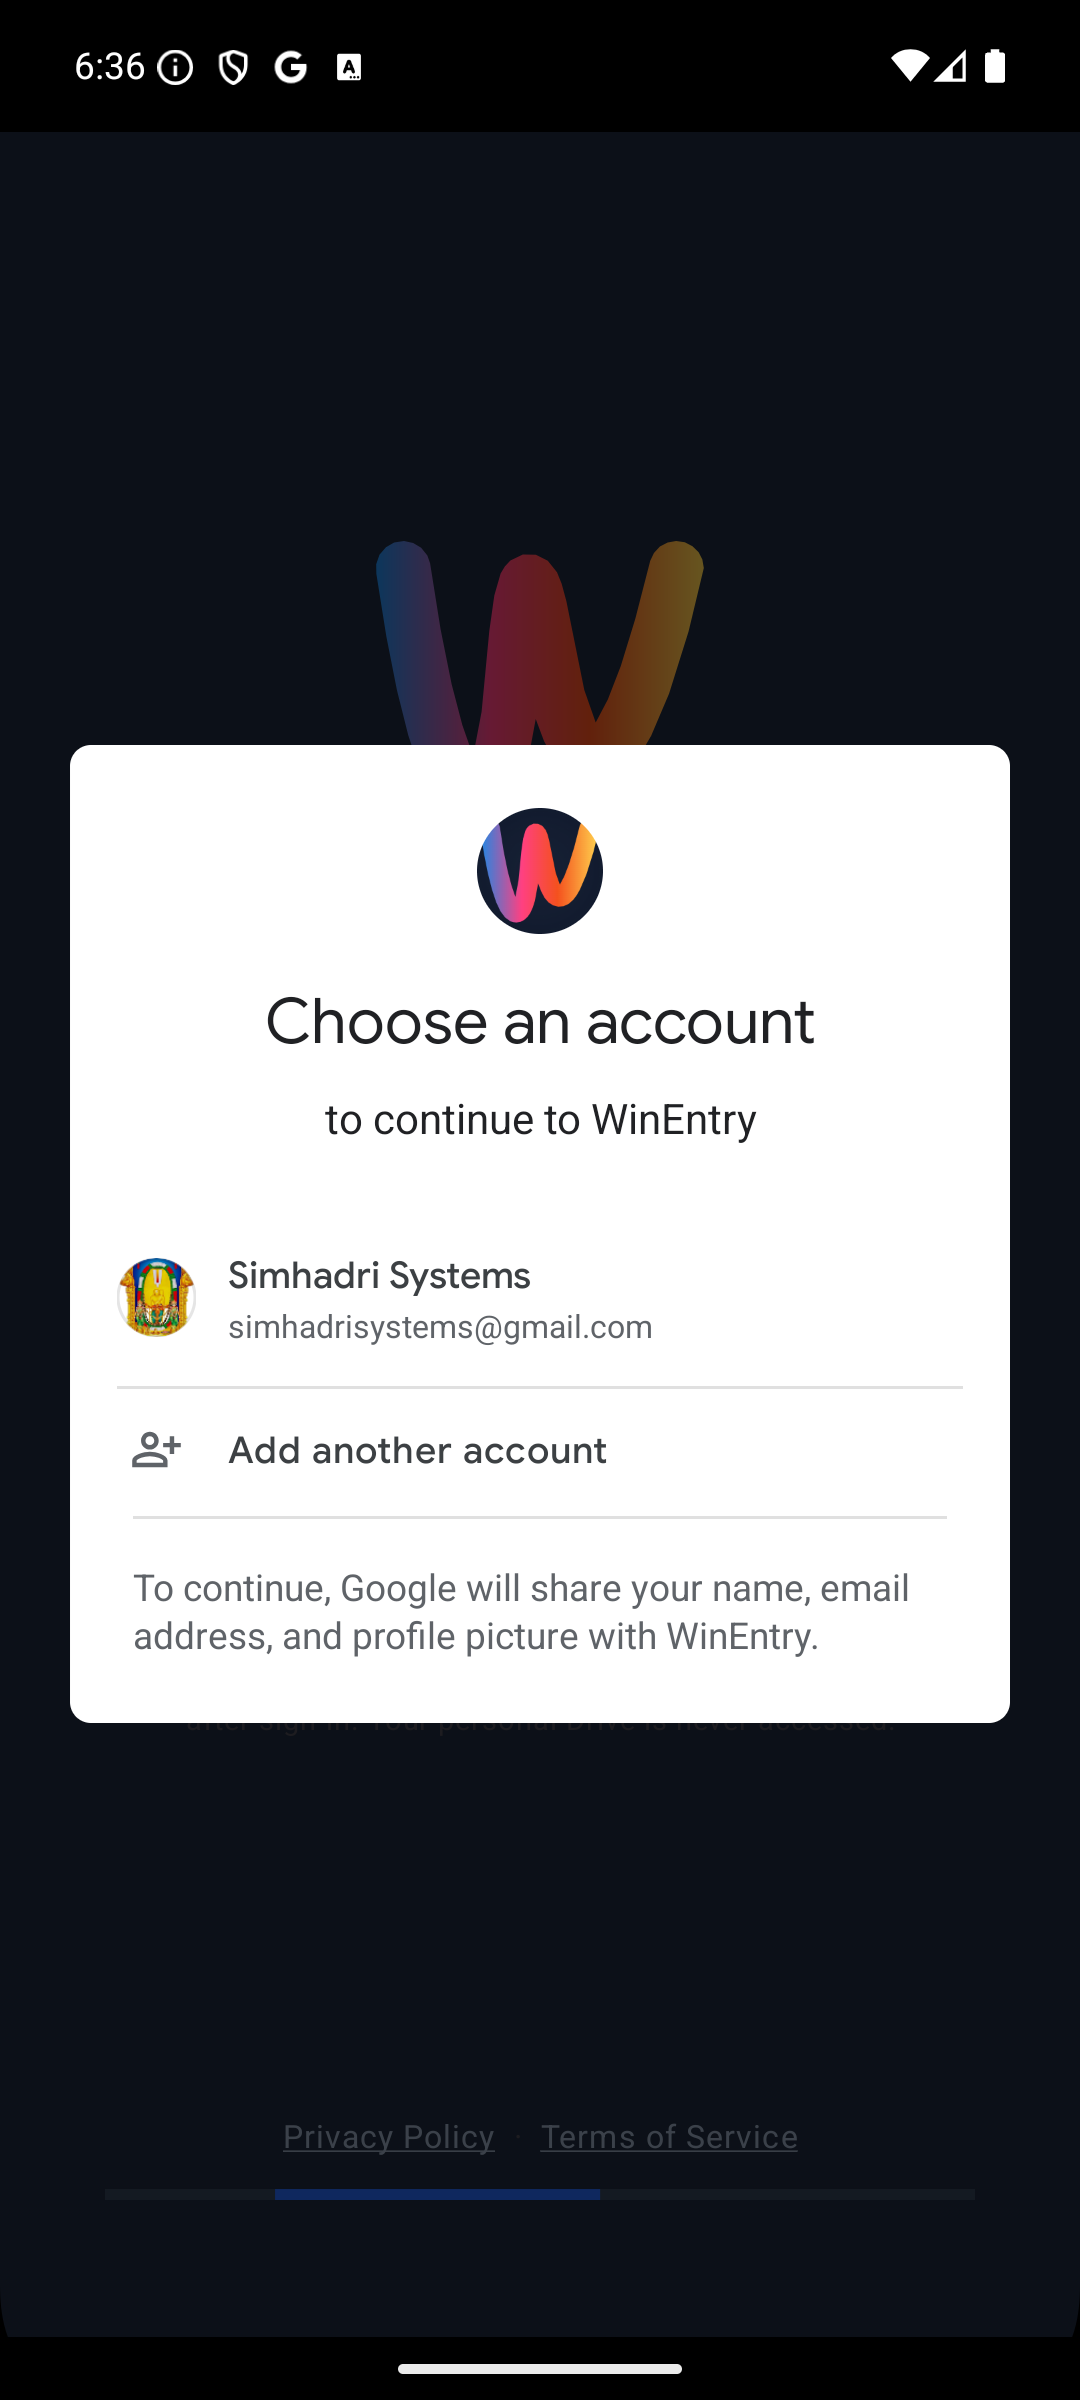
WinEntry uses your Google account to sign in — the same account you use for Gmail or YouTube.
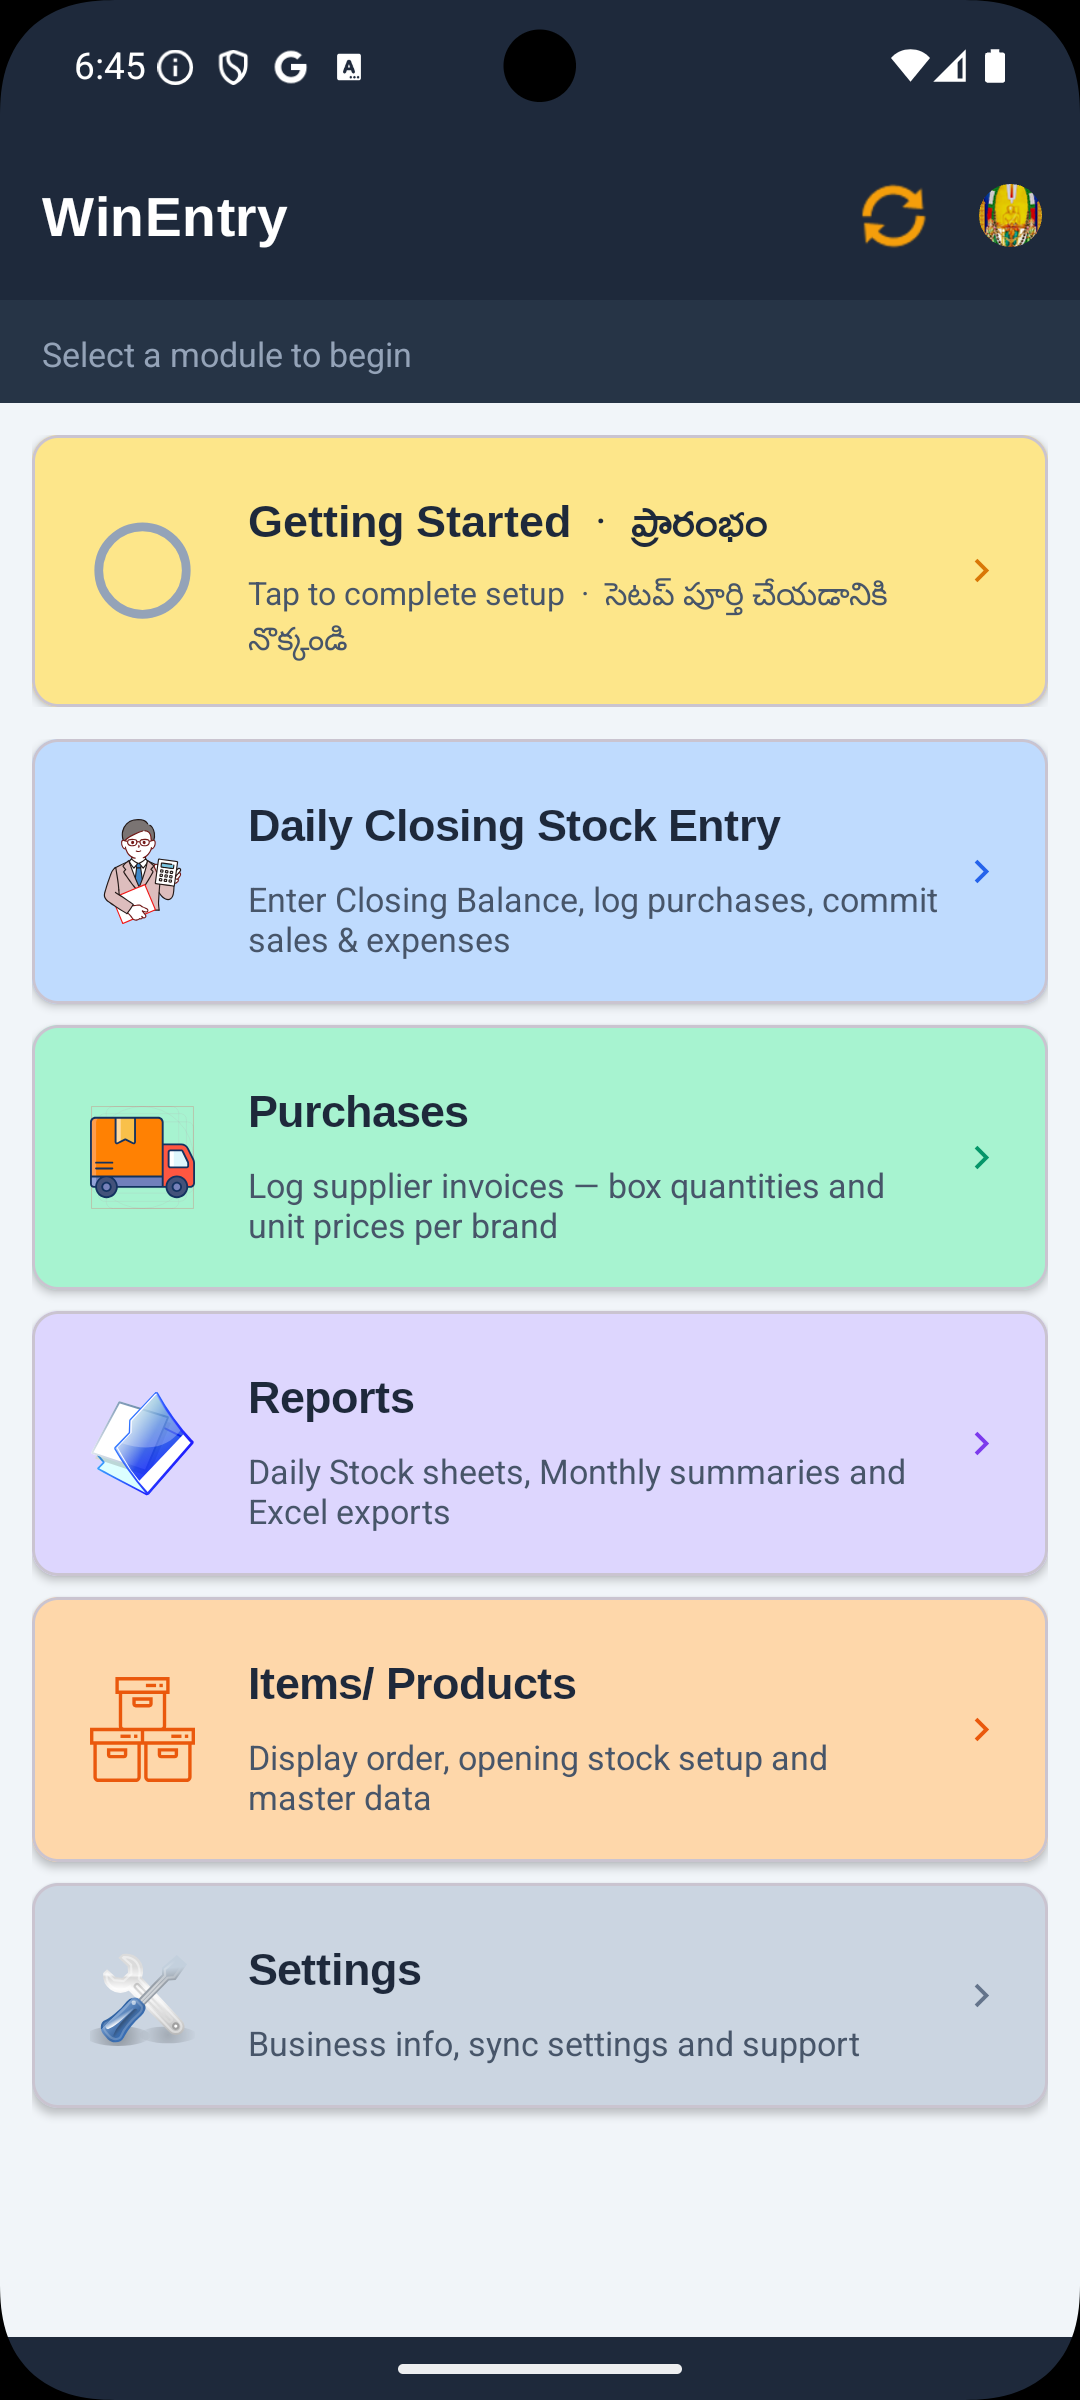
When you open the app after signing in for the first time, an amber Getting Started card appears at the top of the Home screen. Tap this card to open the setup checklist.

The checklist has 4 steps. Steps 1 and 2 are required. You must also complete either Step 3 or Step 4 before the card disappears and you can begin daily trading.
Your business name and owner details appear as the header on all exported reports and on the Home screen.
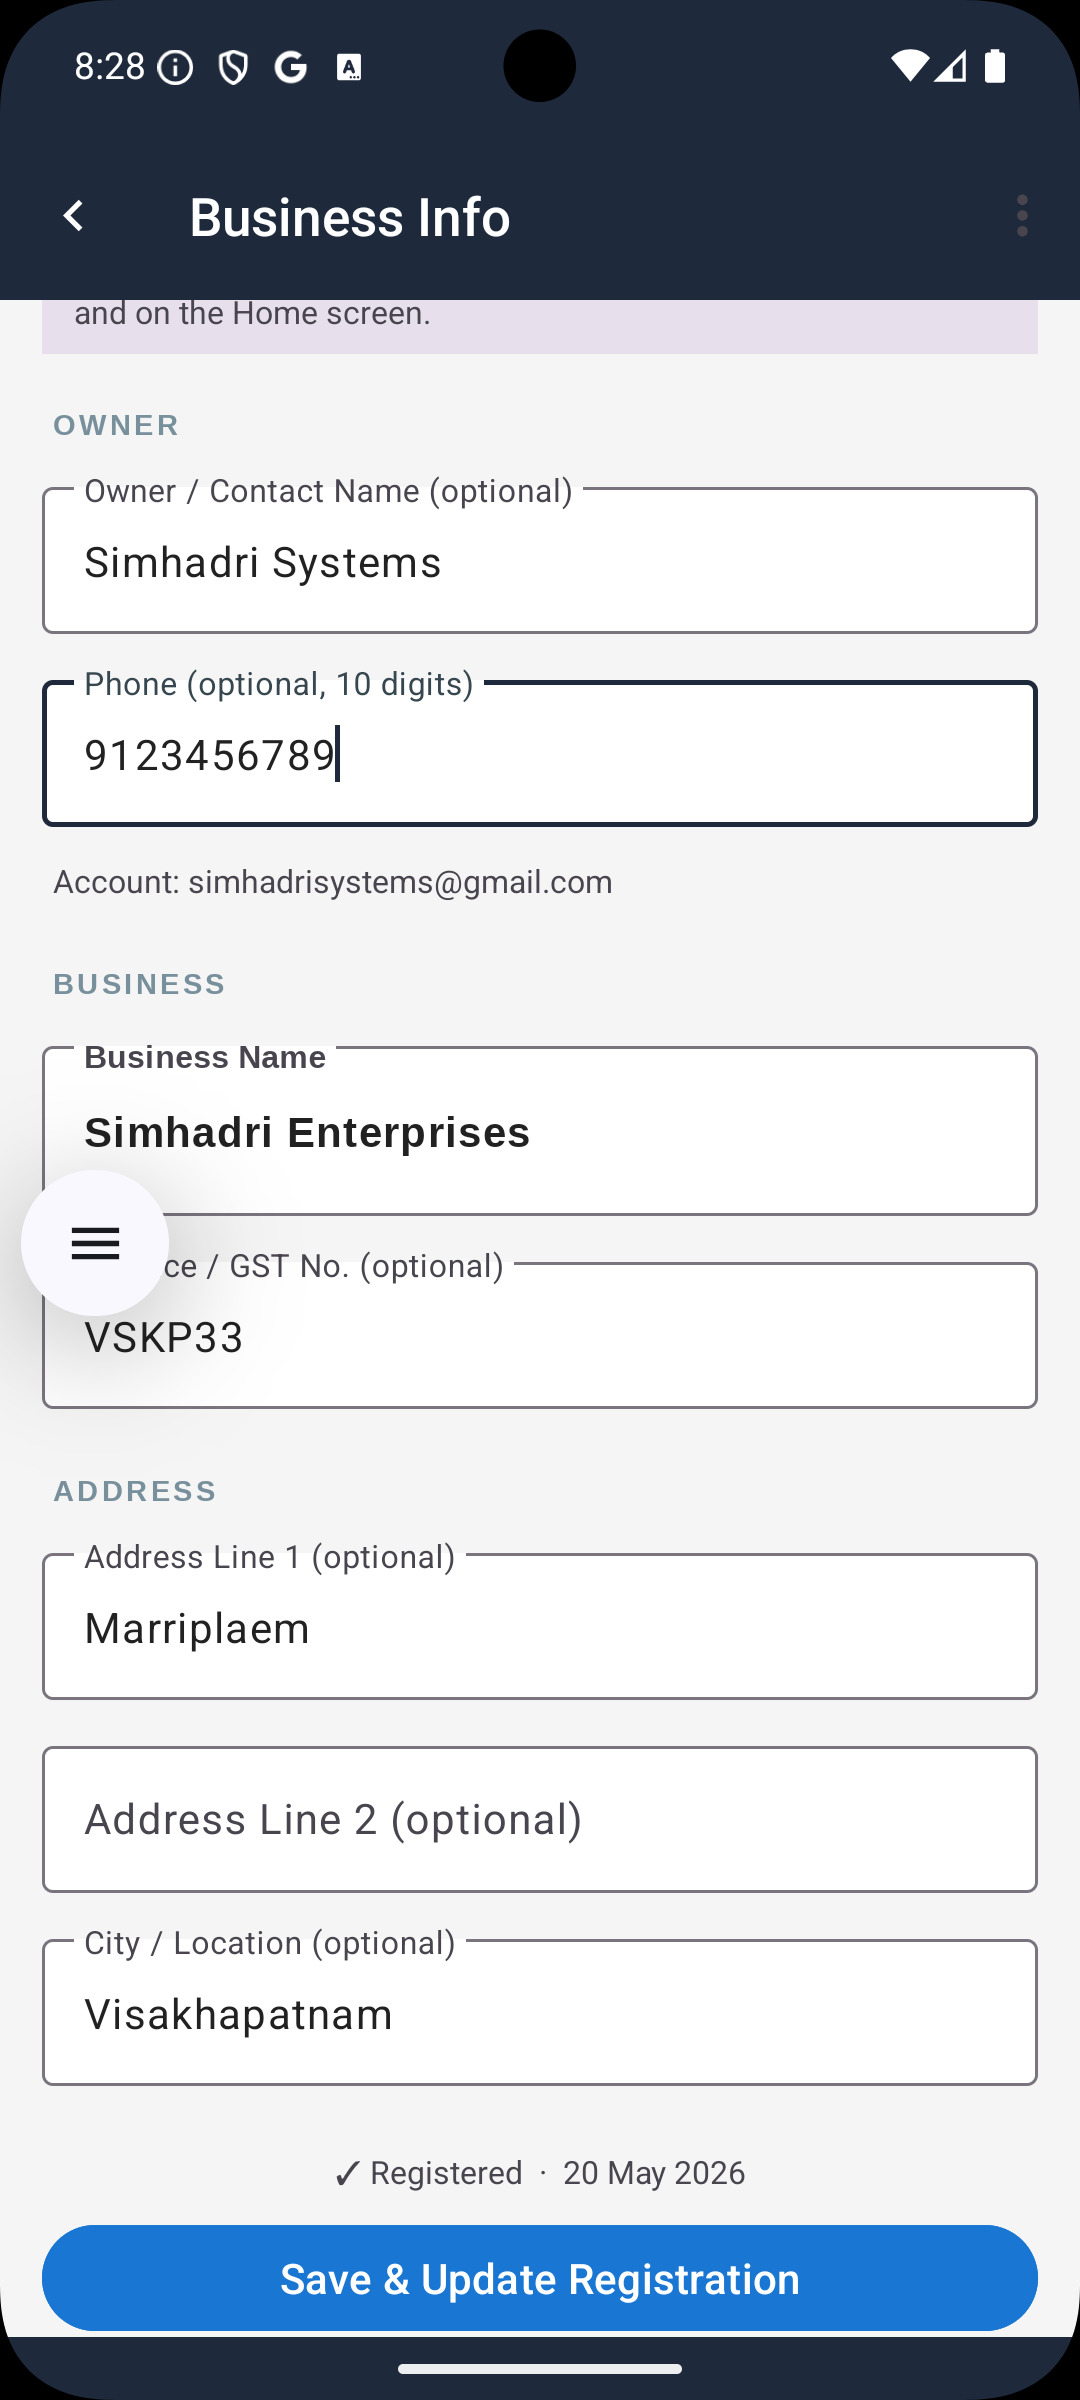
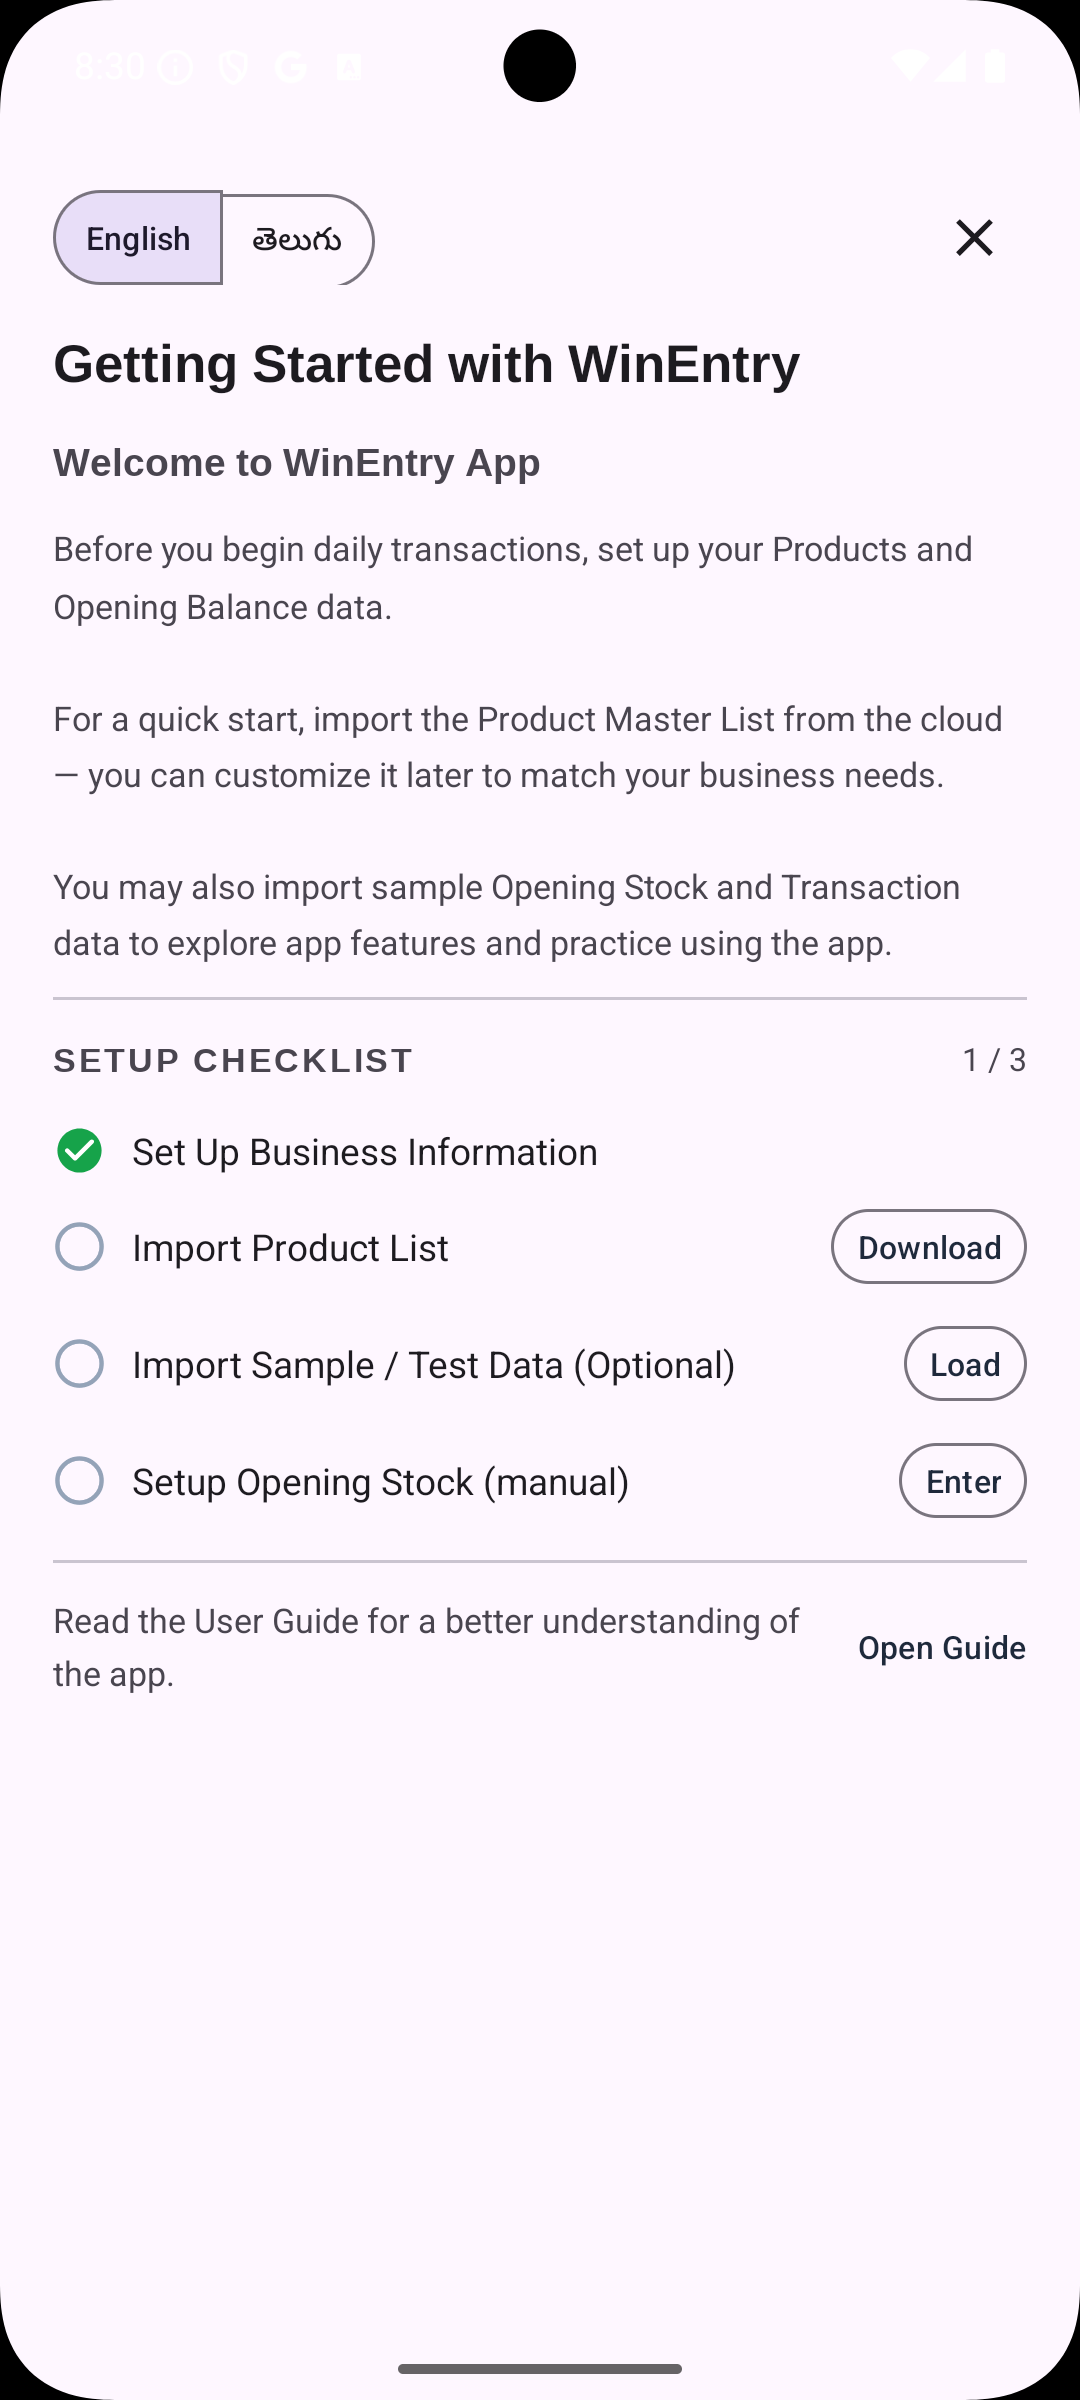
After saving, a green tick appears on Step 1 in the checklist. Future edits use the button label "Save & Update Registration".
Downloads the admin's standard product master list (product codes, names, sizes and prices) to your phone.
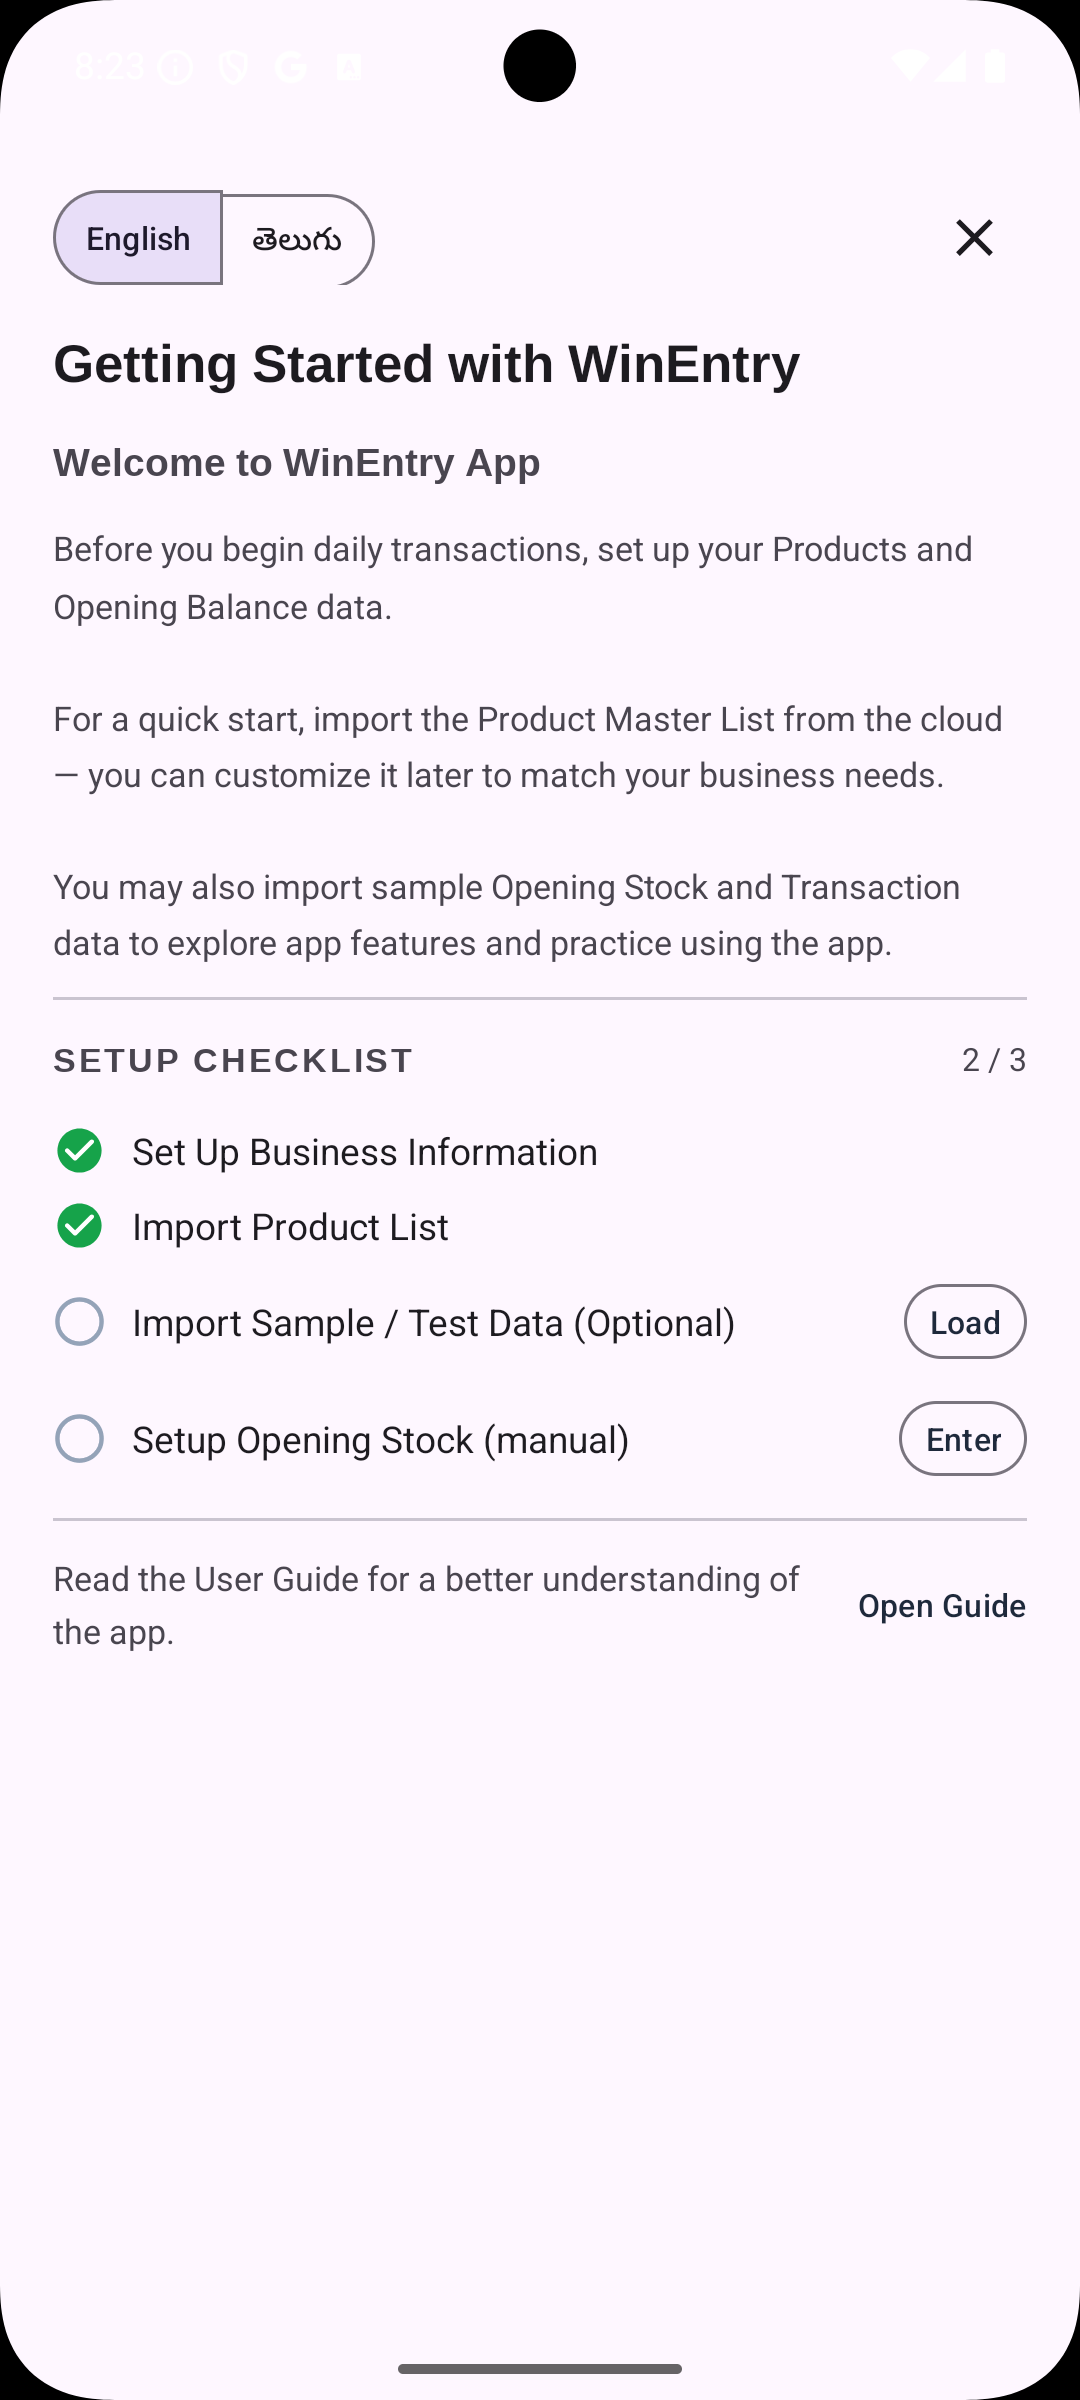
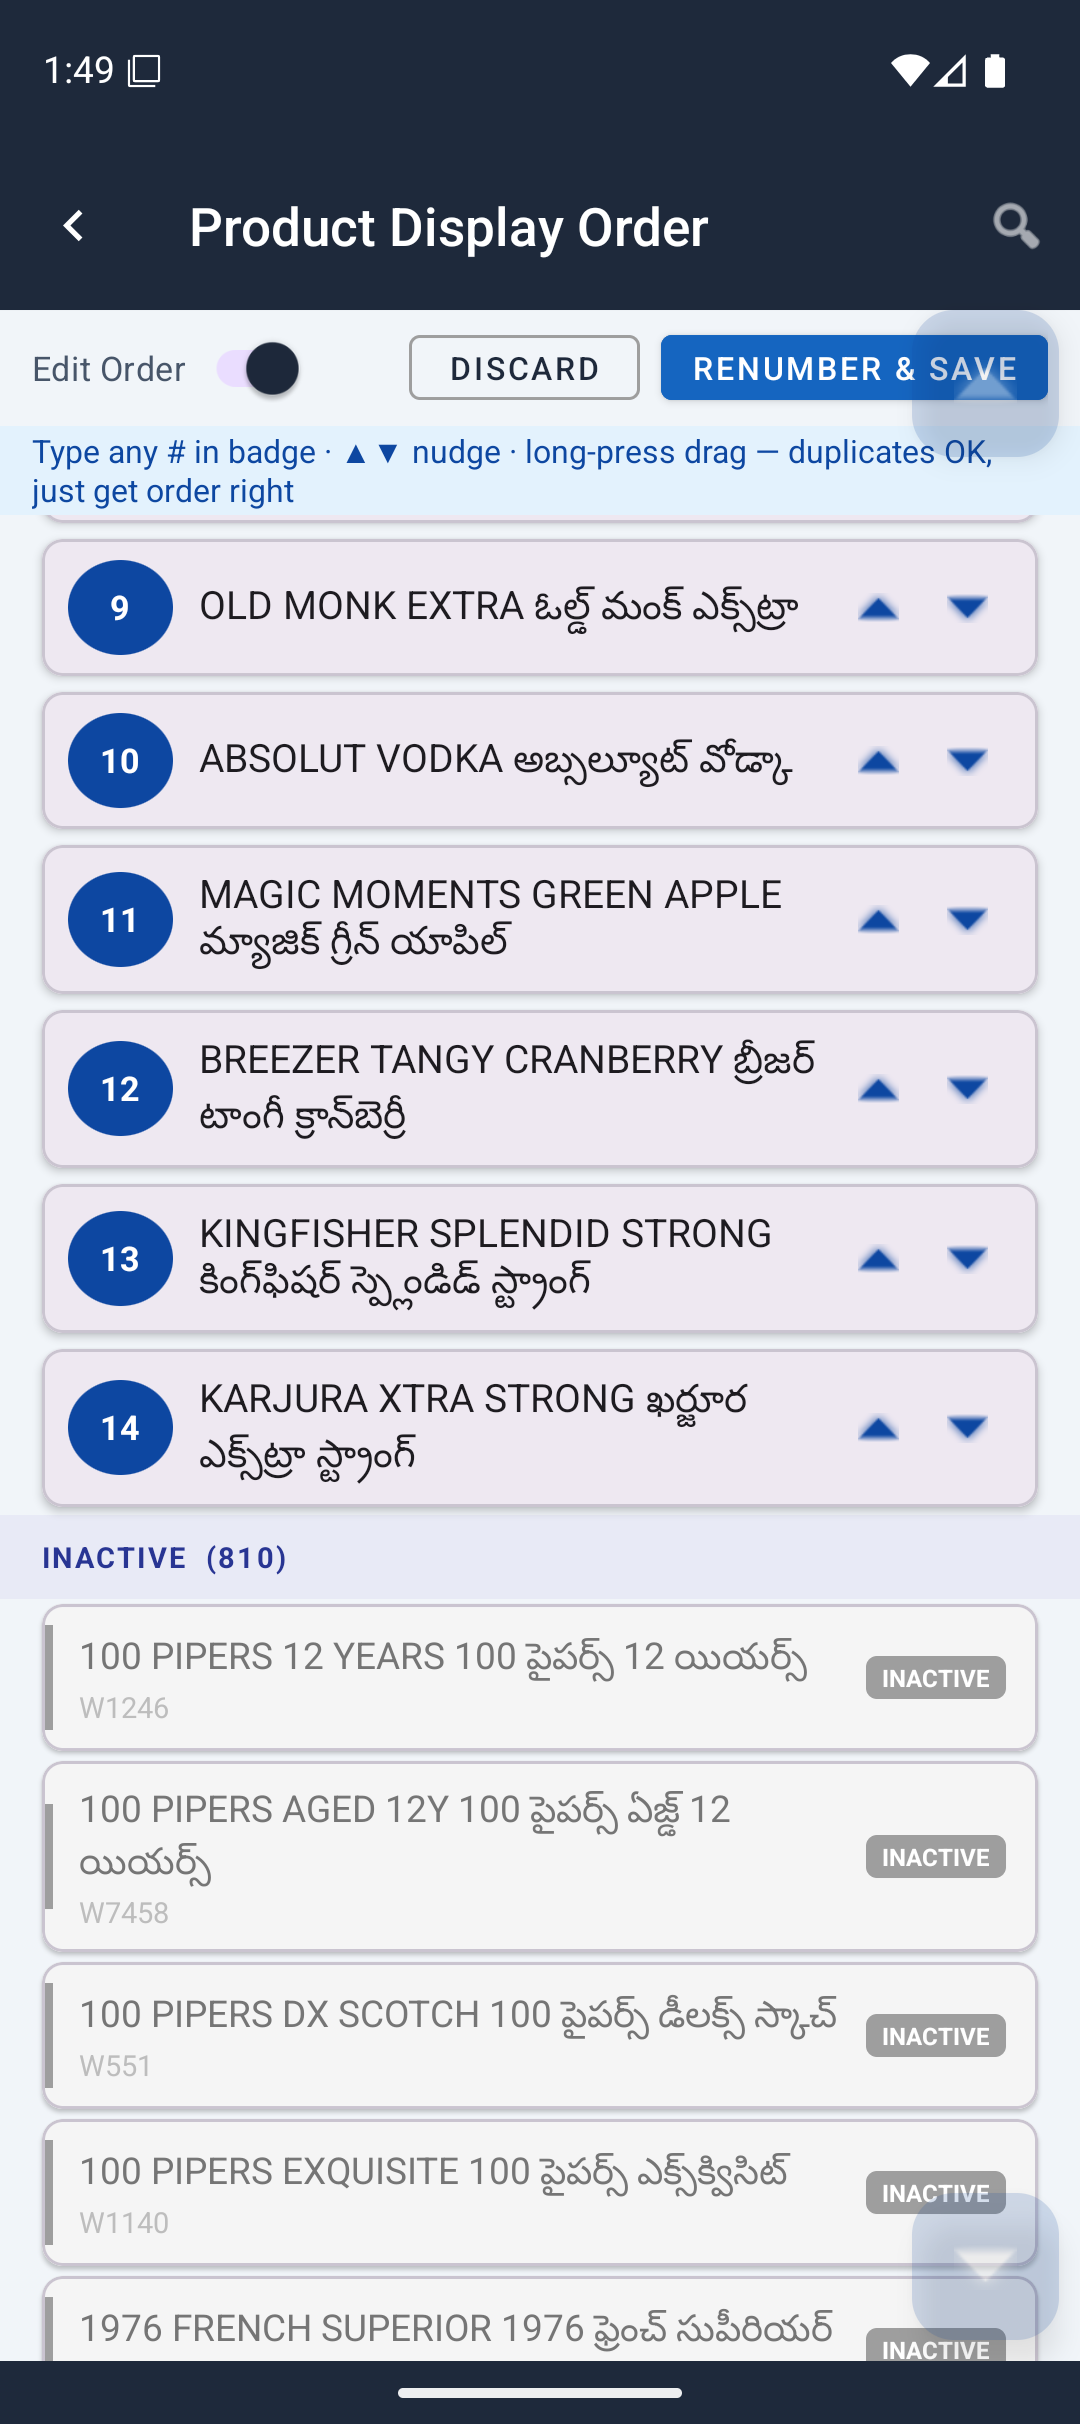
After downloading, go to Items/Products → Product Display Order to arrange products in the order you count your stock. This makes daily closing entry faster.
The order you set here is reflected consistently throughout the app — Daily Stock Entry, Opening Stock, and all reports show products in exactly this sequence. To reorder: tap Product Display Order, switch on Edit, then drag rows using the handle on the left, or tap the ↑ ↓ nudge arrows beside each product. Tap Renumber & Save when done. Double-tap any product row (with Edit switched off) to deactivate it — deactivated products move to an Inactive section at the bottom and are hidden from daily stock entry.
Sample data lets you practise using the app before entering real figures. It loads dummy opening stock and a few days of transactions so you can see how every screen looks with actual data.
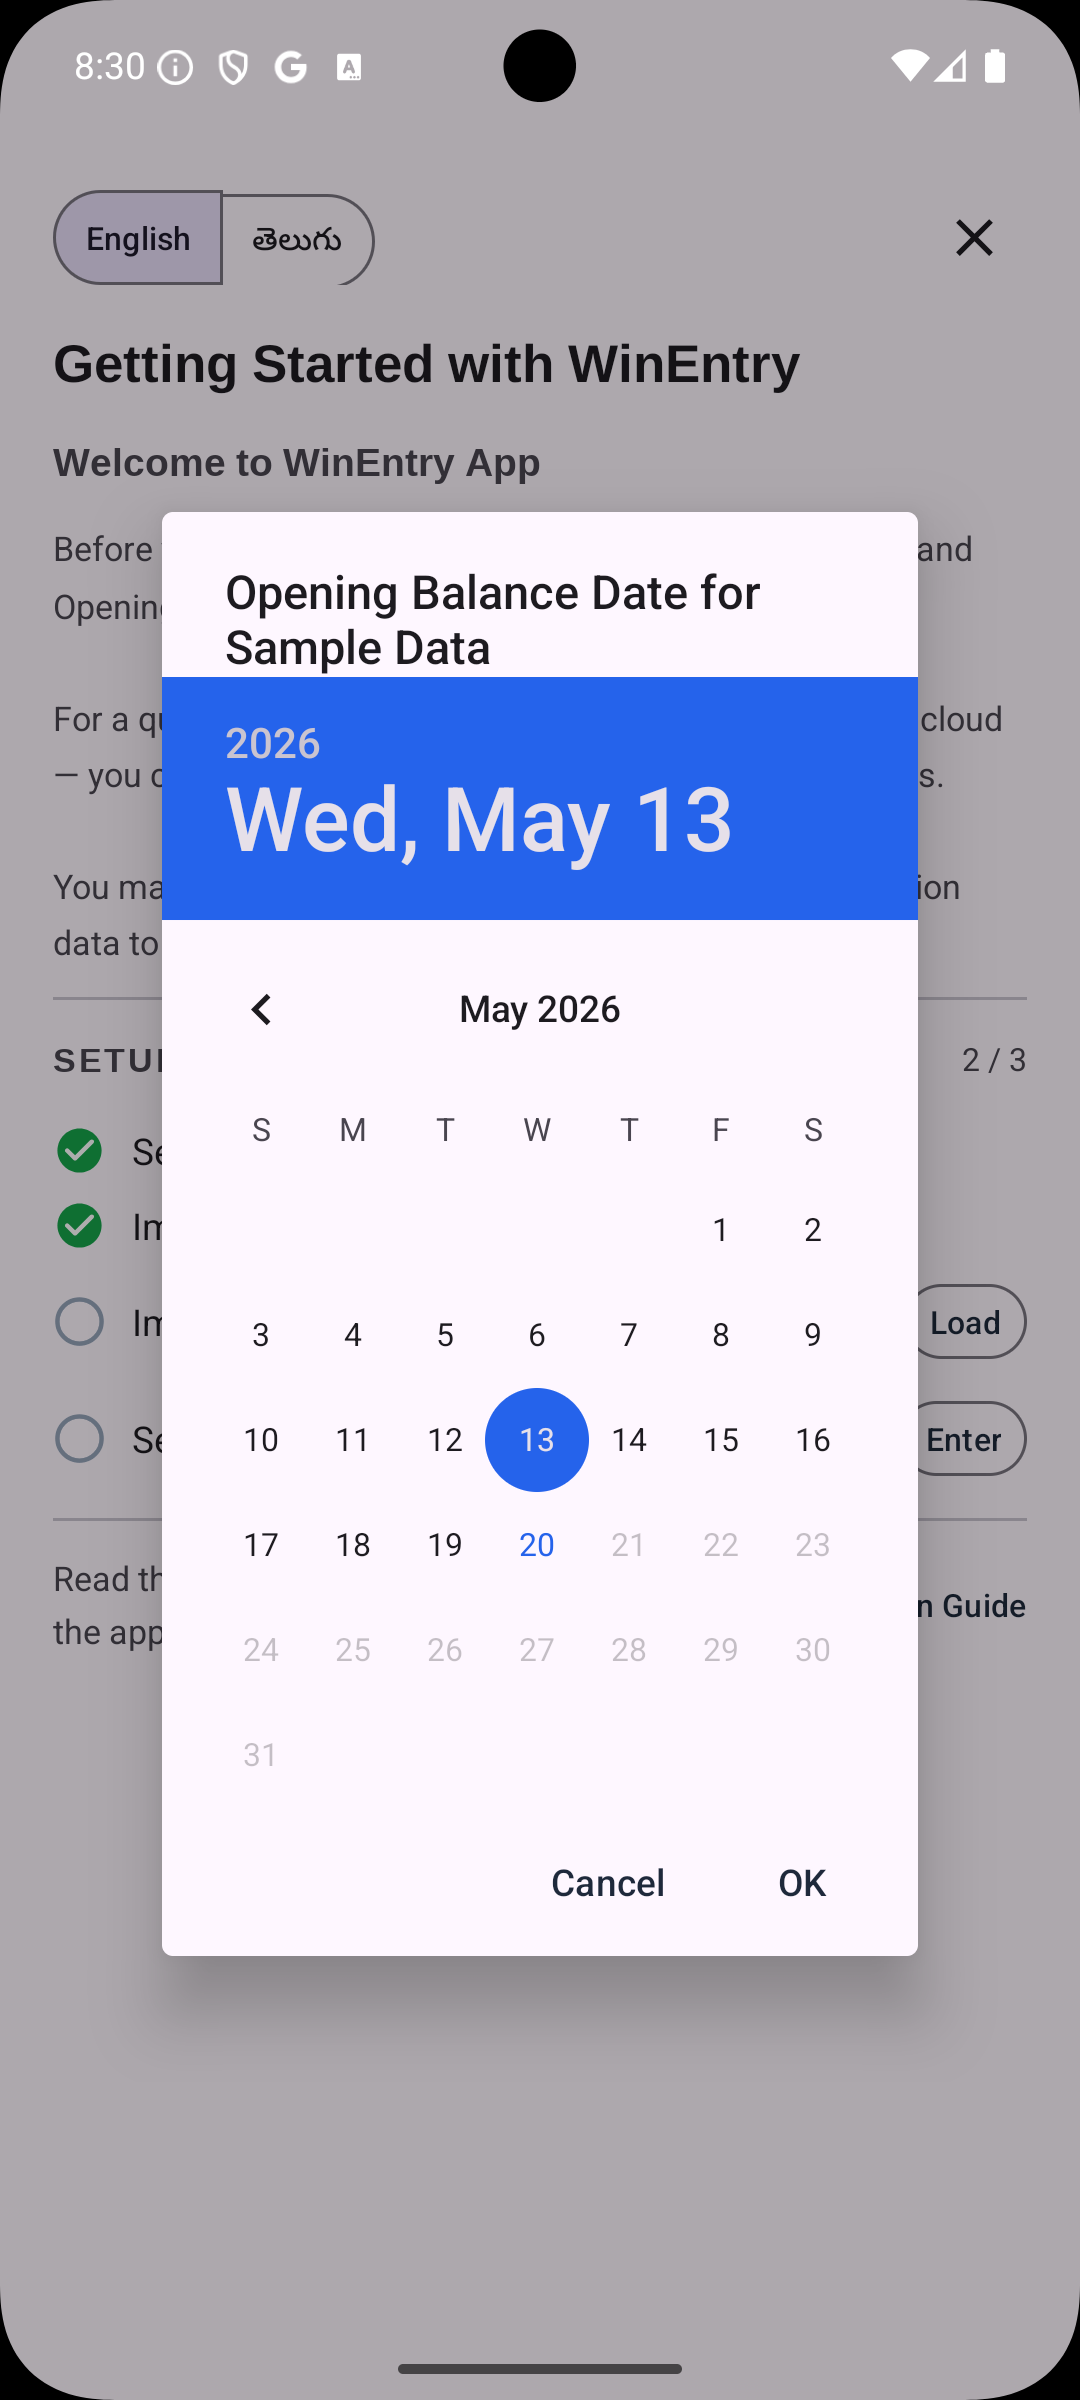
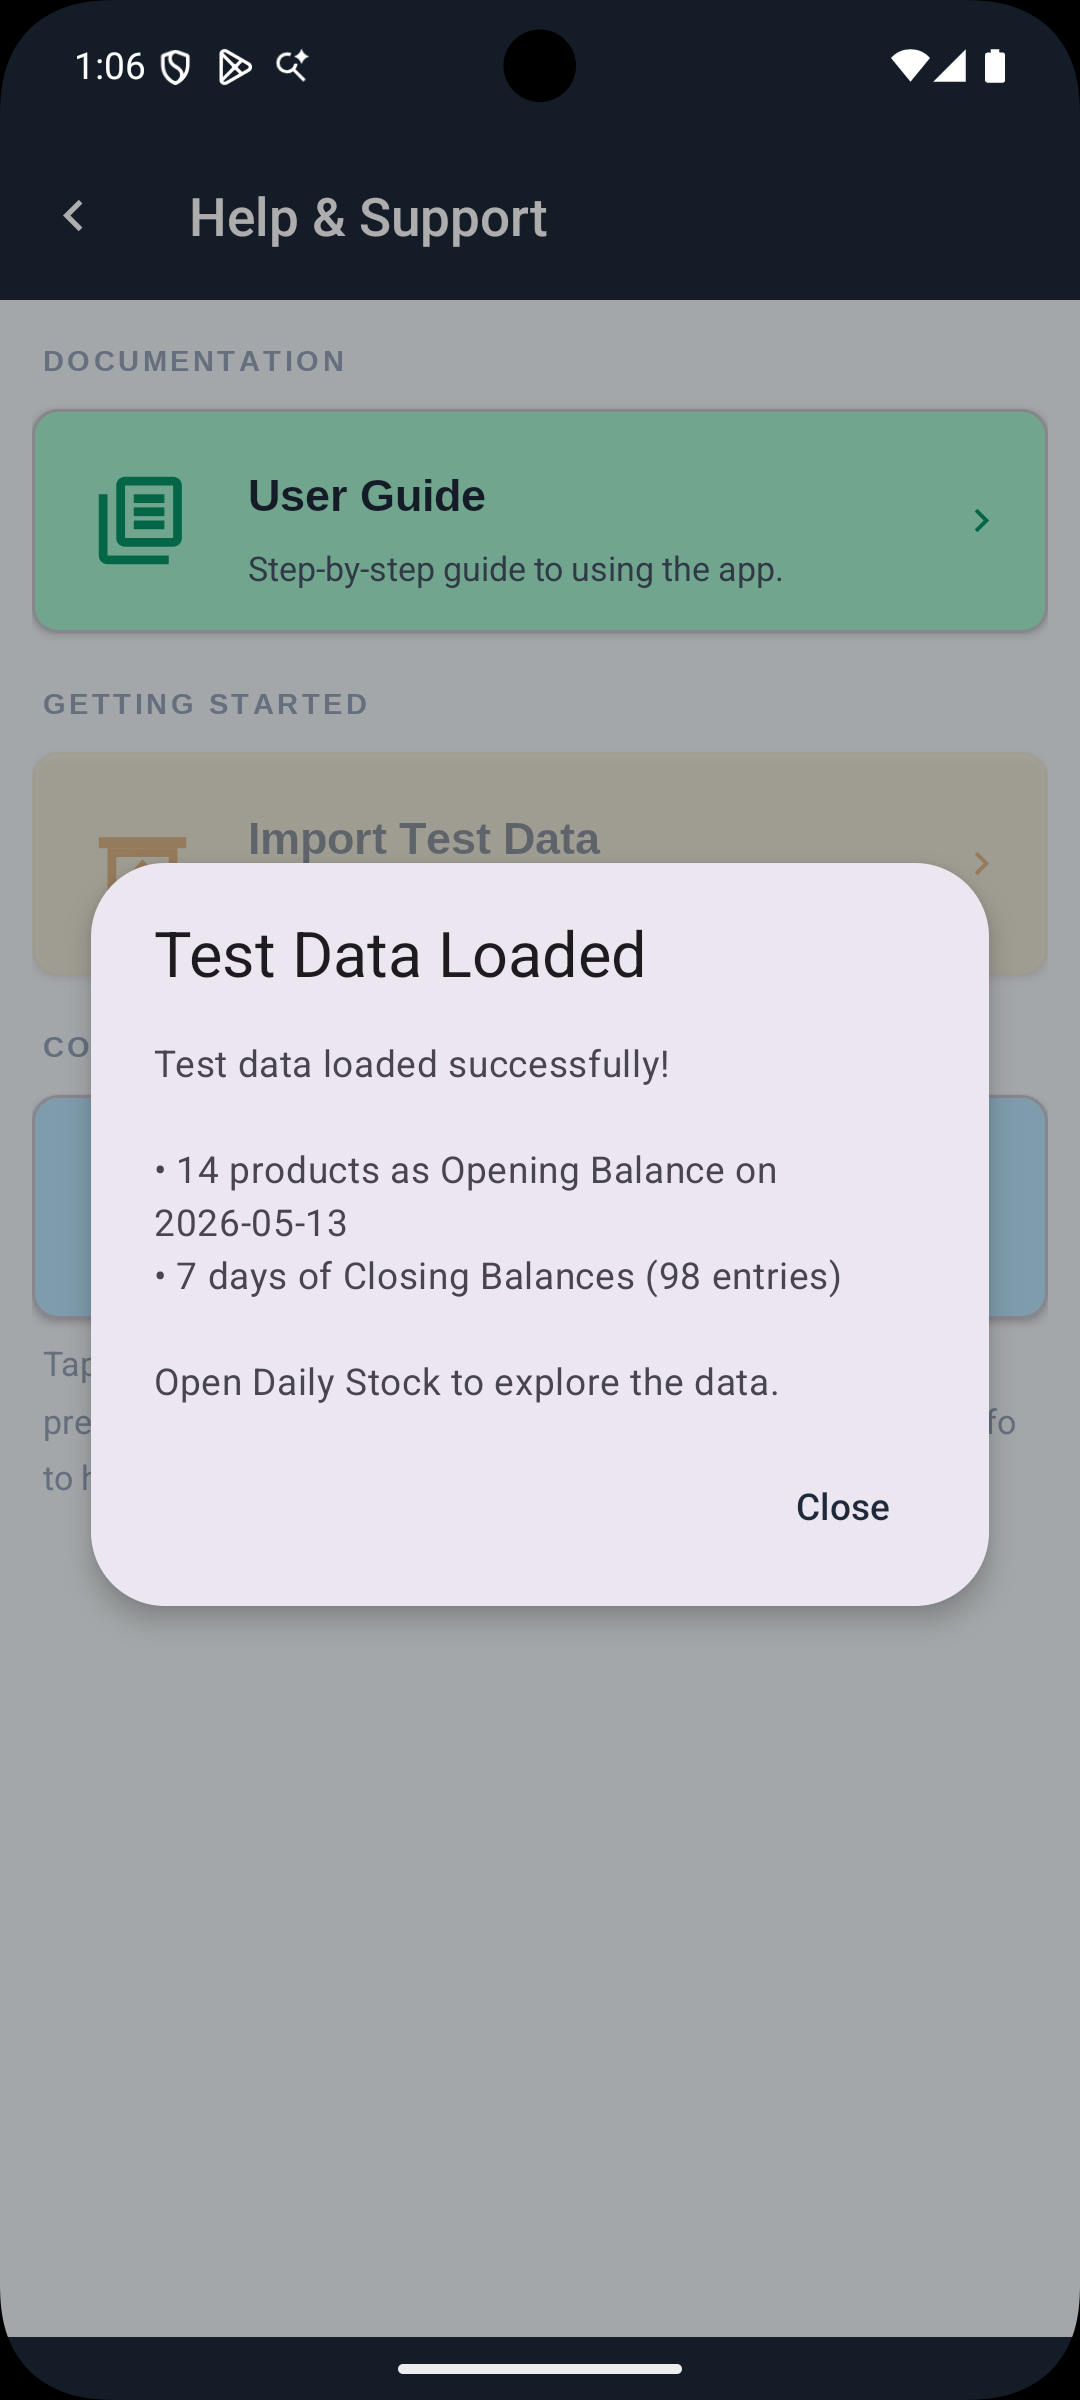
Once loaded, a green tick appears and the card shows "Trial setup complete — you're all set!"
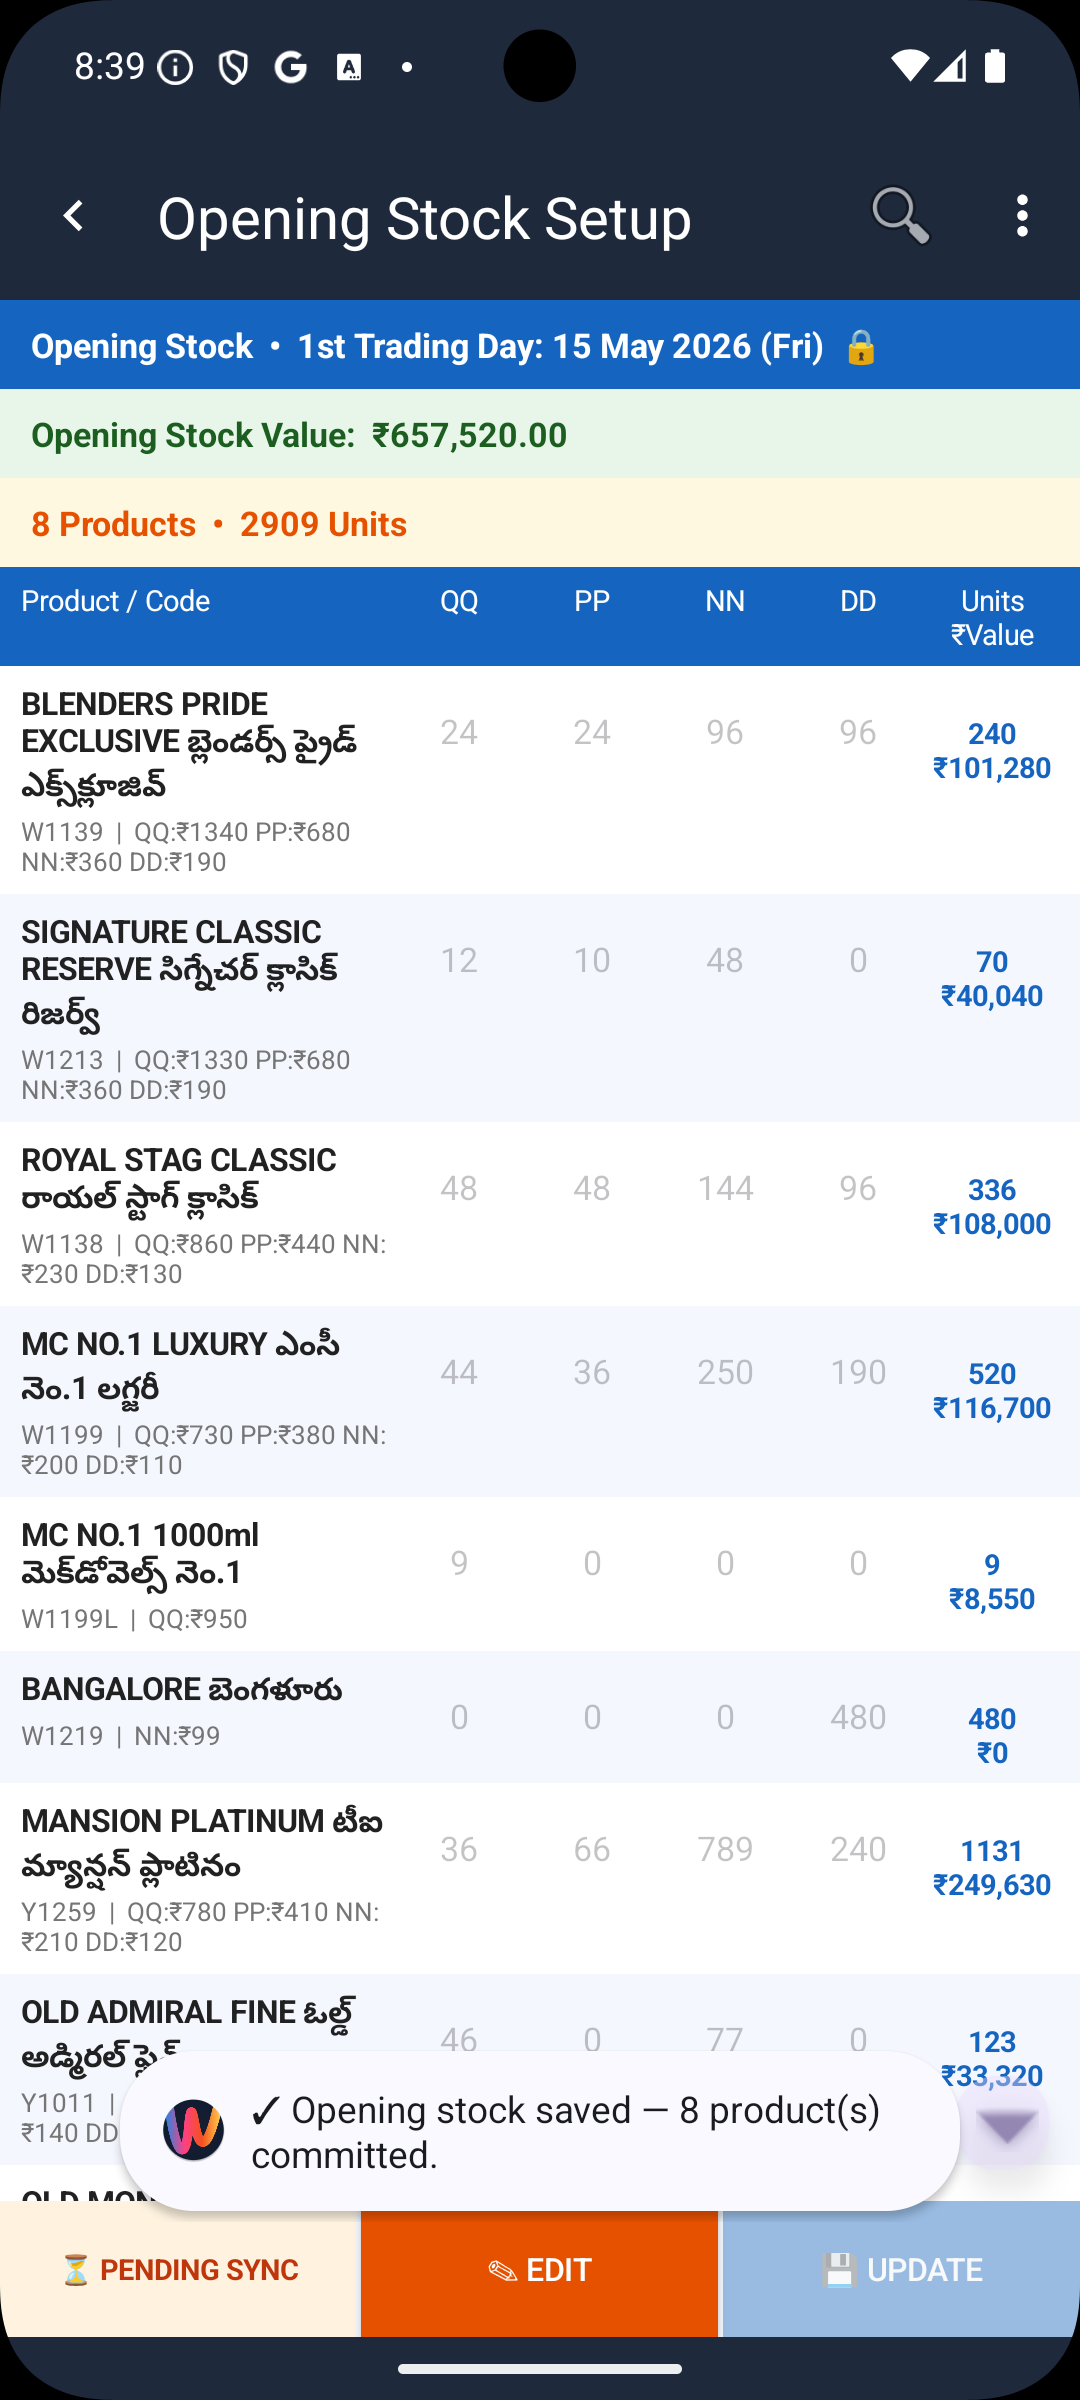
If you are starting with real data (not sample data), you need to enter the actual unit count per product and size as your starting inventory. This is done once when you first go live. There are two ways to do it — choose whichever suits you.
Enter directly on screen — best for smaller product lists.
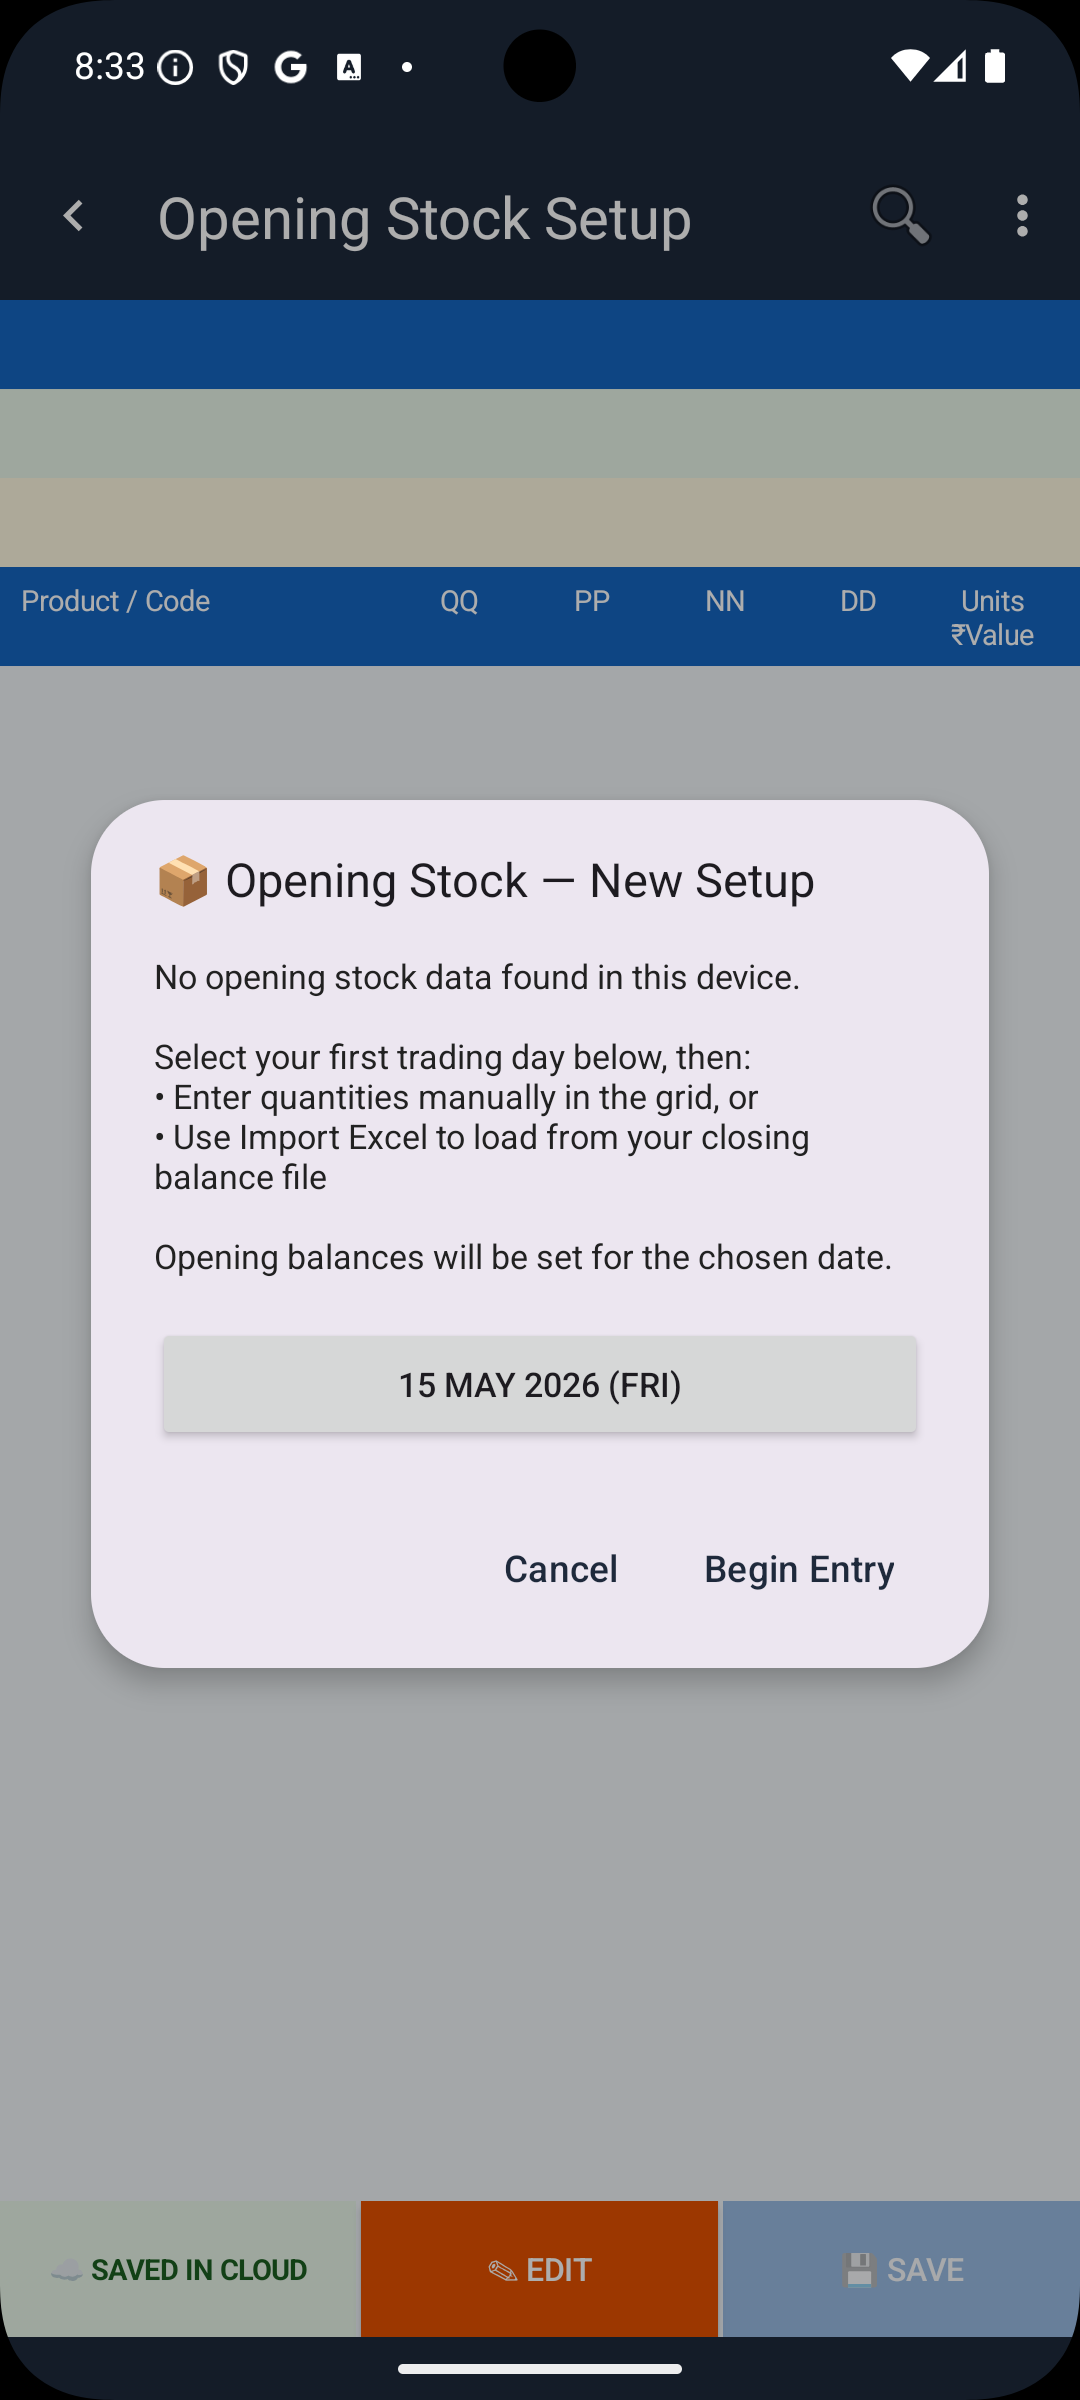
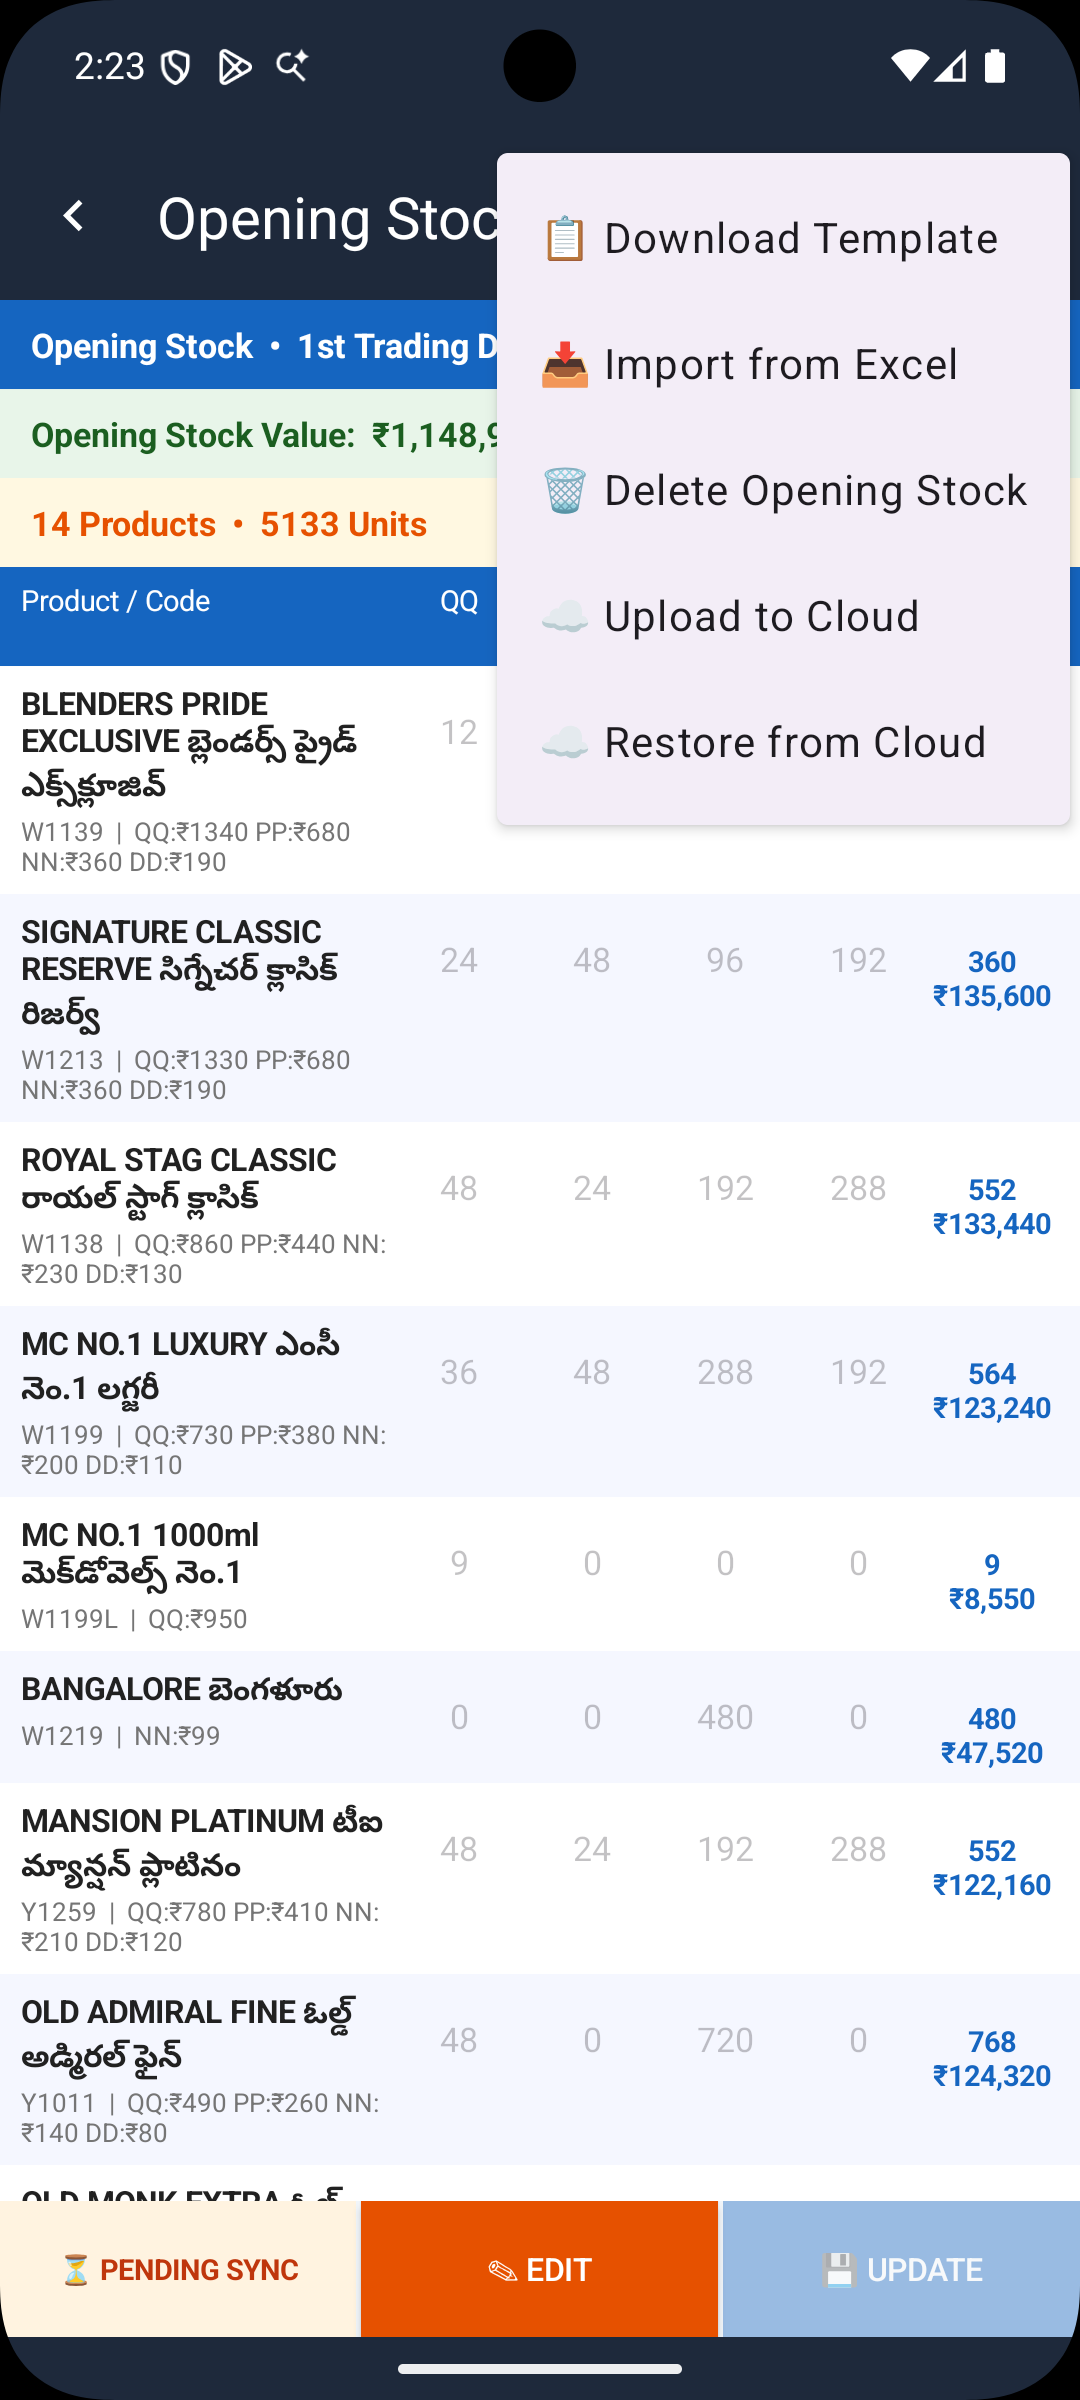
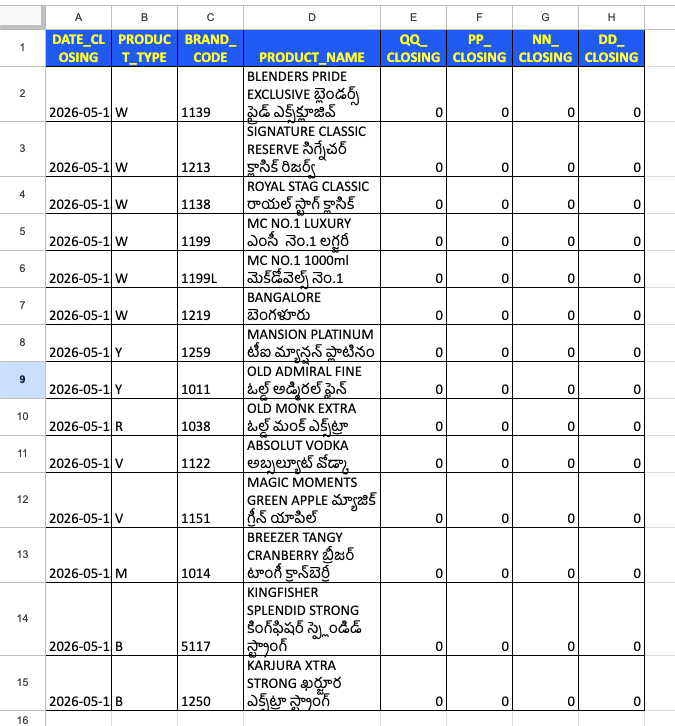
Faster for large product lists — if you already have your opening stock figures in a spreadsheet.
Once saved (by either method), a green tick appears on Step 4 and the Getting Started card disappears automatically when all required steps are complete.
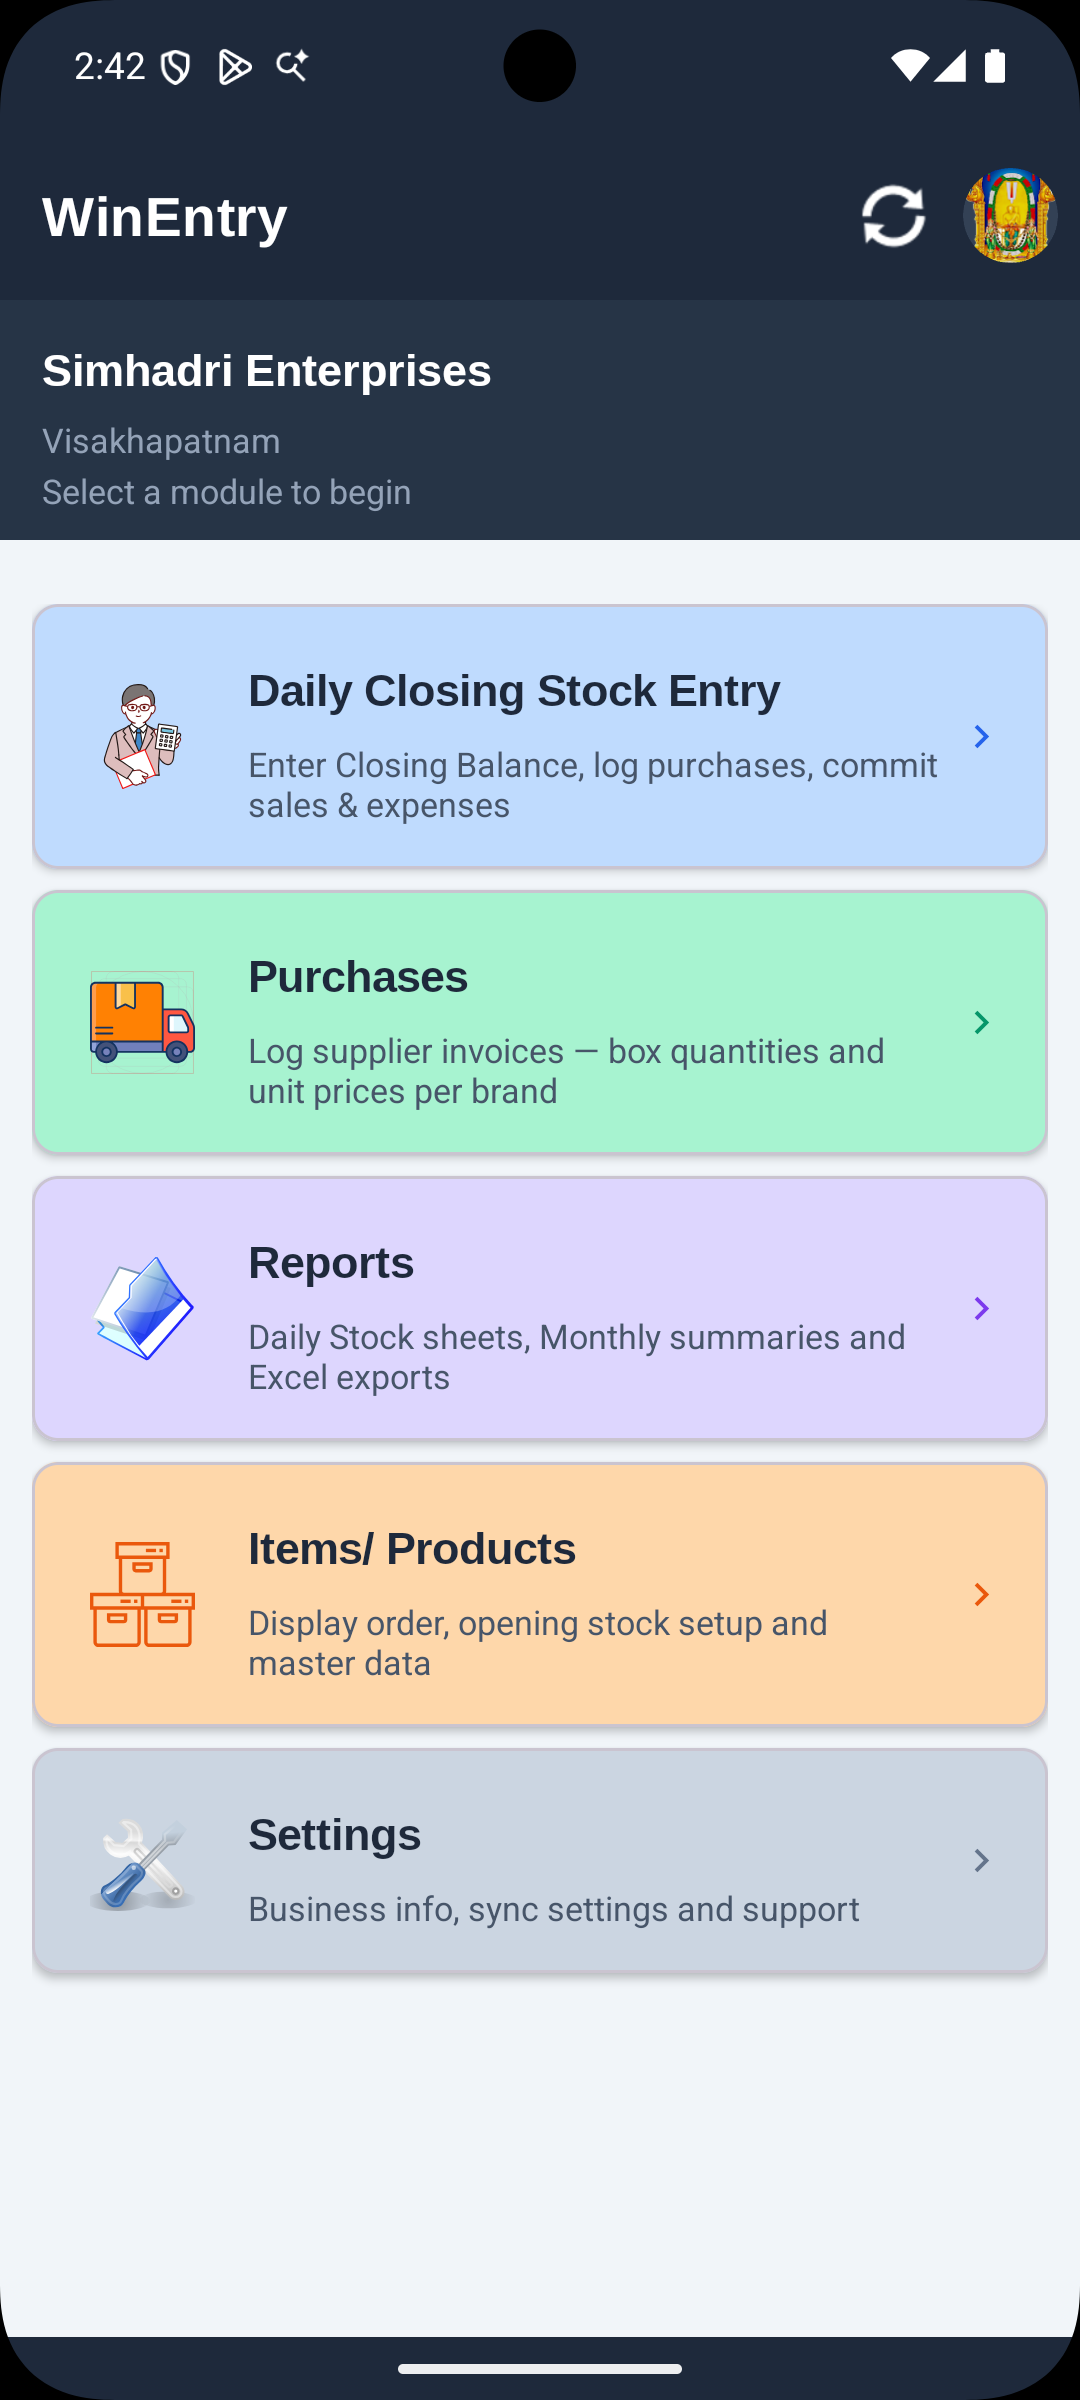
After setup, the Home screen shows five module cards.
| Element | What it does |
|---|---|
| Business name + location | Displayed at top — from Business Info |
| Cloud/Sync icon 🔄 (top-right) | Tap to manually push data to cloud. White = all synced; Red = sync errors, tap to retry; Amber = Drive Backup not set up |
| Account icon | Shows your Google profile photo when signed in. Tap to see account email or sign out |
| Card | What it does |
|---|---|
| Daily Closing Stock Entry | Enter today's closing unit count and commit day-end totals |
| Purchases | Record supplier delivery invoices with reference number, quantities and prices |
| Reports | View and export daily, period and monthly reports to Excel |
| Items / Products | Manage product list, display order and opening stock |
| Settings | Business info, language, cloud backup, sync settings and support |
Tap any card to open the module. Use the back arrow (top-left inside the module) or the phone's back button to return to Home.
This is the core daily workflow. At end of day, count the units on your shelves and enter the closing balance. The app calculates daily sales automatically.
Opening Balance + Purchases − Closing Balance = Daily Sale
Tap Daily Closing Stock Entry from the Home screen.
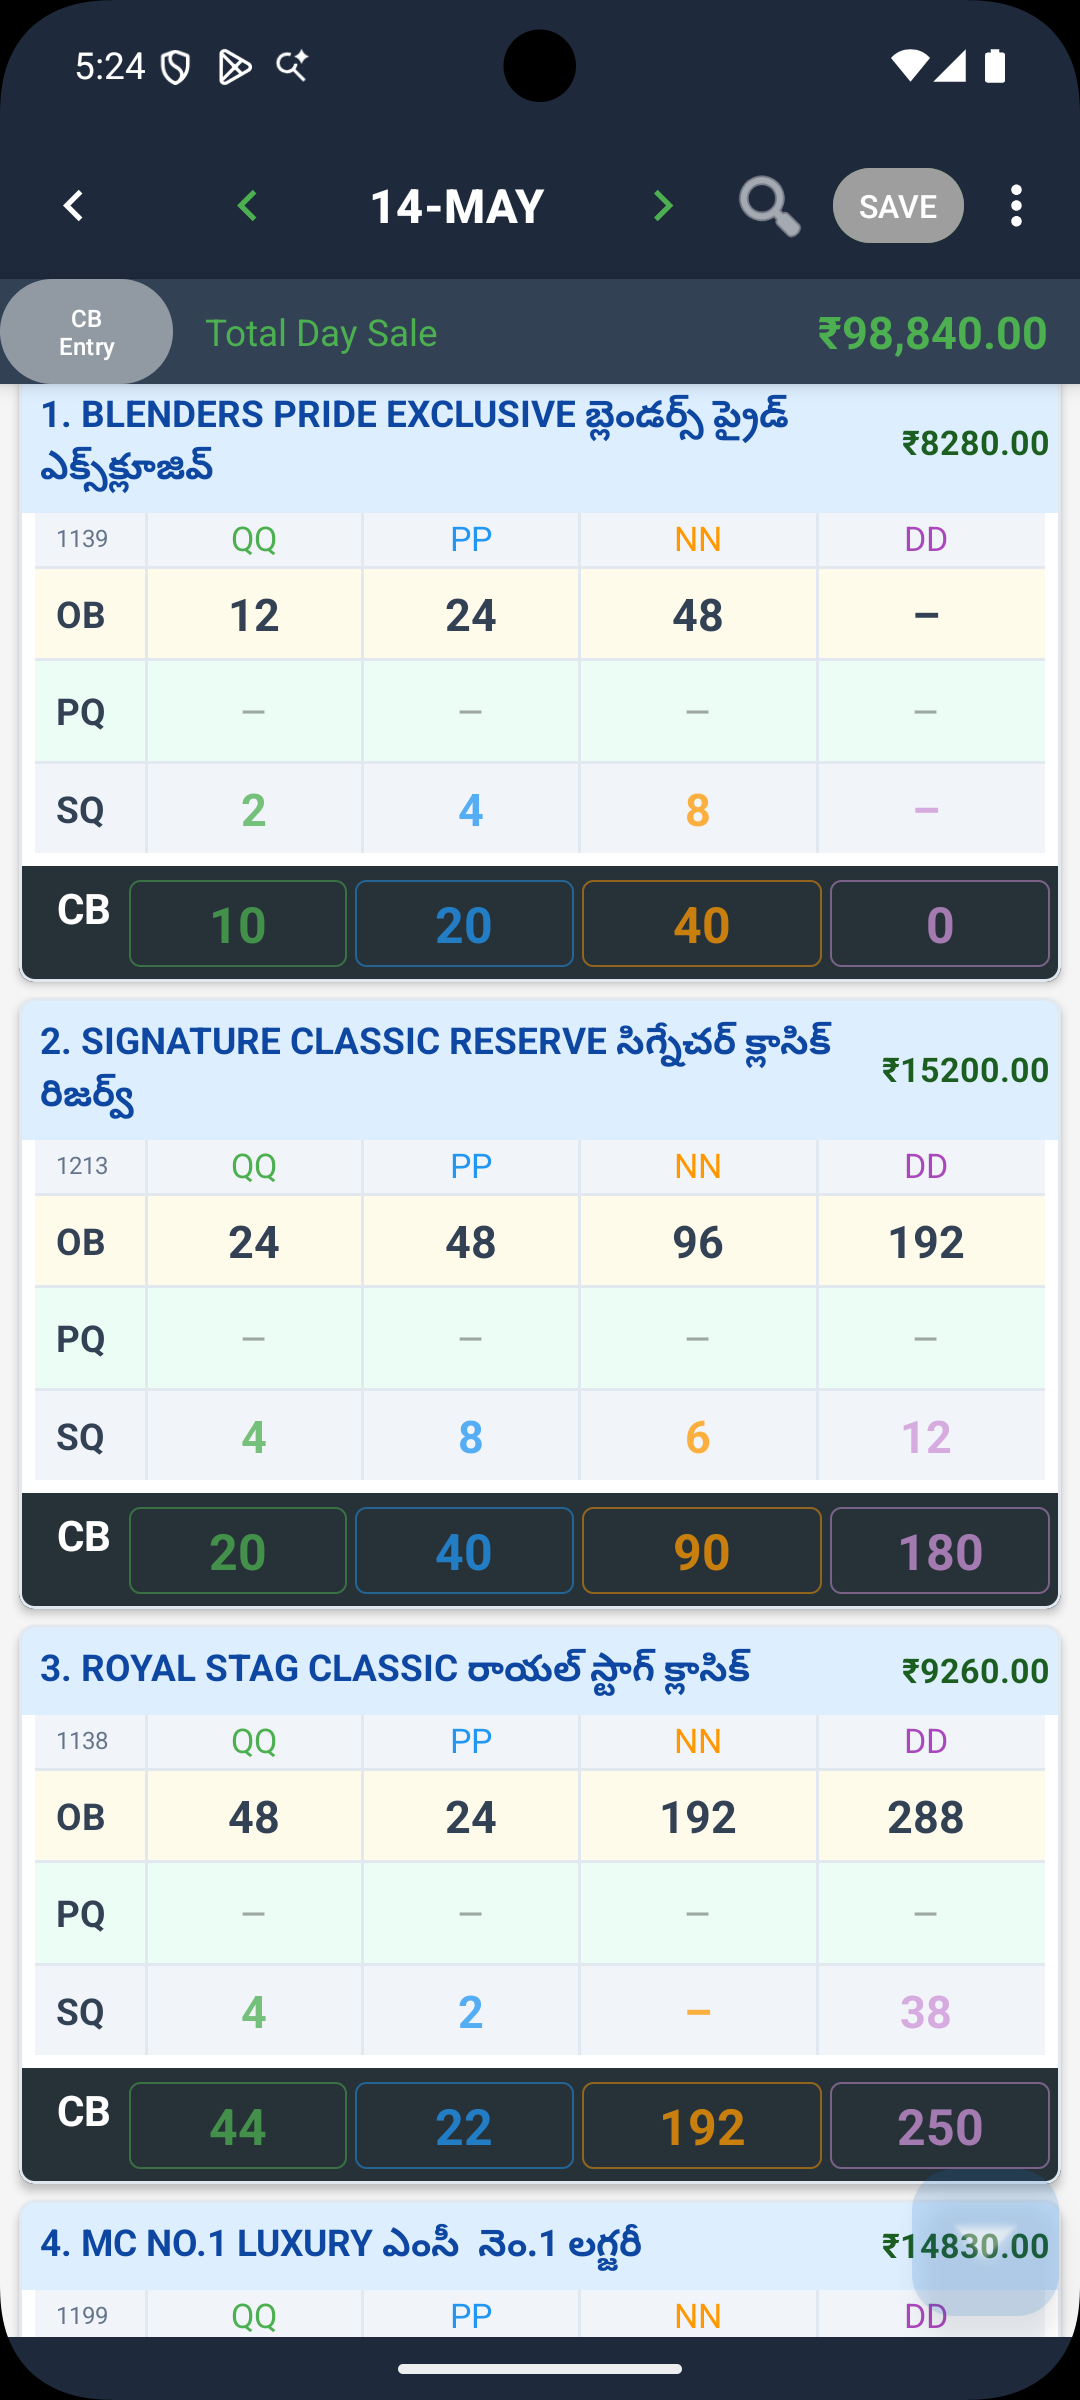

Top controls:
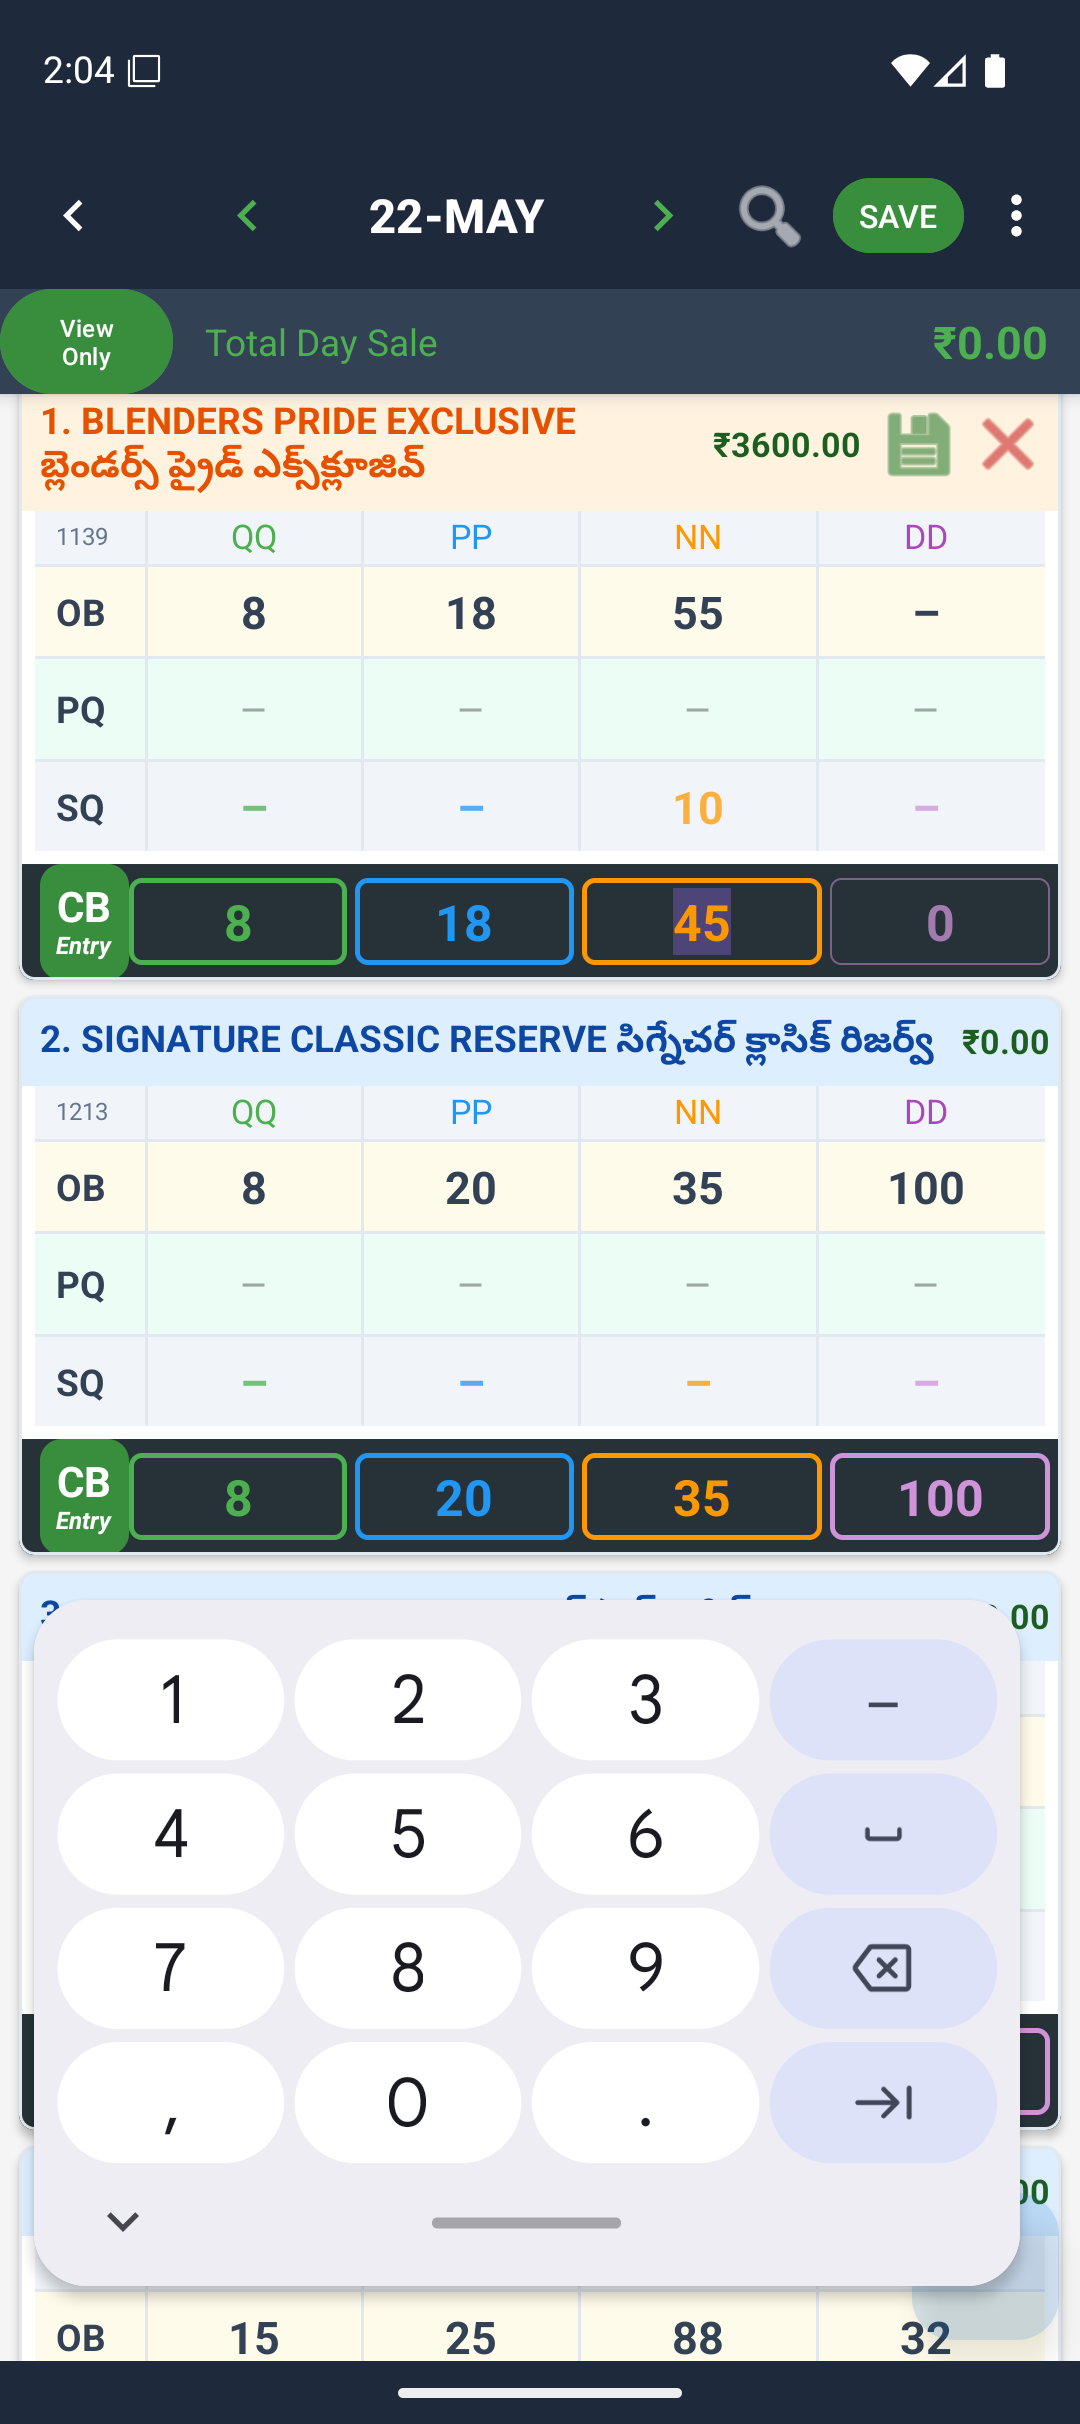
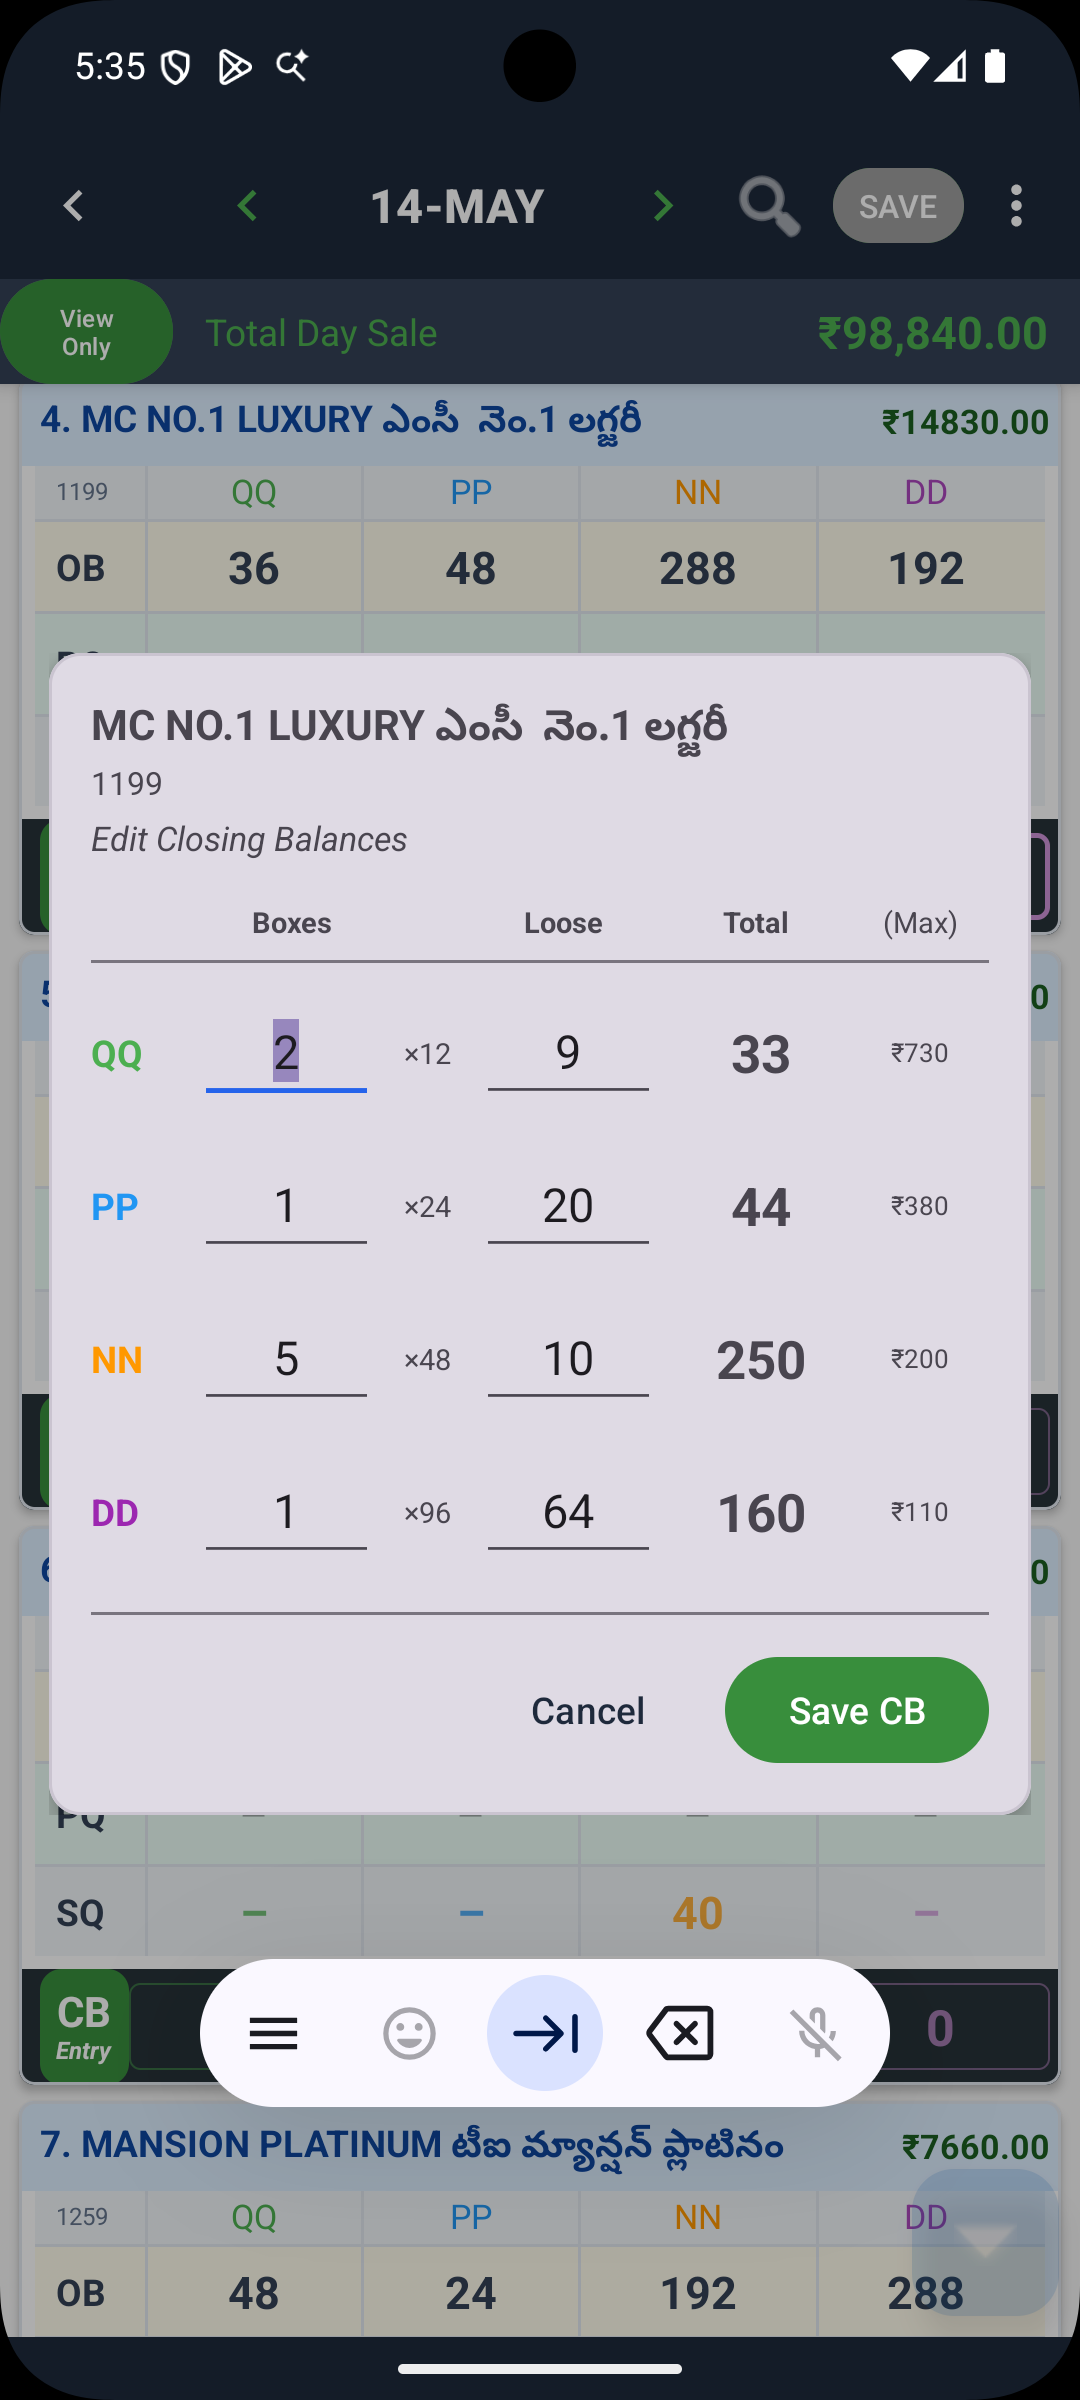
If you have a large number of products, or if your closing stock is already recorded in a spreadsheet, you can import it directly rather than typing each figure into the app.
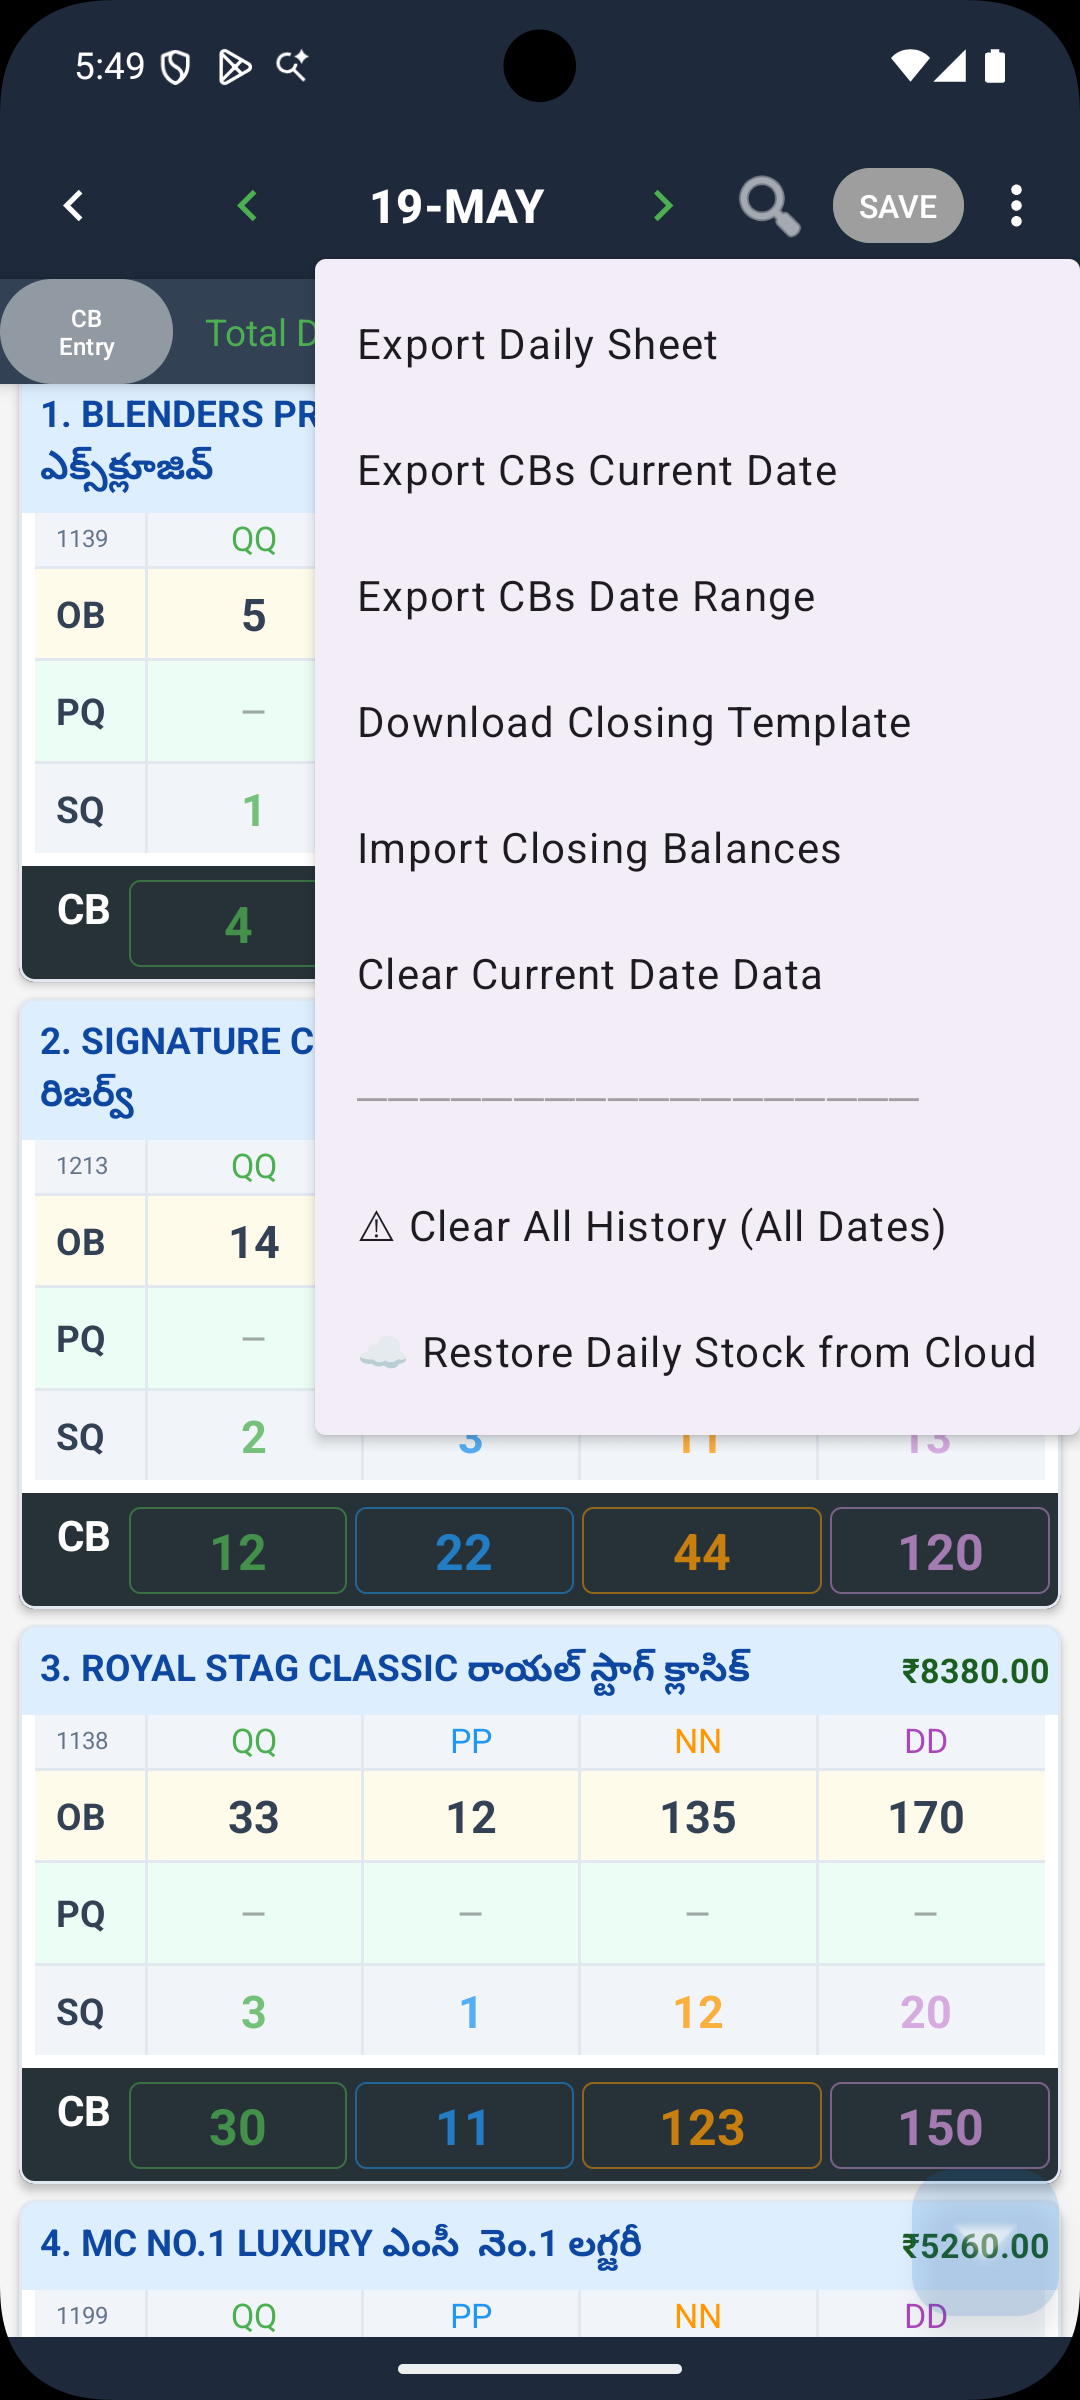
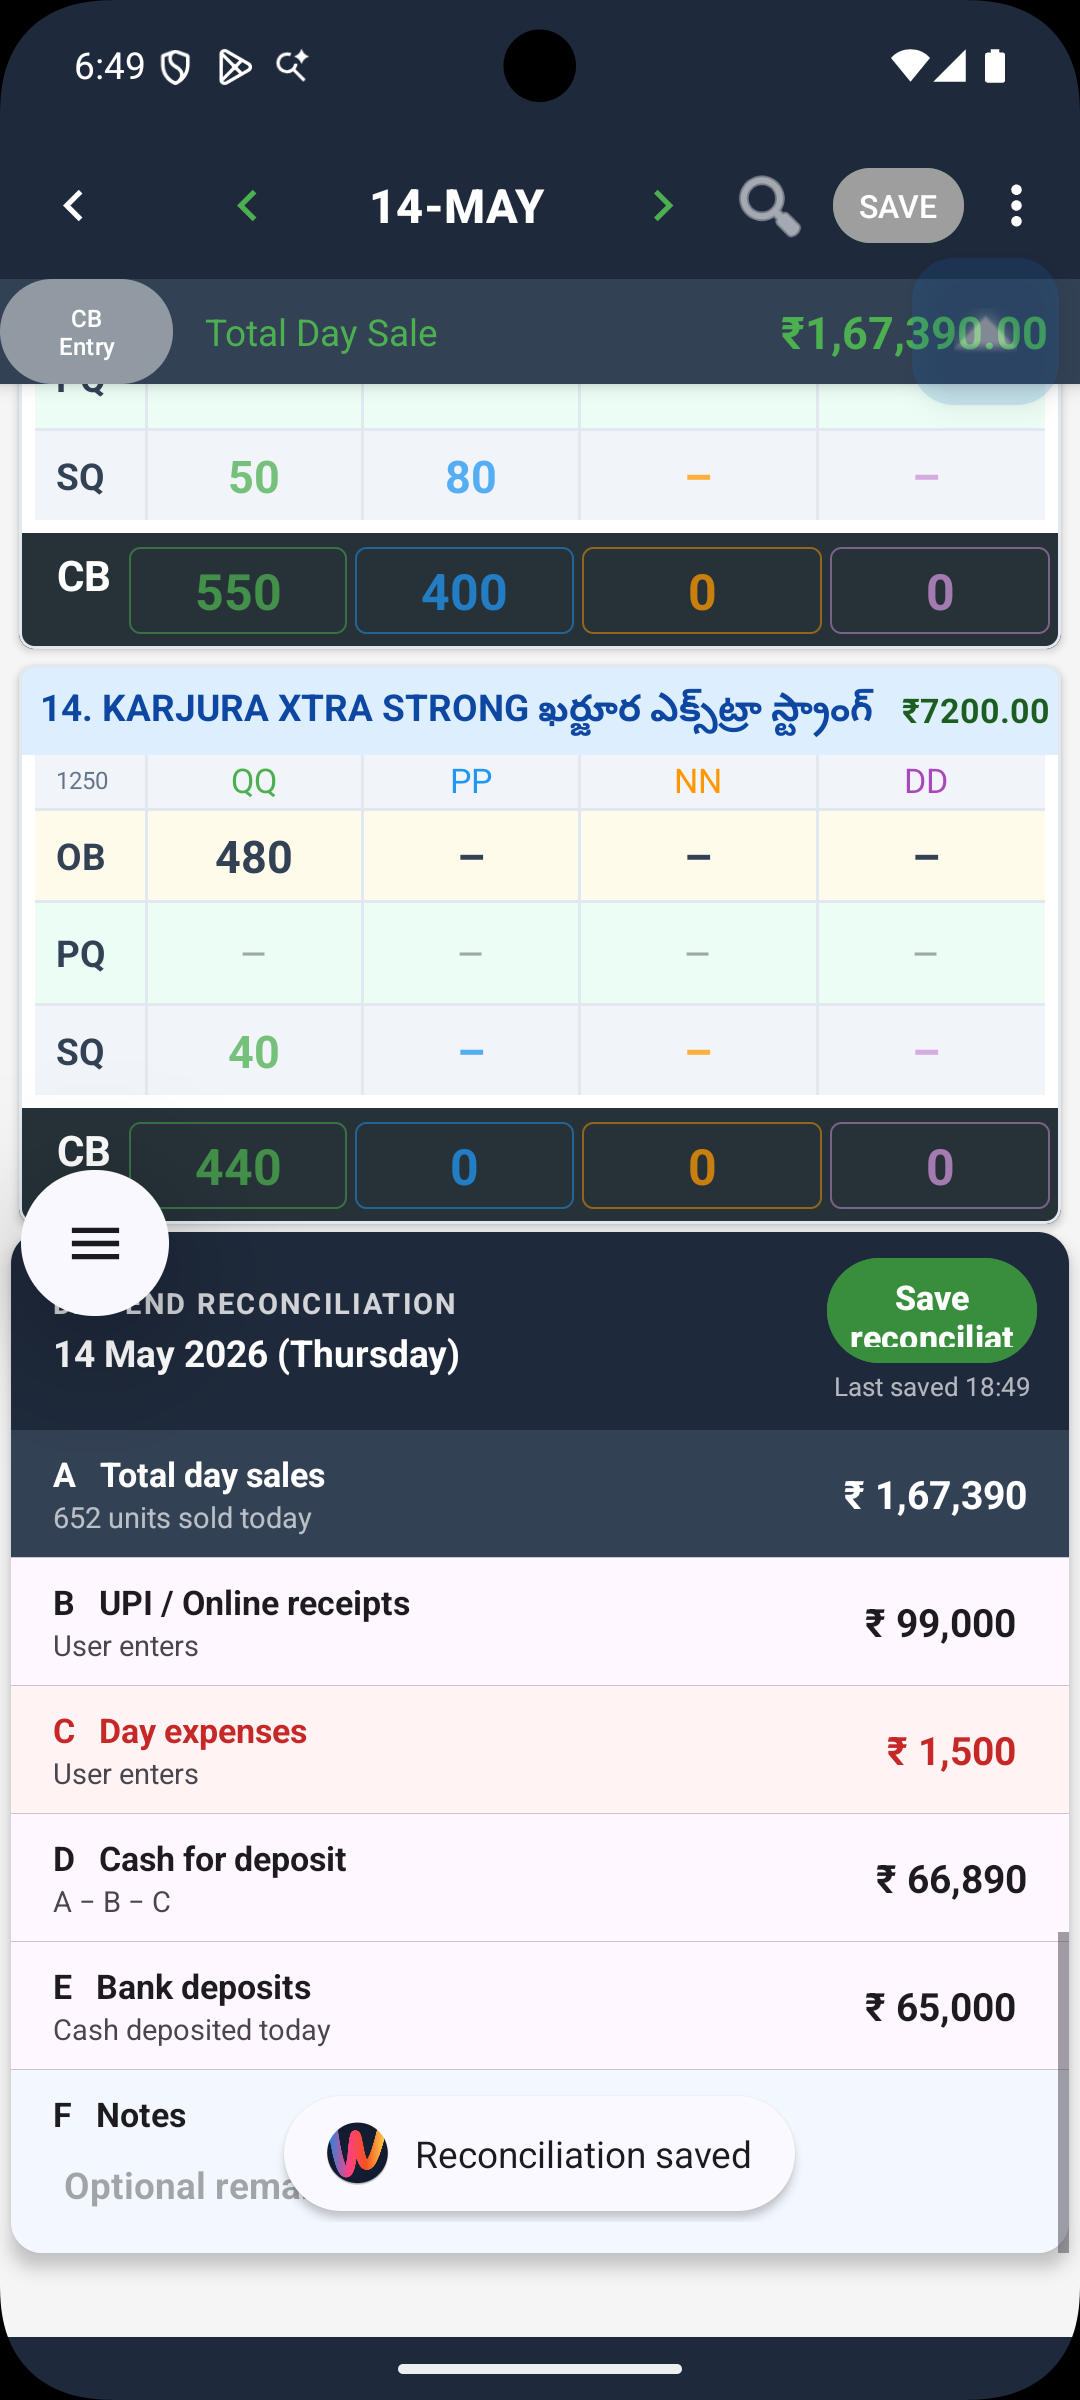
After entering closing balances, scroll to the bottom of the list to complete the day-end summary:
Tap Save at the bottom of the reconciliation section to lock the day-end summary.
| Menu item | What it does |
|---|---|
| Export Daily Stock | Export the full stock sheet as Excel |
| Export Current Date | Export only today's data as Excel |
| Export Date Range | Export a range of dates as Excel |
| Download Closing Template | Download a pre-filled Excel template for bulk CB entry |
| Import Closing | Import closing balances from an Excel file |
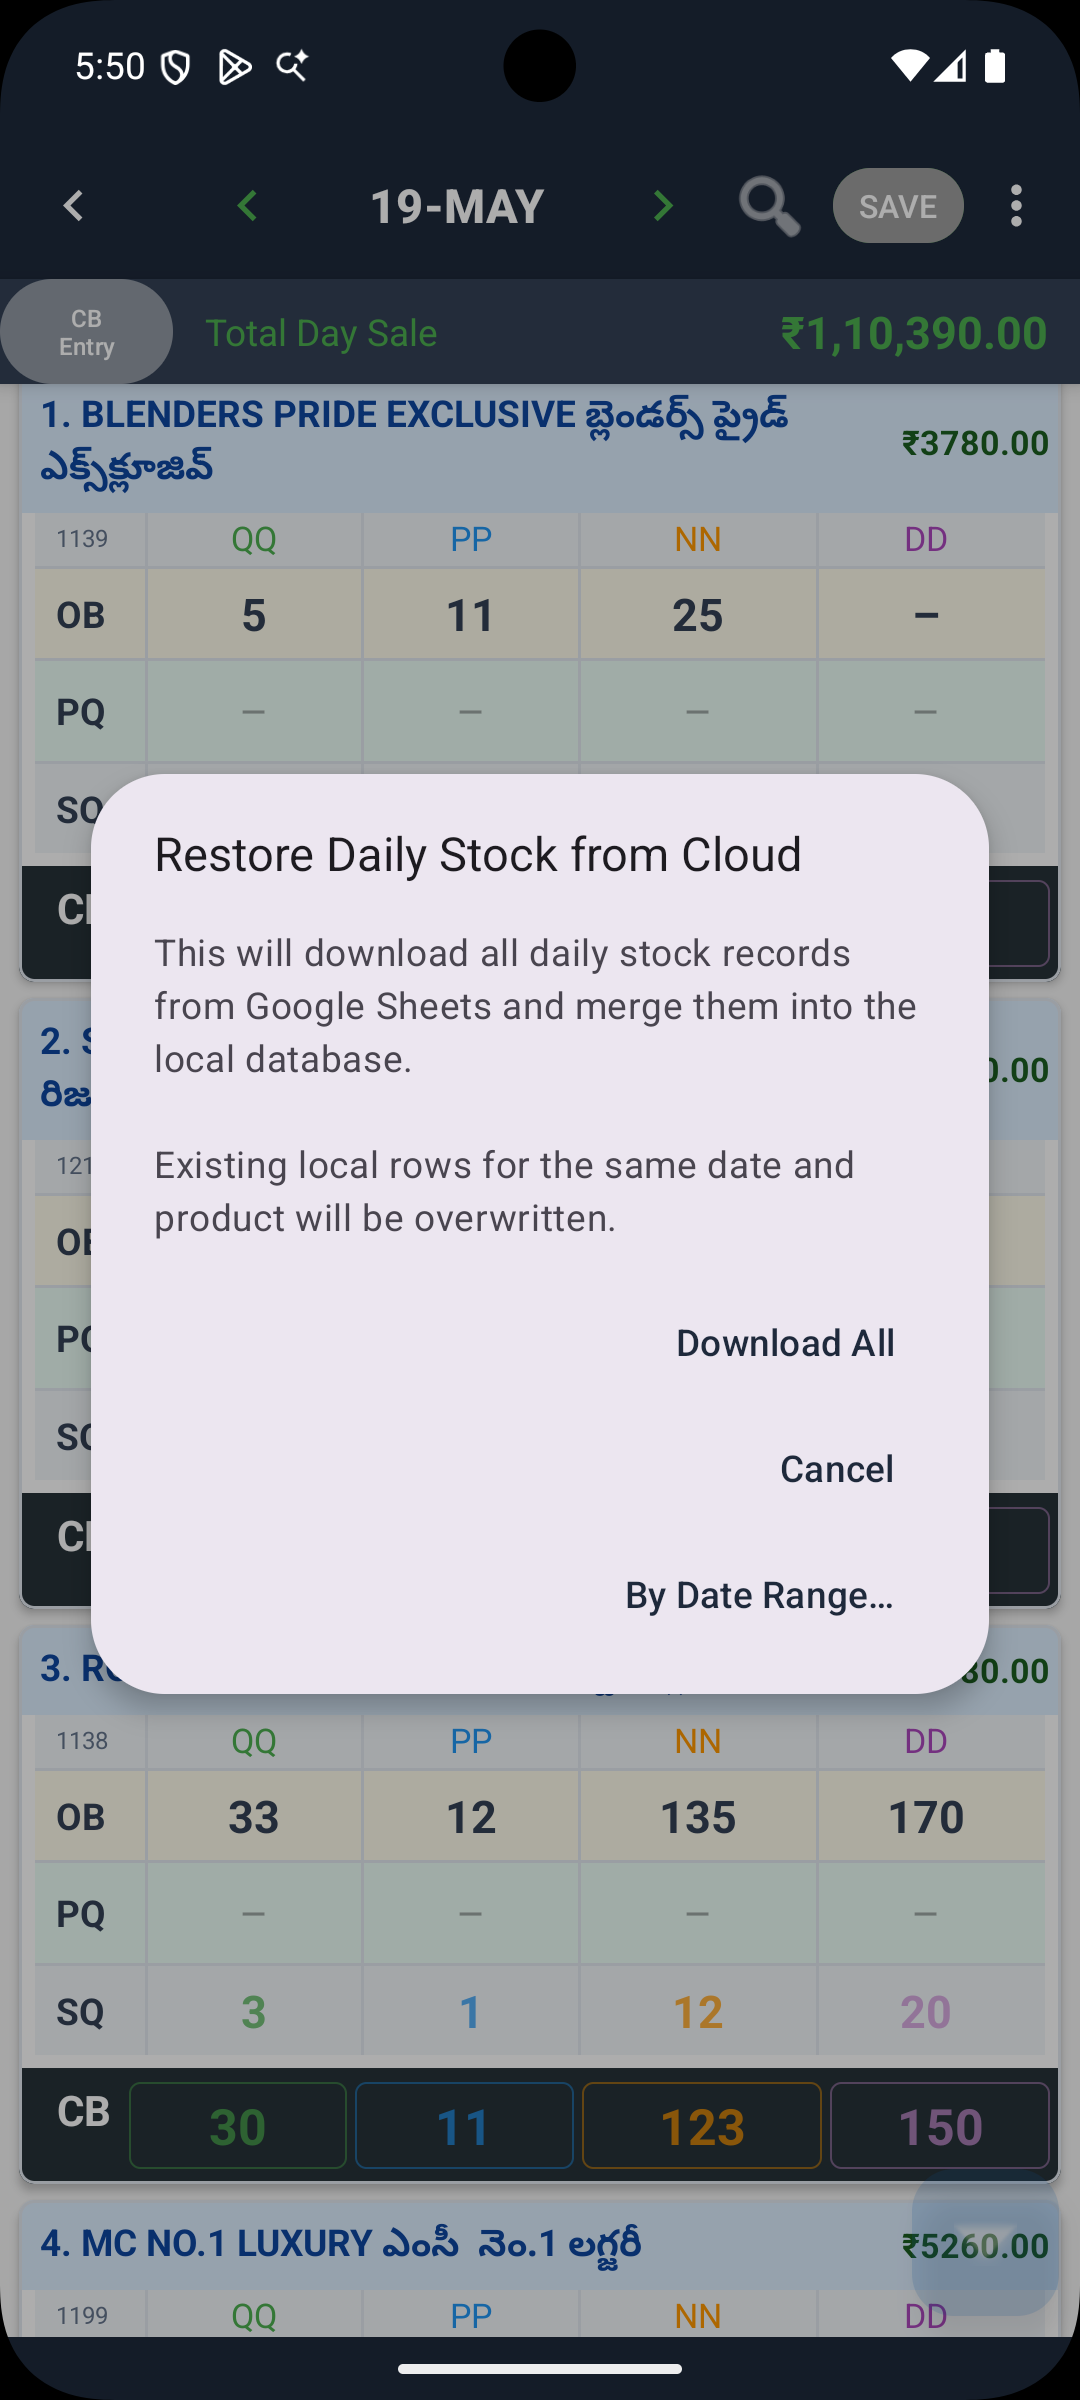
| Restore from Cloud | Pull daily stock data down from your cloud workspace |
| Clear Current Date | Delete all entries for the selected date only |
| Clear ALL Daily Stock | Delete all daily stock data (requires typing "DELETE ALL" to confirm) |
Tap the search icon in the toolbar to filter products by name or product code while in the daily stock screen.
If you navigate away or switch dates with unsaved changes, the app asks: Save Now / Discard / Keep Editing. Your data is safe until you explicitly discard it.
Record every supplier delivery invoice here. Purchases are automatically included in the daily stock calculation for the purchase date.
Tap Purchases from the Home screen to see all recorded invoices.
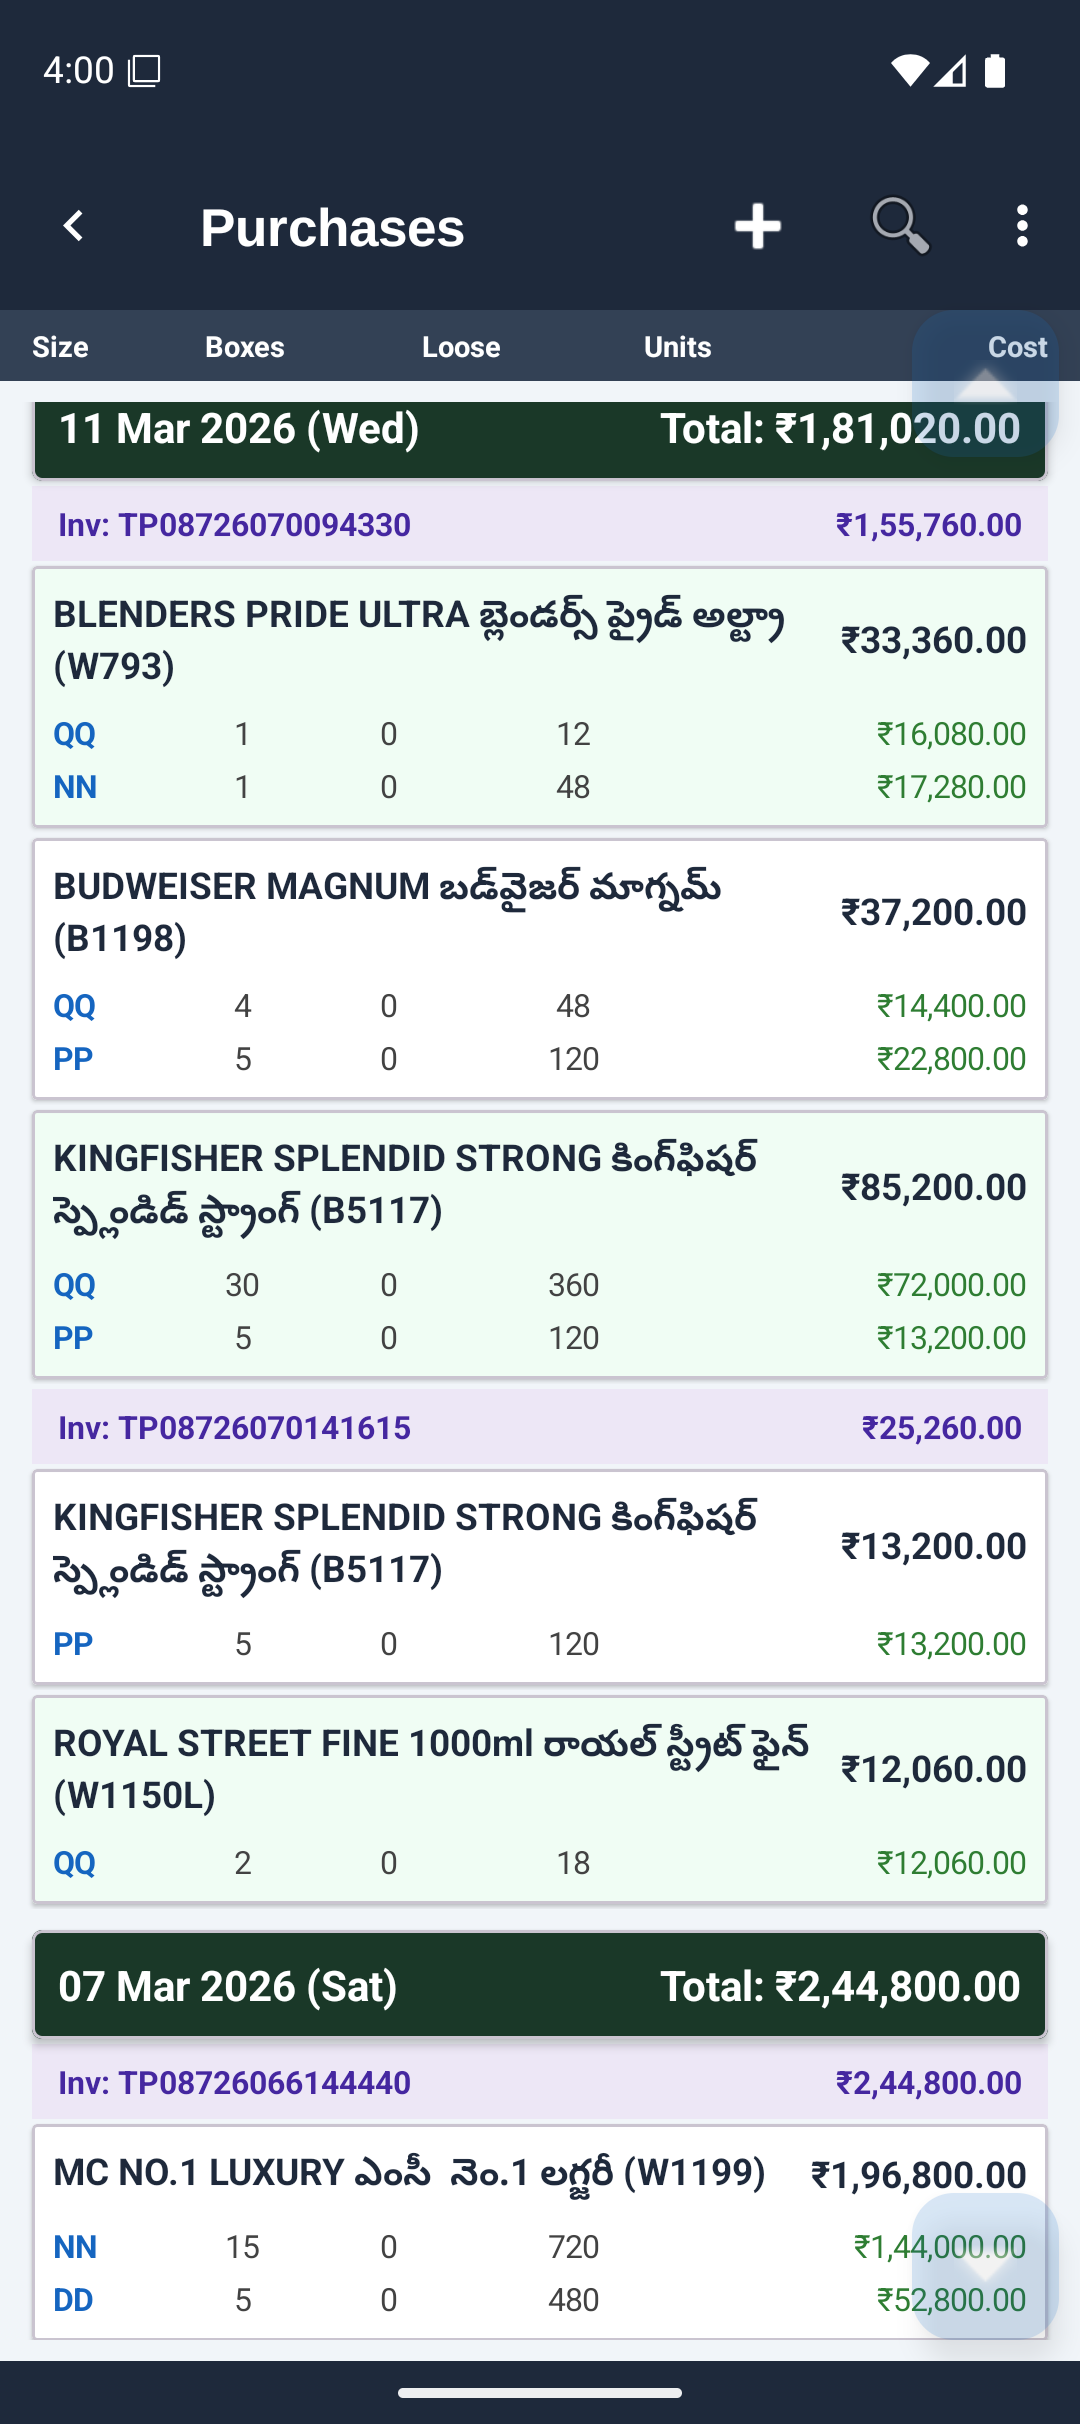
Tap + to open the Purchase Entry form.
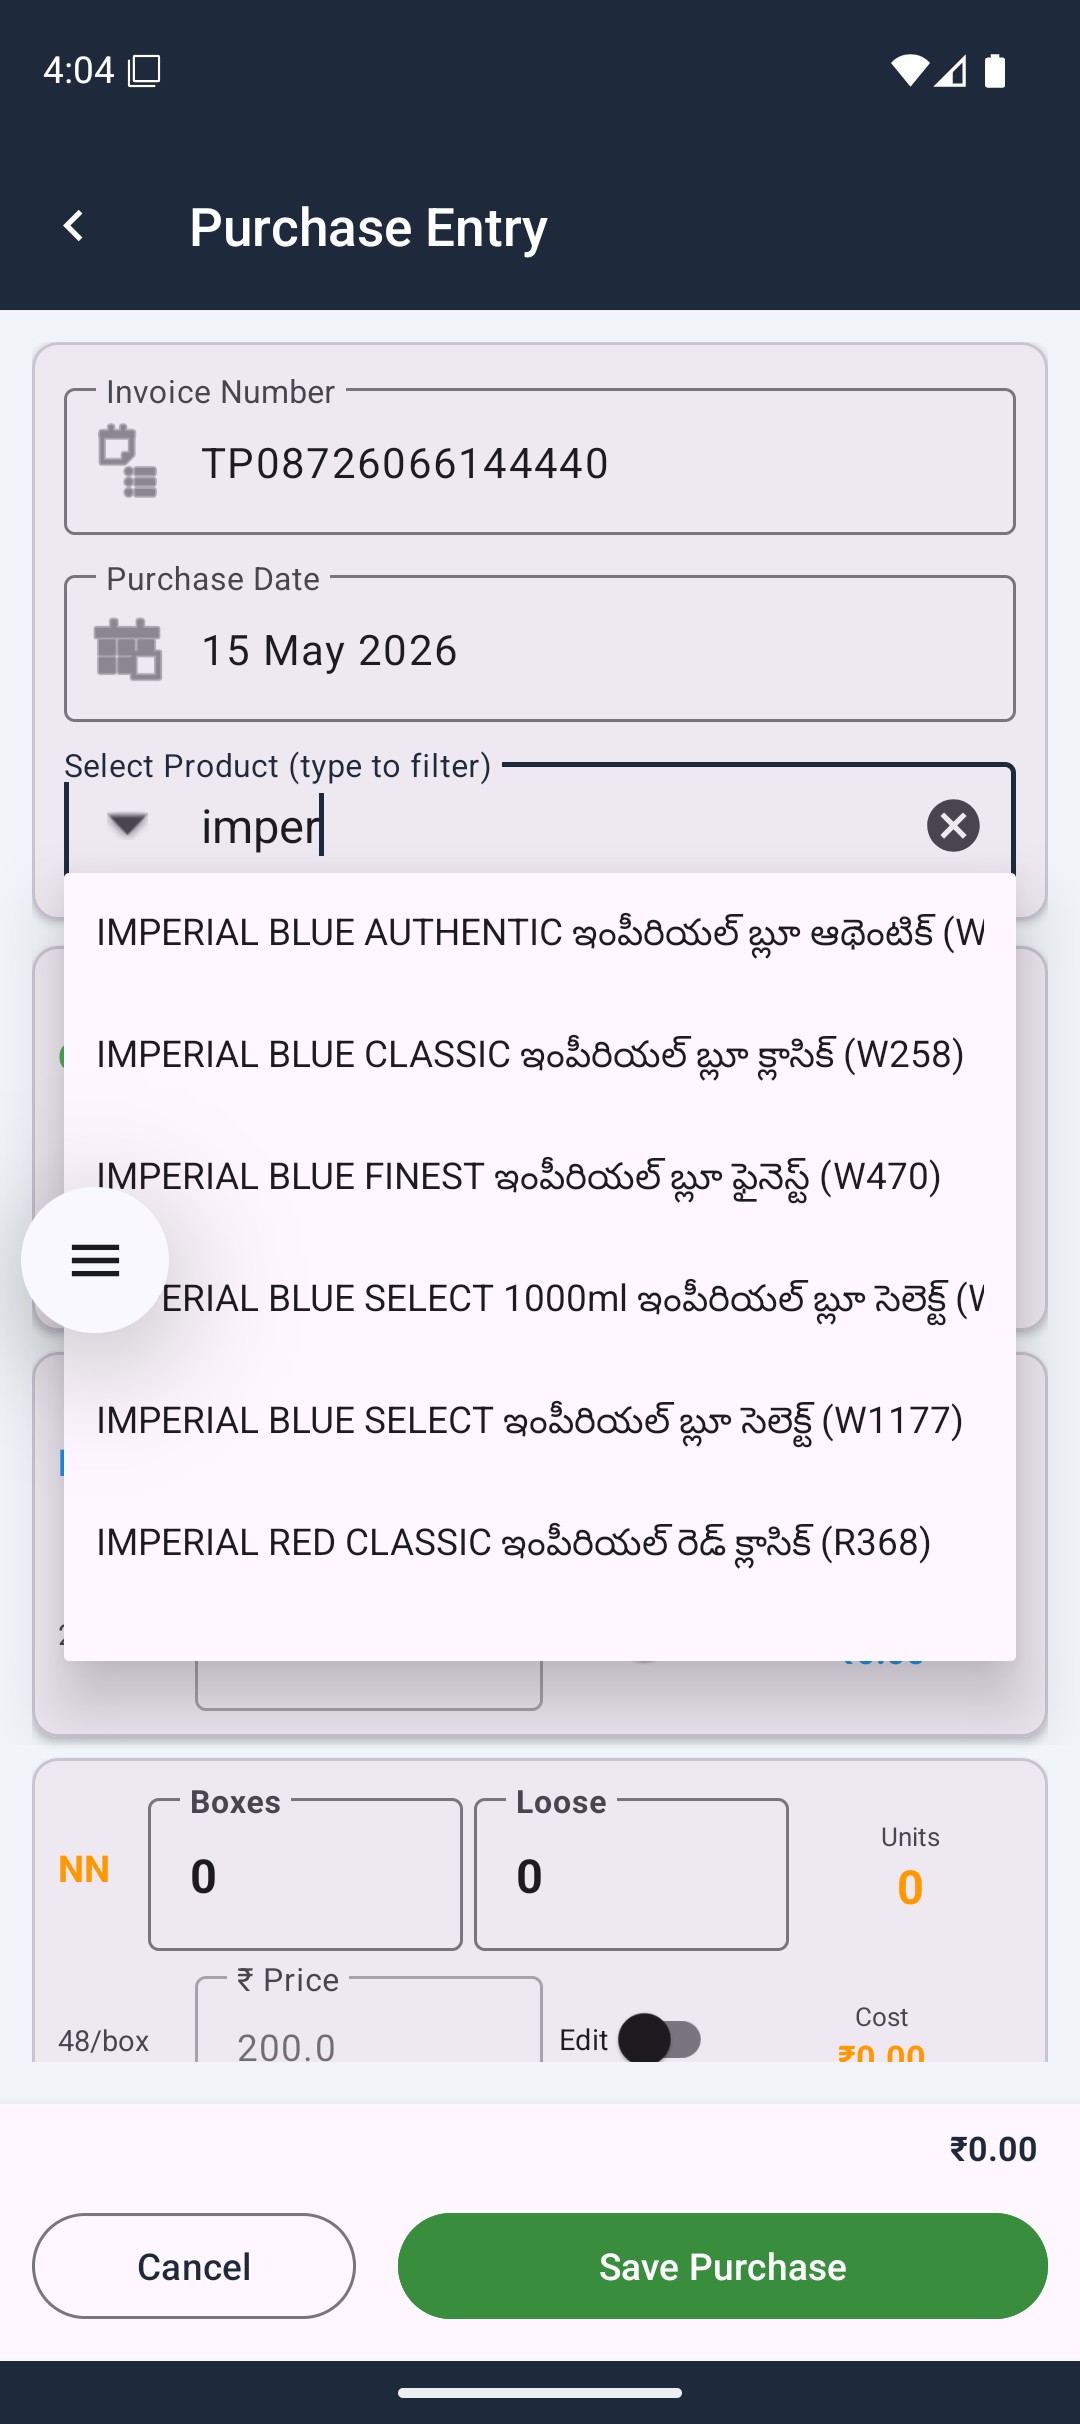
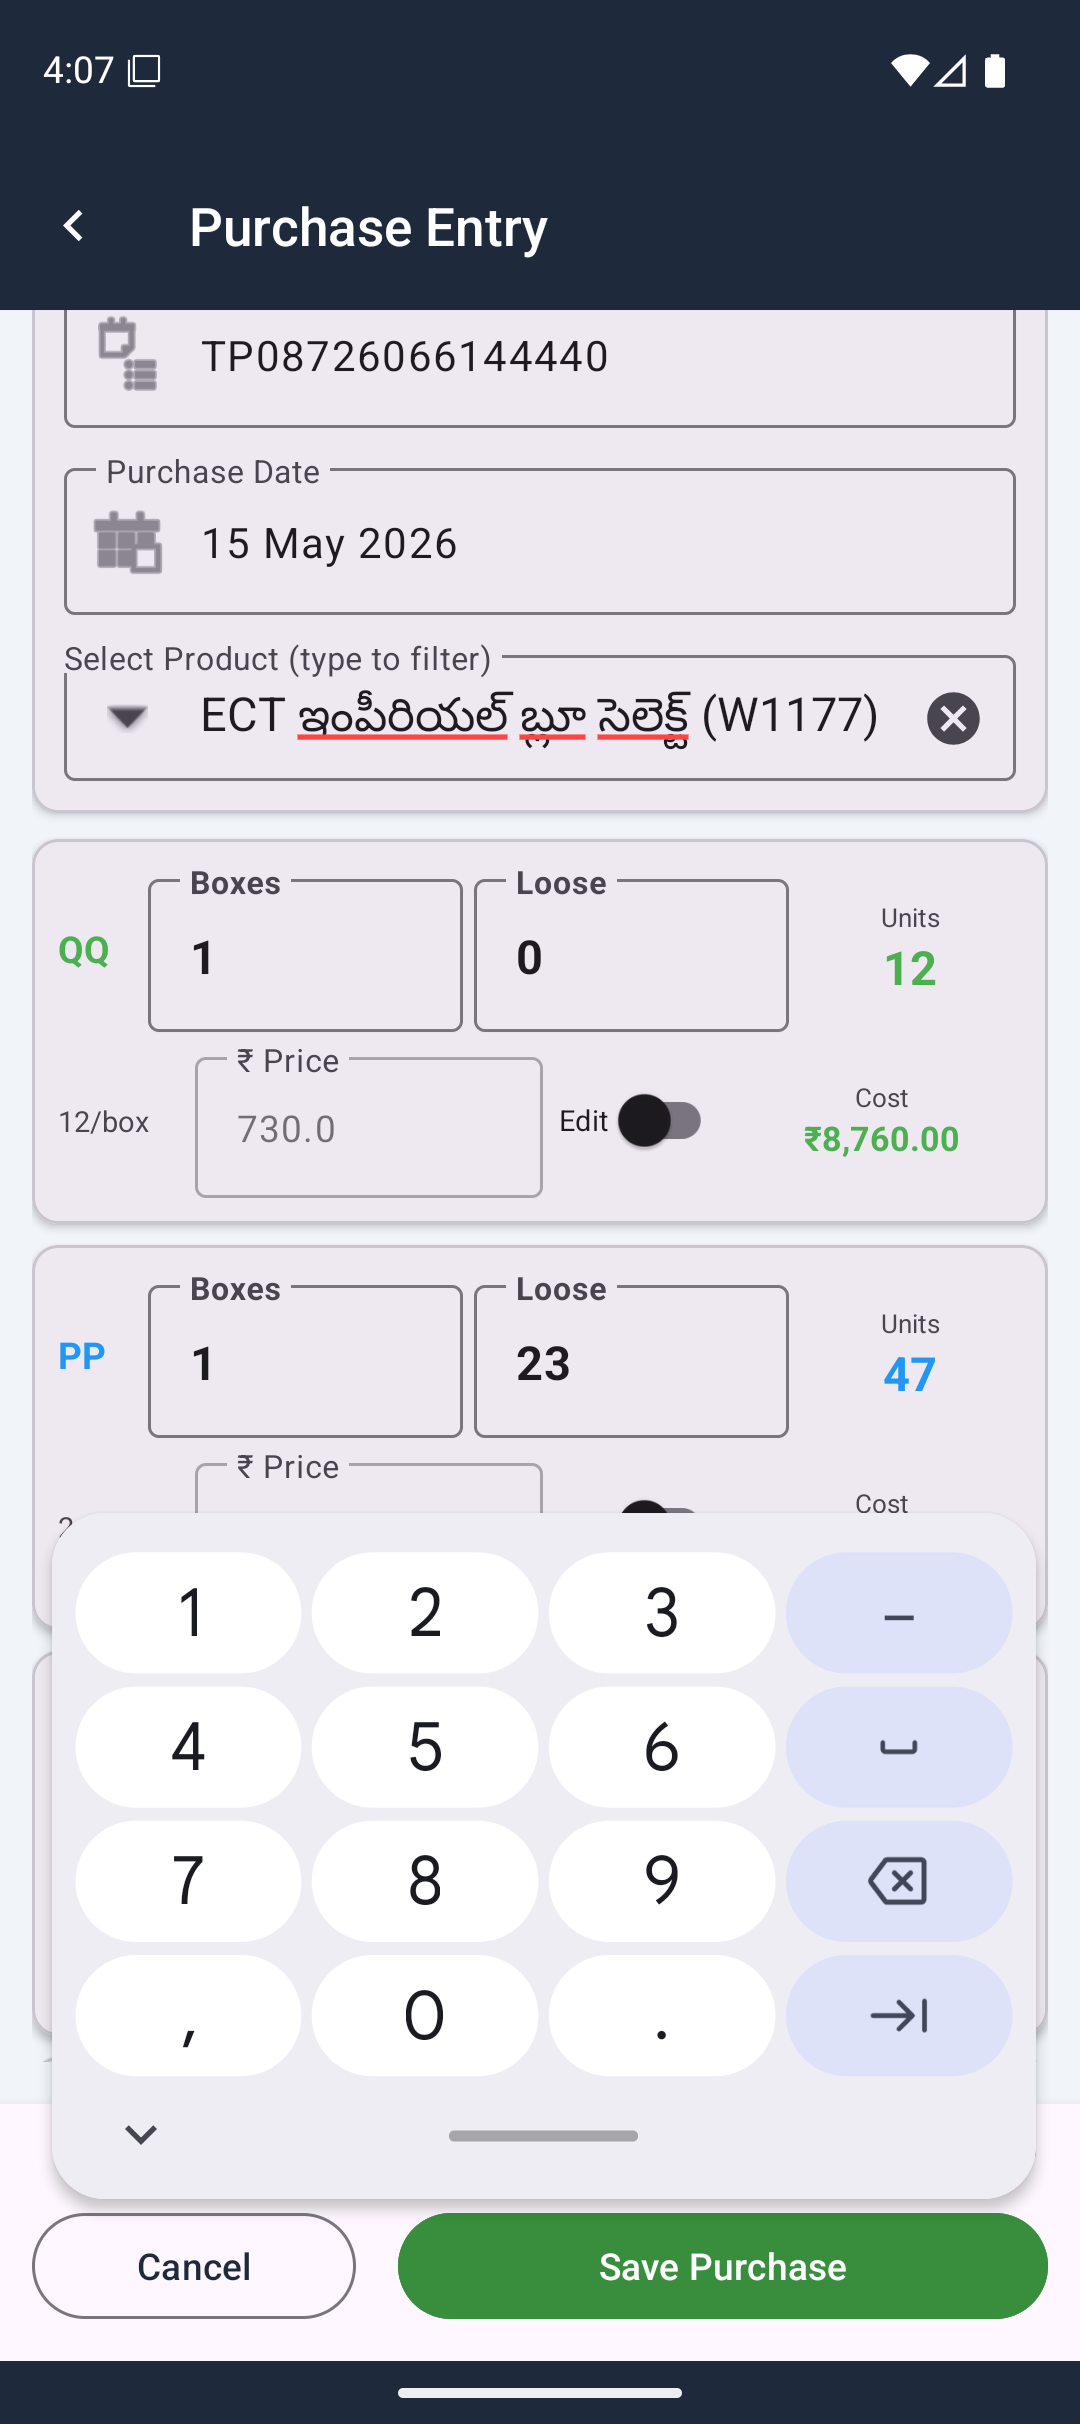
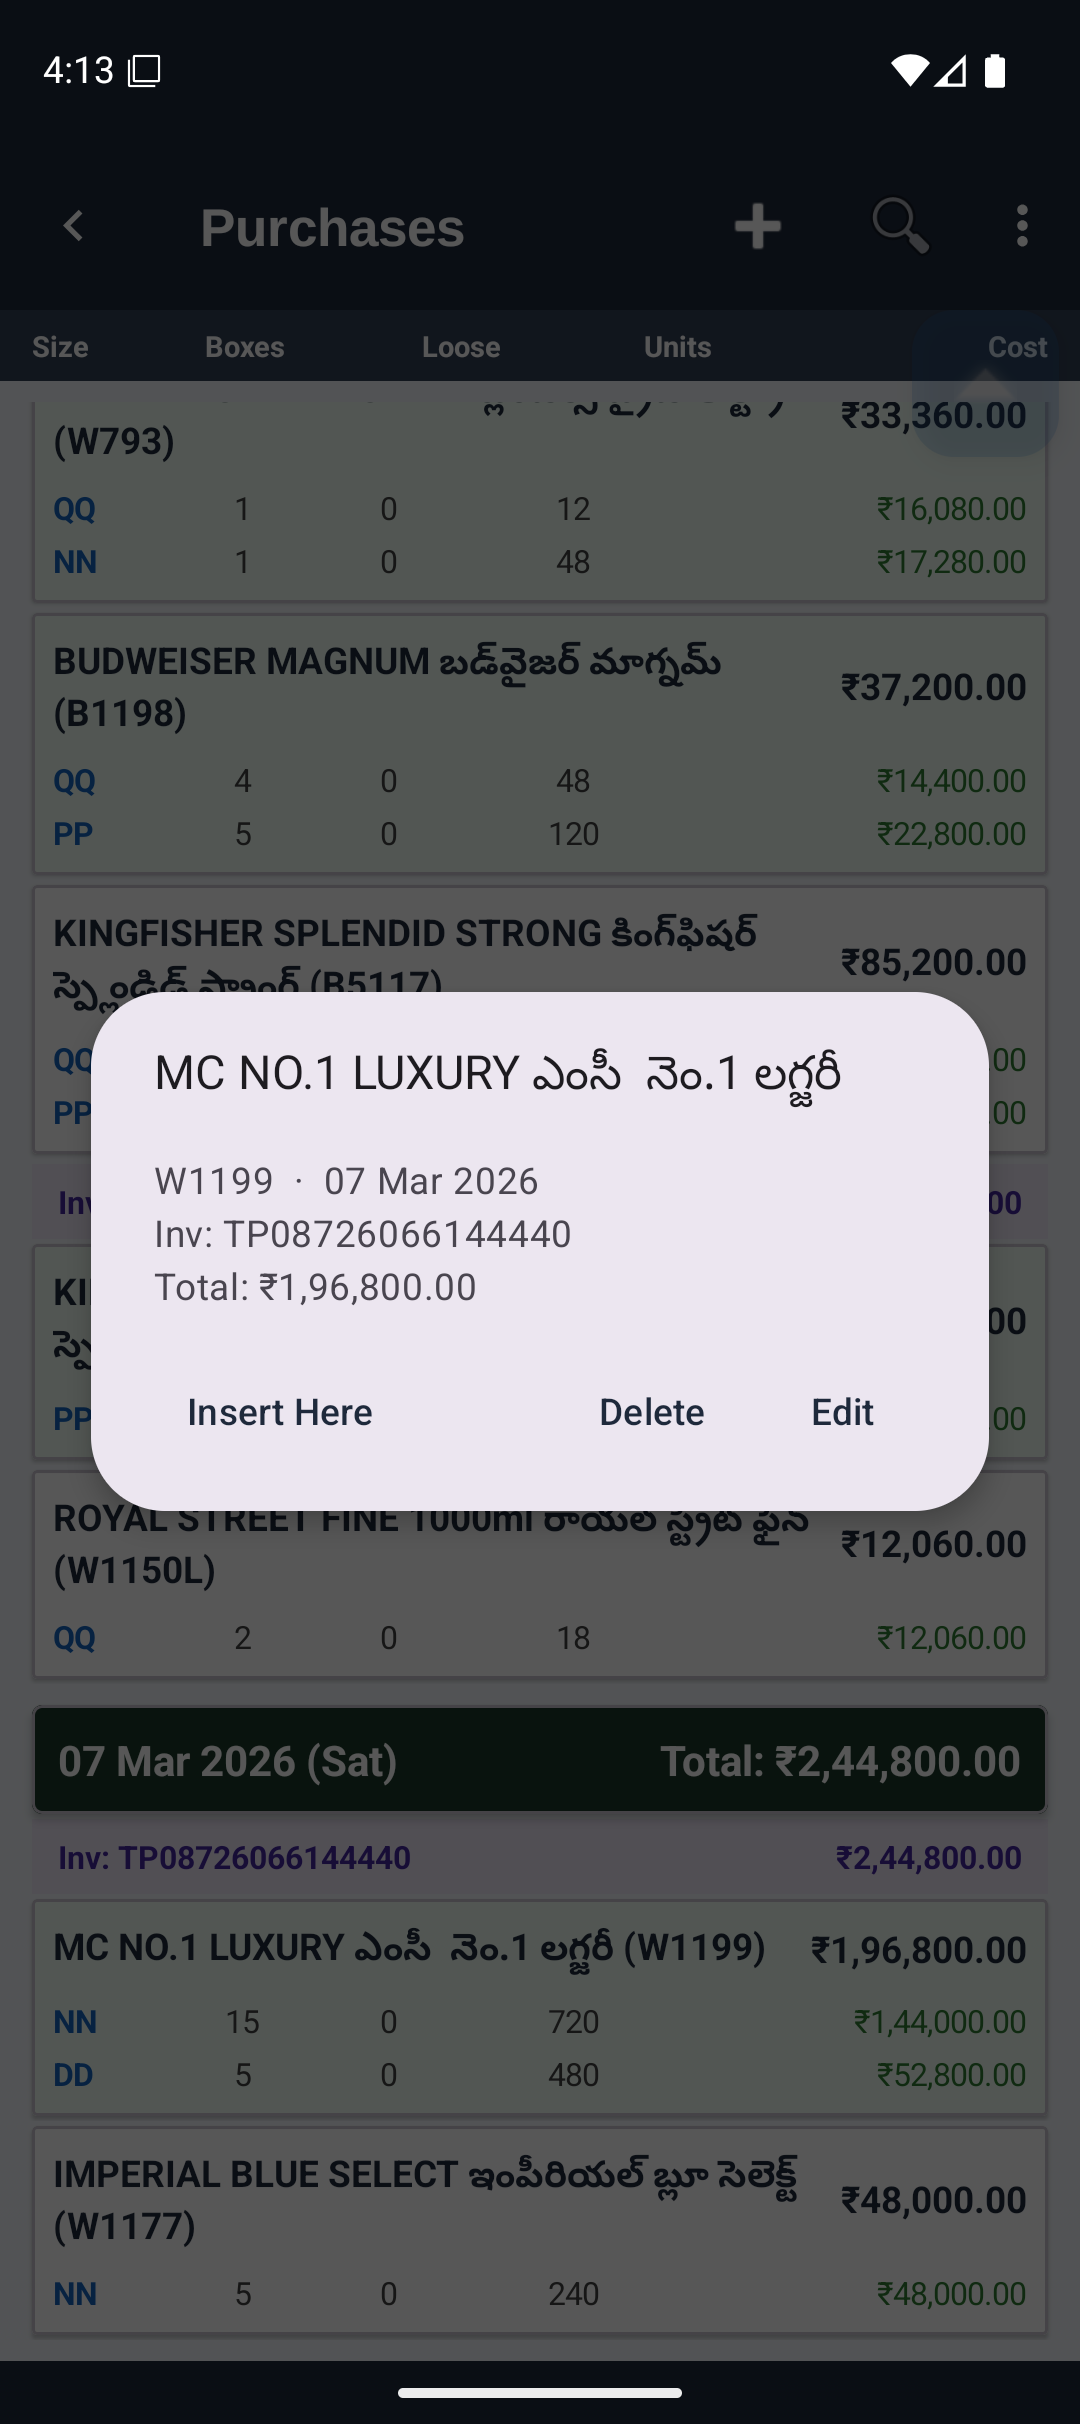
Double-tap any purchase in the list to open an action dialog with Edit, Delete, or Insert Here options. Deletions are permanent and immediately update the daily stock totals for that date.
In the purchases list, double-tap an existing purchase and select Insert Here. This opens a new purchase form pre-filled with the same invoice number, date and supplier — just change the product.
When you receive a delivery with many products, or when entering historical invoices in bulk, importing from Excel is far faster than tapping through each product one by one.
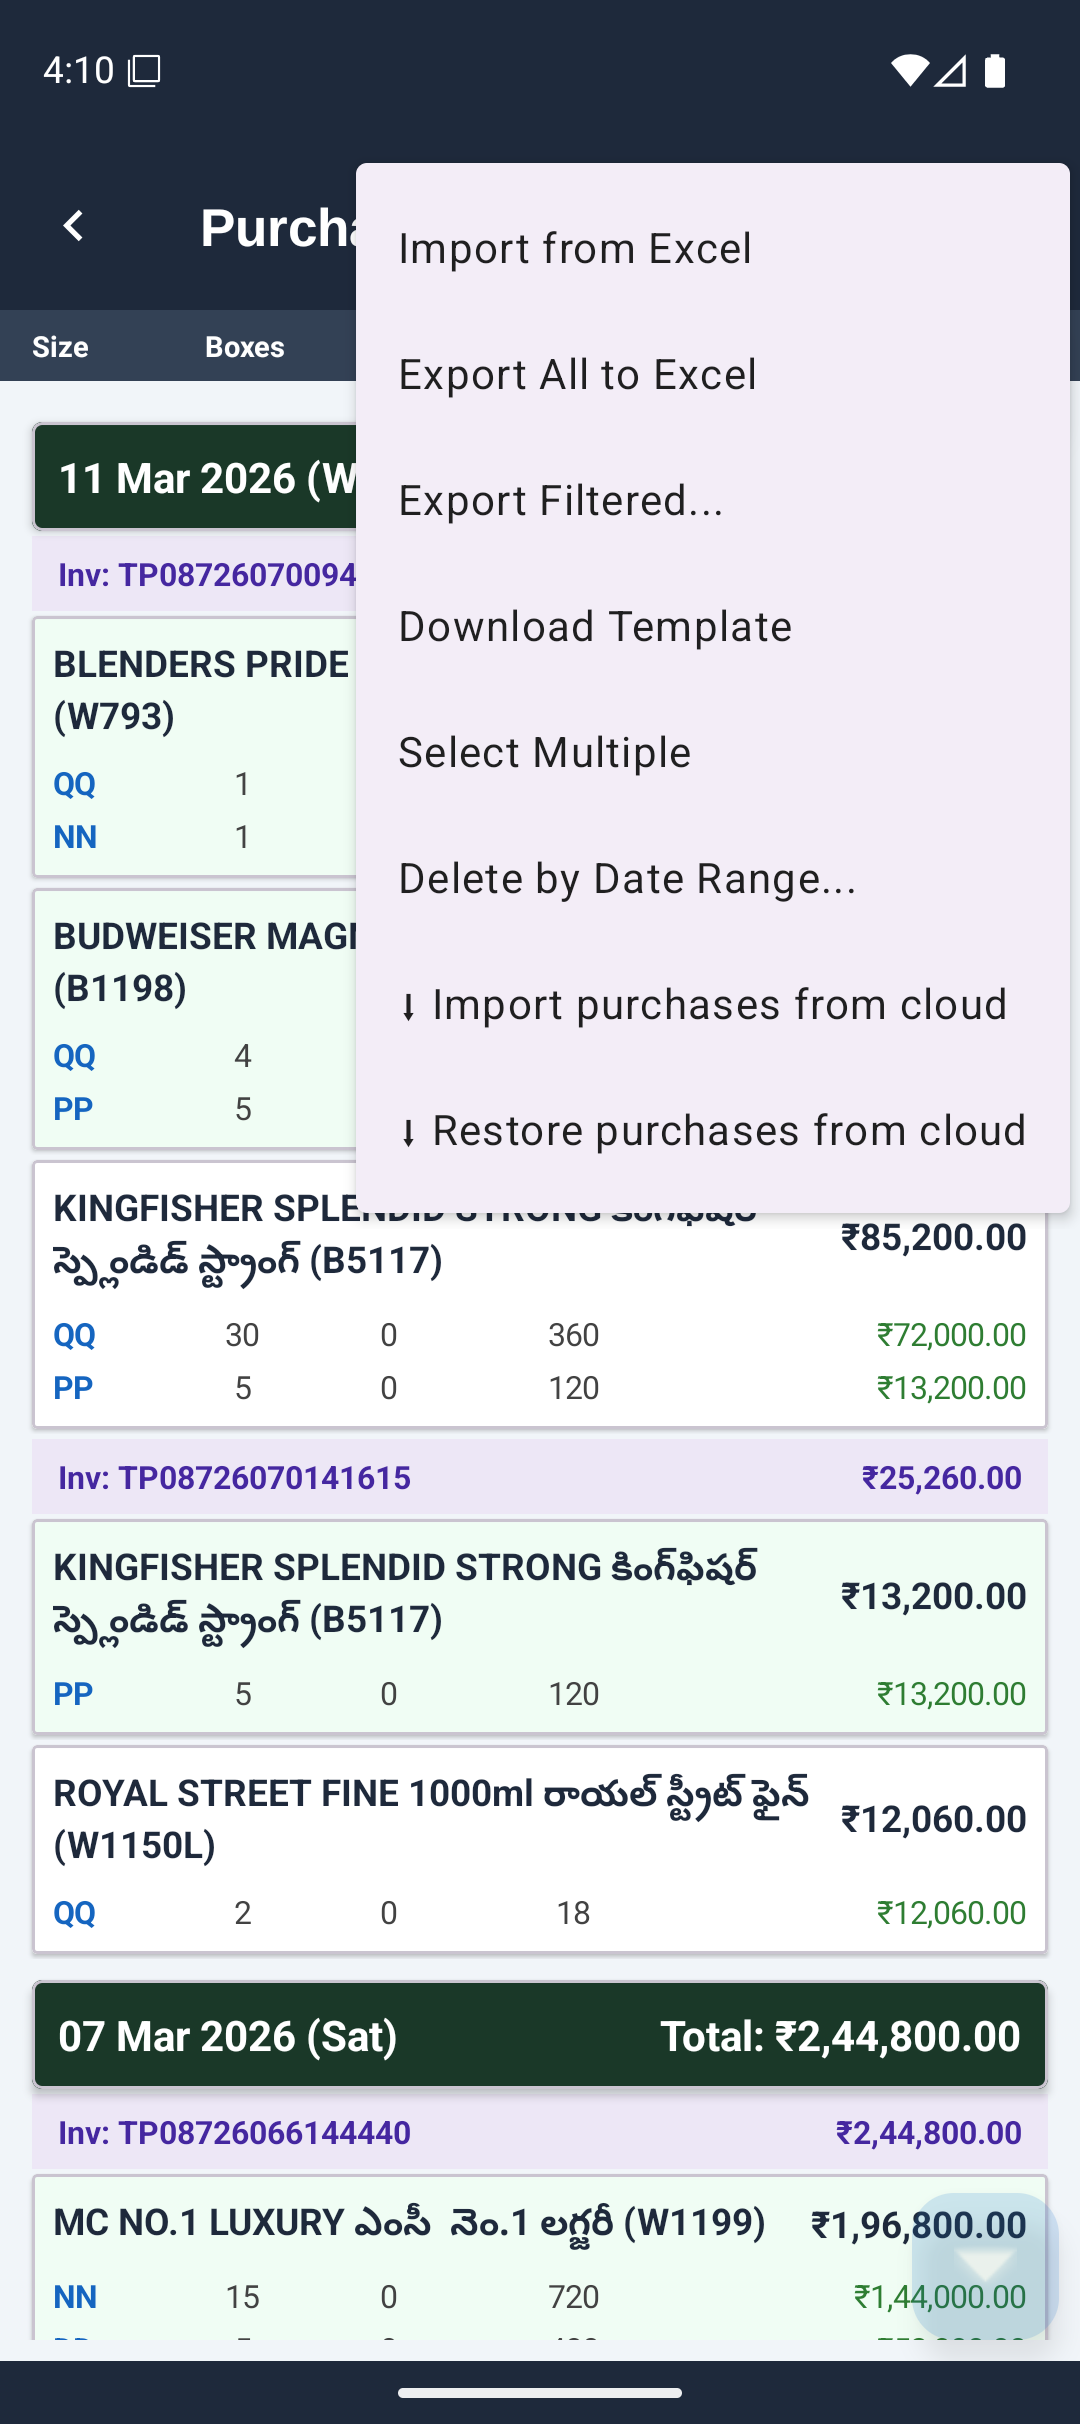
| Menu item | What it does |
|---|---|
| Import from Excel | Bulk-import purchases from an Excel file (download template first) |
| Export All | Export all purchase records as Excel |
| Export Filtered | Export purchases within a date range |
| Download Template | Get an Excel template pre-filled with your product list |
| Delete by Date Range | Delete all purchases within a chosen date range |
| Multi-Select | Select multiple purchases to delete in one go |
| Download from Cloud | Pull purchase data from your cloud workspace |
Tap Reports from the Home screen.
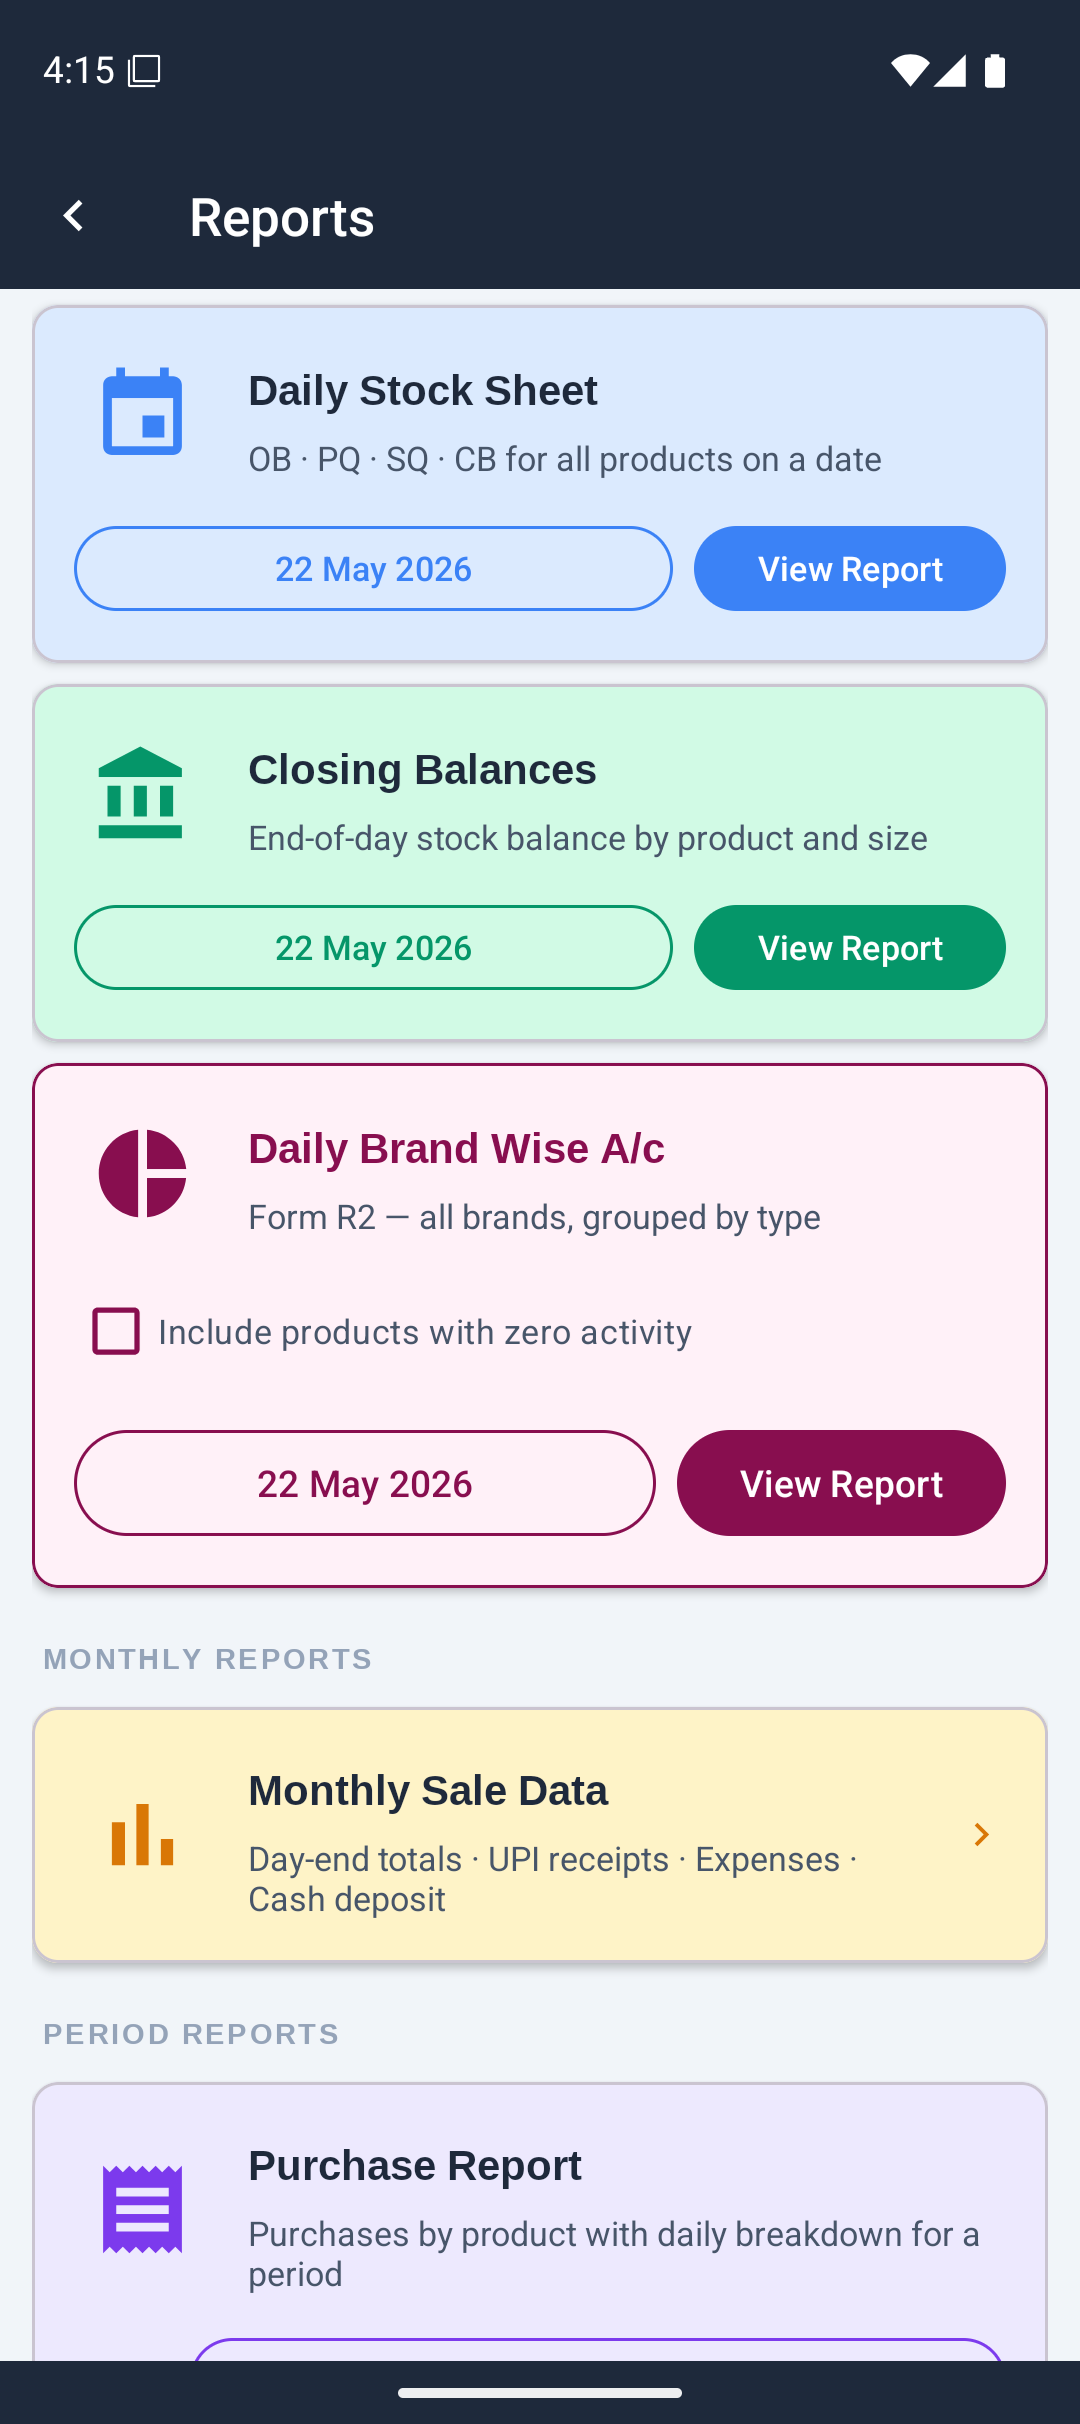
Full table: opening balance, purchases, closing balance and calculated sales for all products and sizes on a selected date.
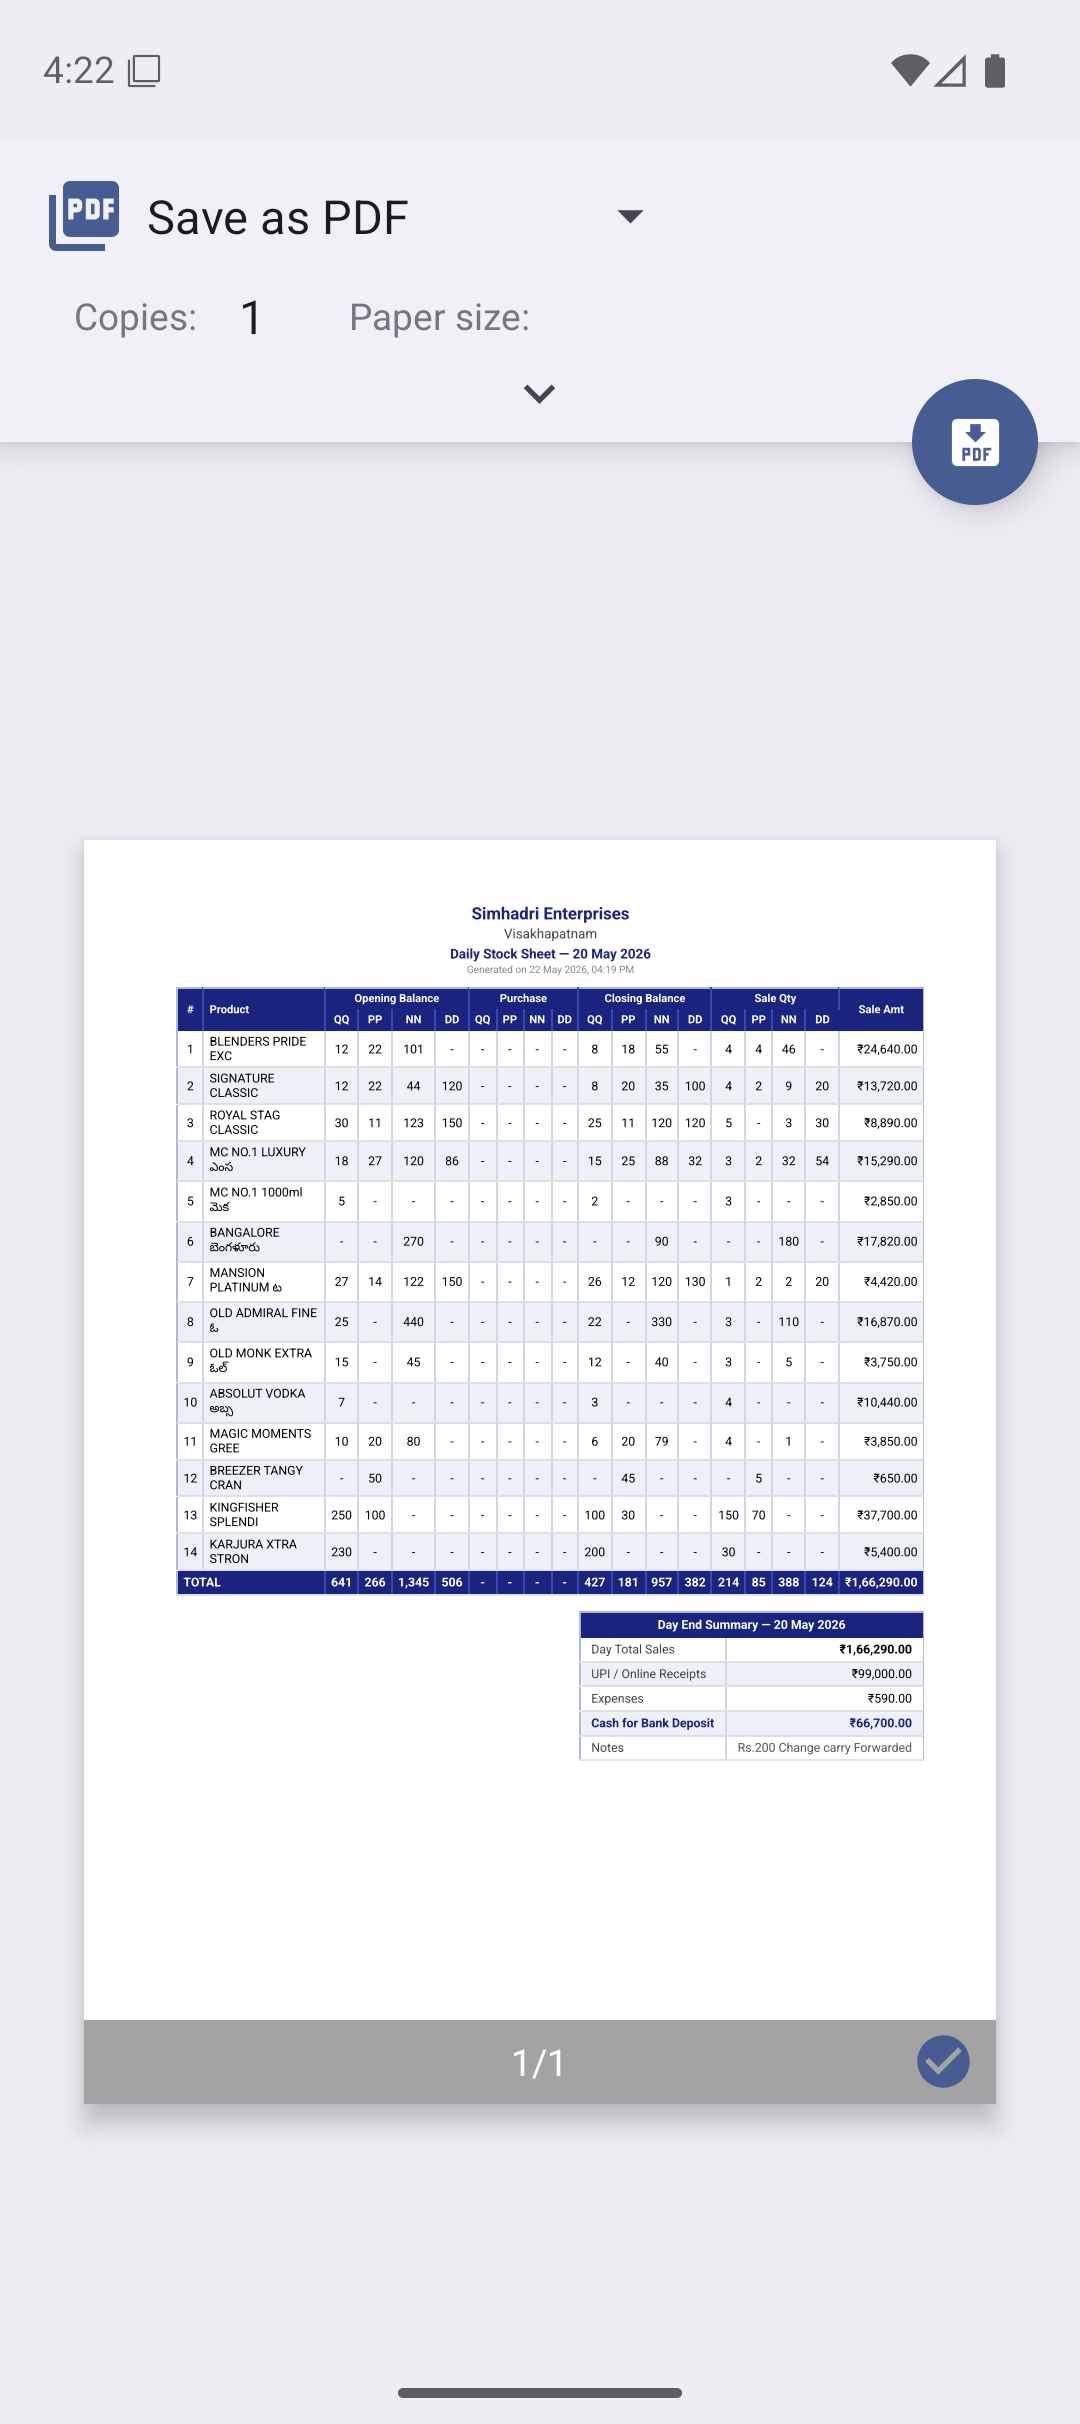
End-of-day stock quantities per product across all sizes on a selected date. Useful for a quick physical stock verification.
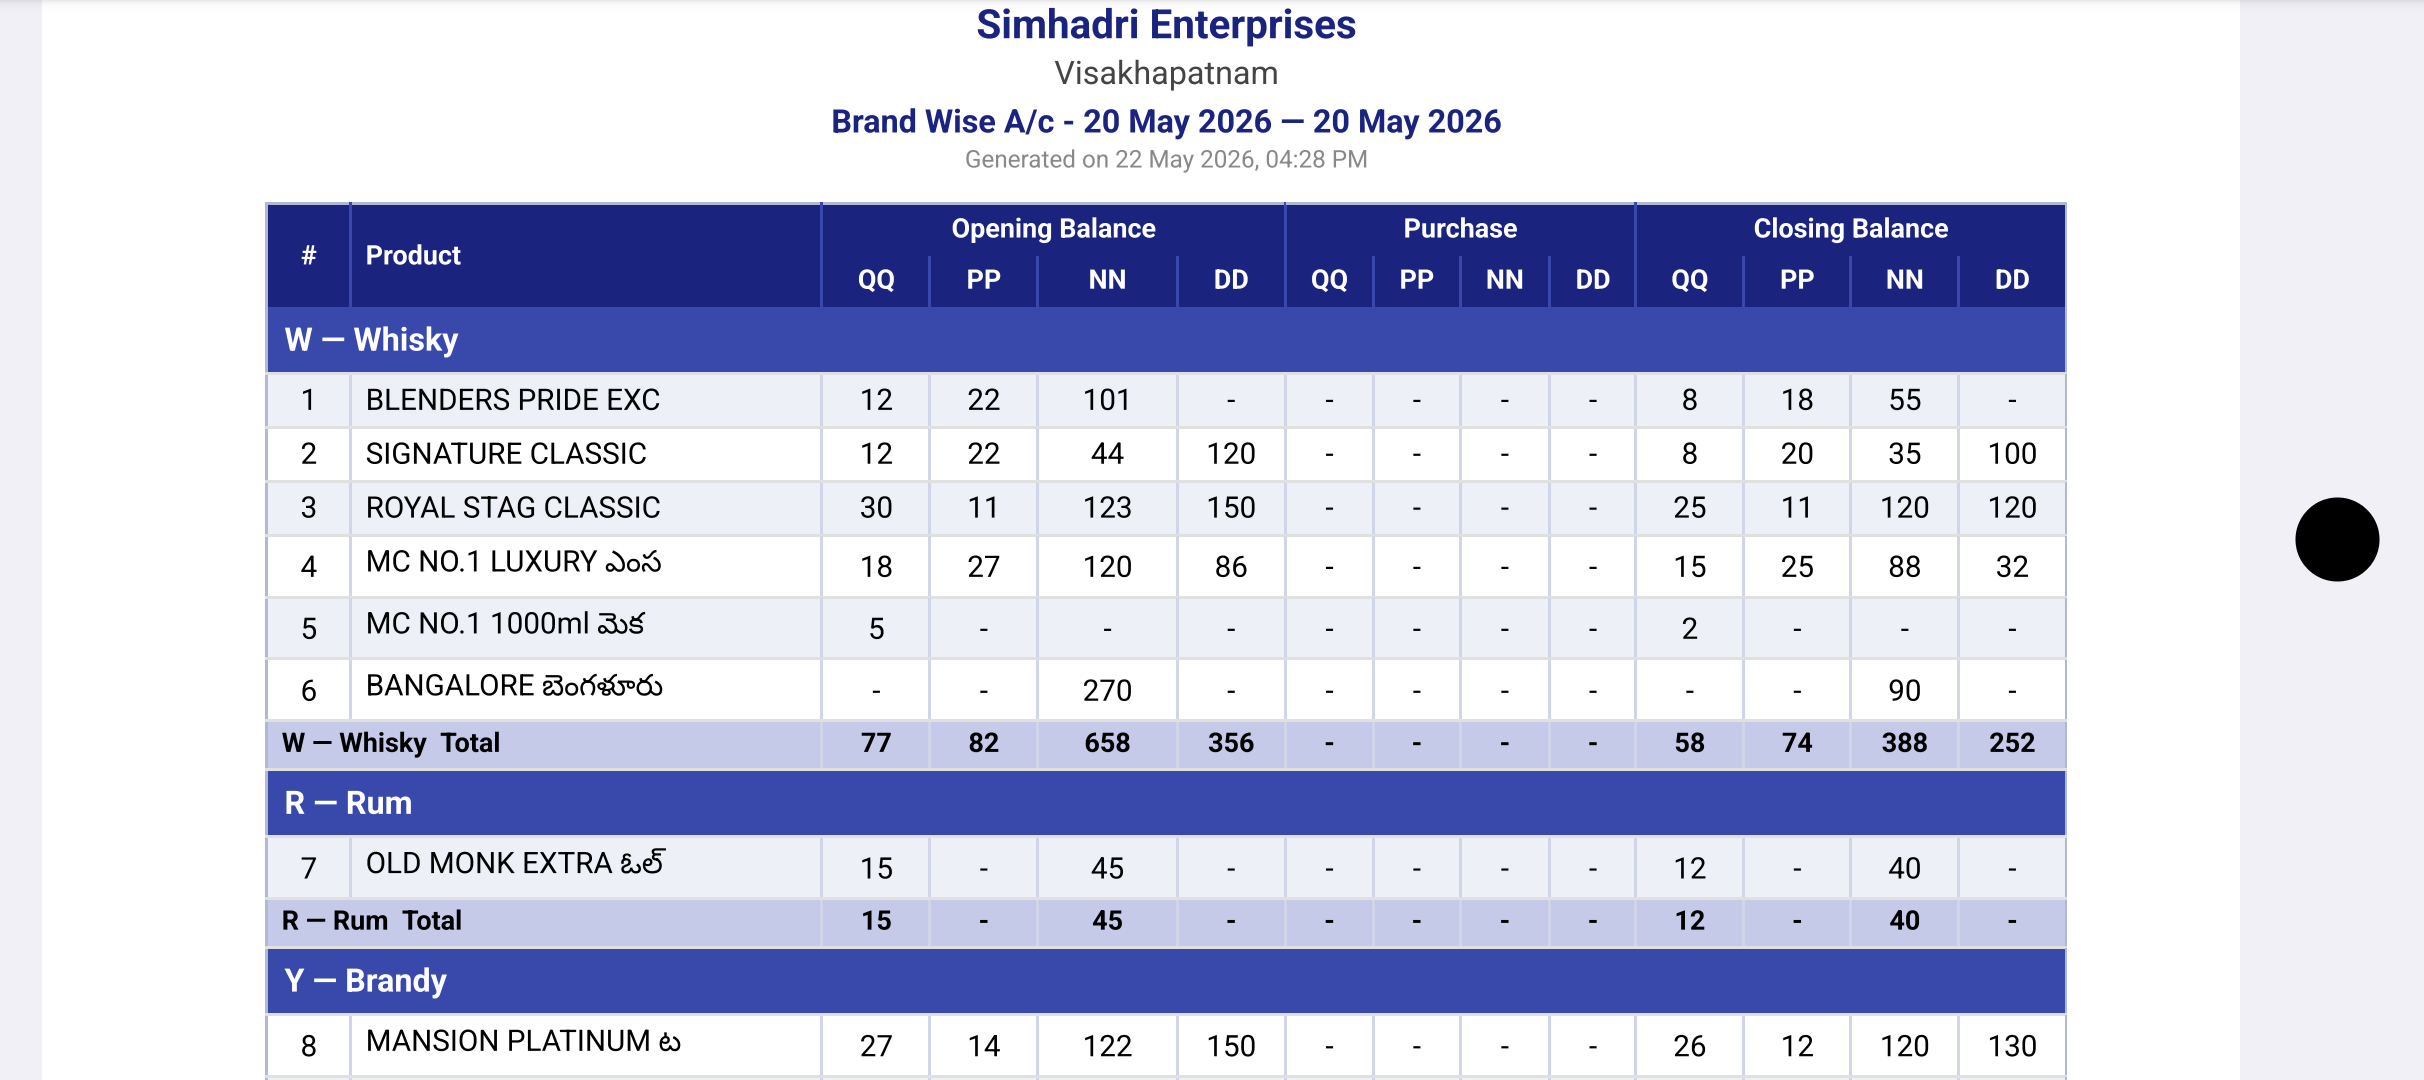
A daily account summarising sales and stock per brand, grouped by product category. Useful for regulatory reporting where required by your business type.
All purchase records within a date range, grouped by invoice — useful for supplier-wise or invoice-wise reconciliation.
Shows the day-end commit totals (sale amount, UPI receipts, expenses, cash deposit) for each day in a selected month — for monthly reconciliation and accounts.
Days with no saved day-end reconciliation are highlighted in amber with a * marker. Days where closing balances were updated after reconciliation are marked with a refresh icon (stale — consider re-committing those days for accuracy). Column totals appear at the bottom; cash amounts shown in red if negative.
| Monthly Summary Menu (⋮) | What it does |
|---|---|
| Share | Share the report as a colour-coded HTML file |
| Print / Save as PDF | Print or save using your phone's print service |
| Import Reconciliation from Cloud | Pull day-end data from your cloud workspace |
| Delete Reconciliation Range | Remove day-end records for a date range |
Total purchase quantities per product for a selected month, one row per product.
In the report filter, toggle "Include products with zero activity" to show products with no sales or purchases on the selected date. Off by default to keep reports compact.
Tap Items / Products from the Home screen.
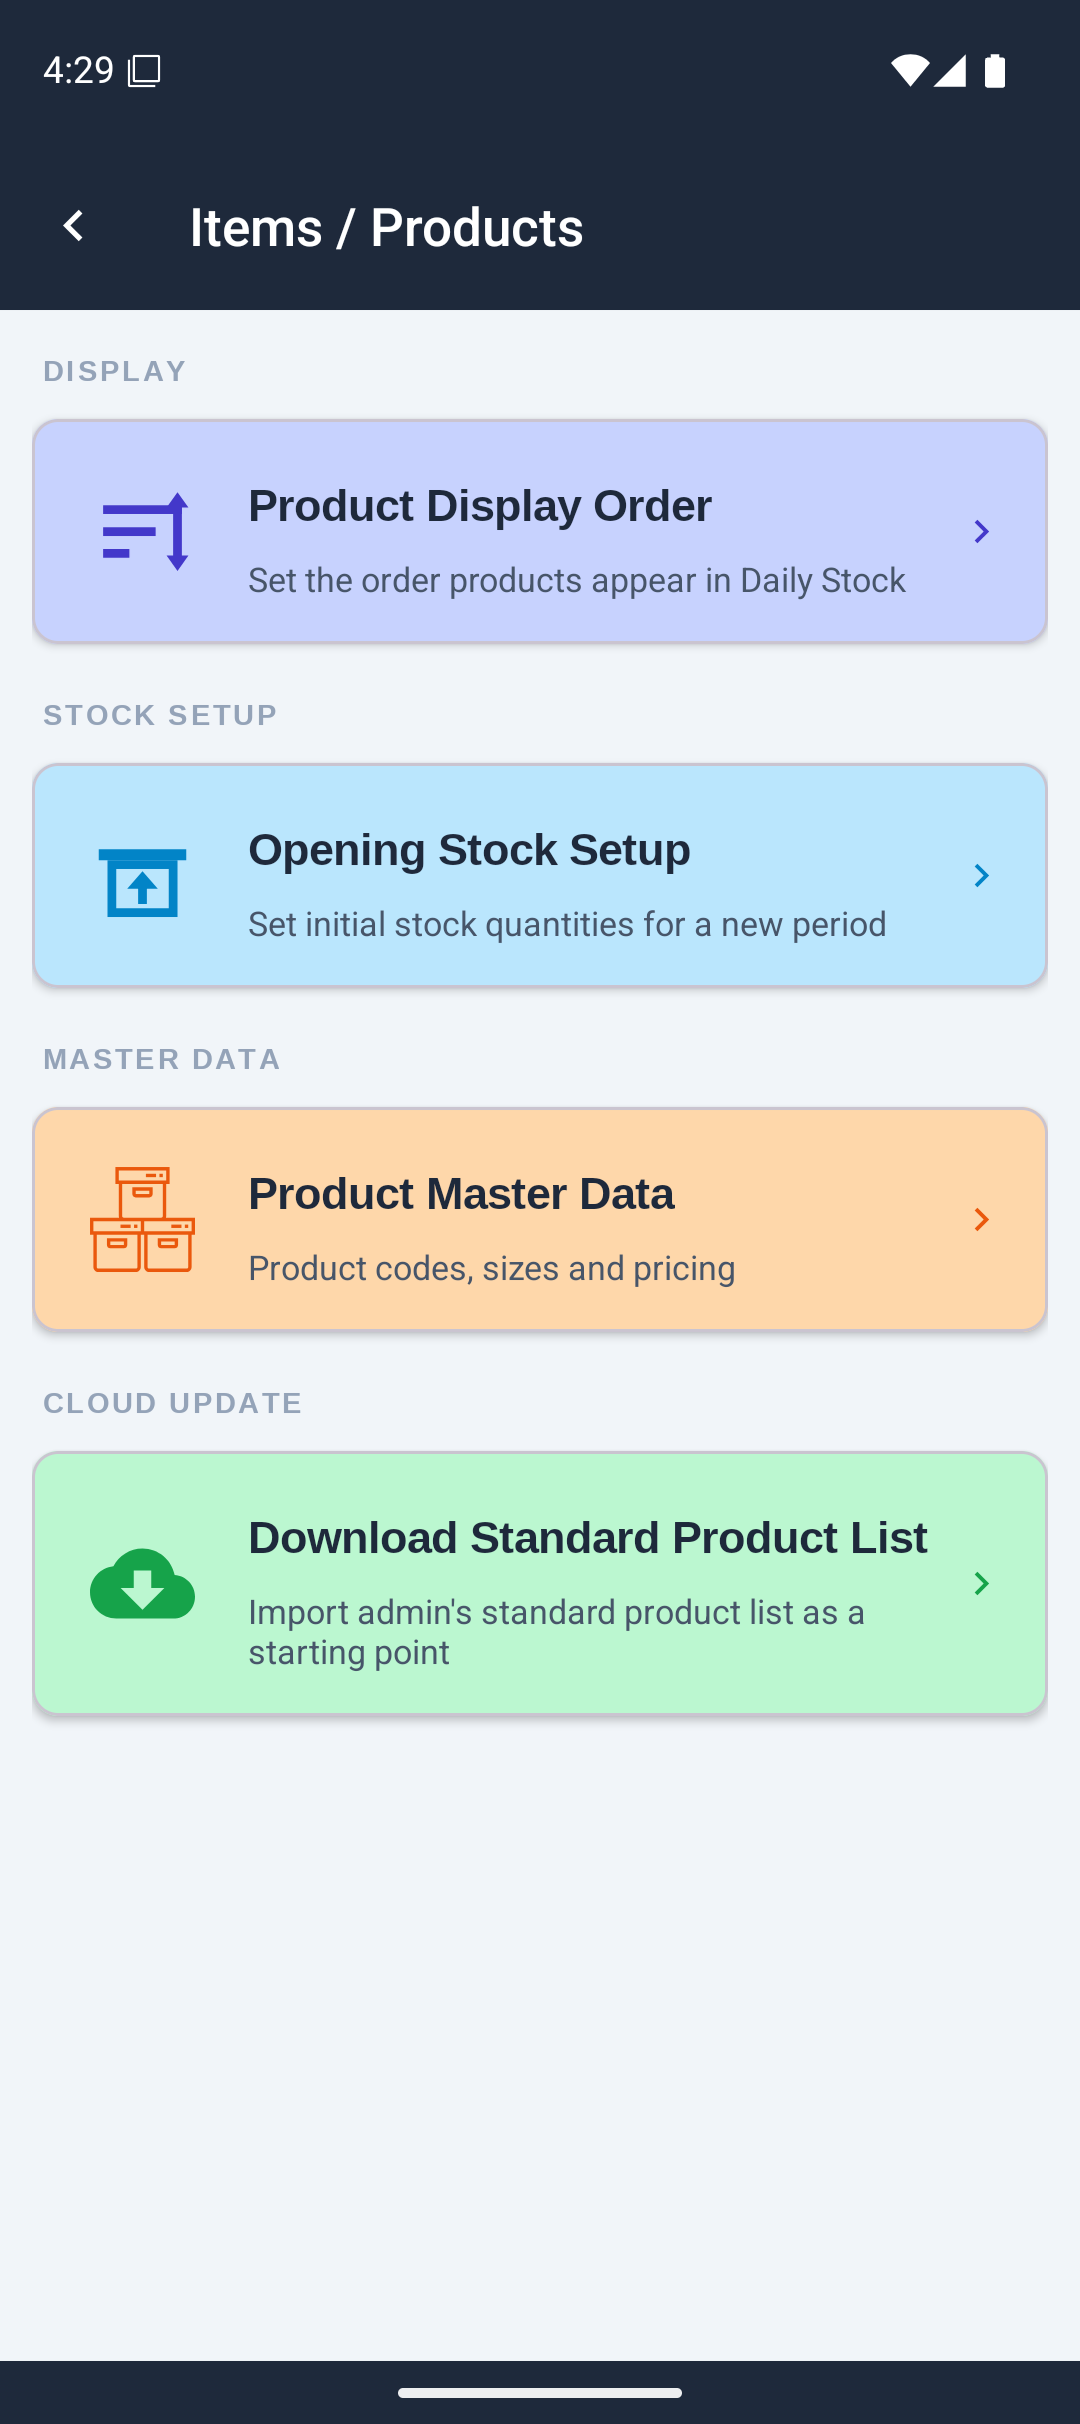
Controls the order products appear in the Daily Stock Entry screen and in reports.
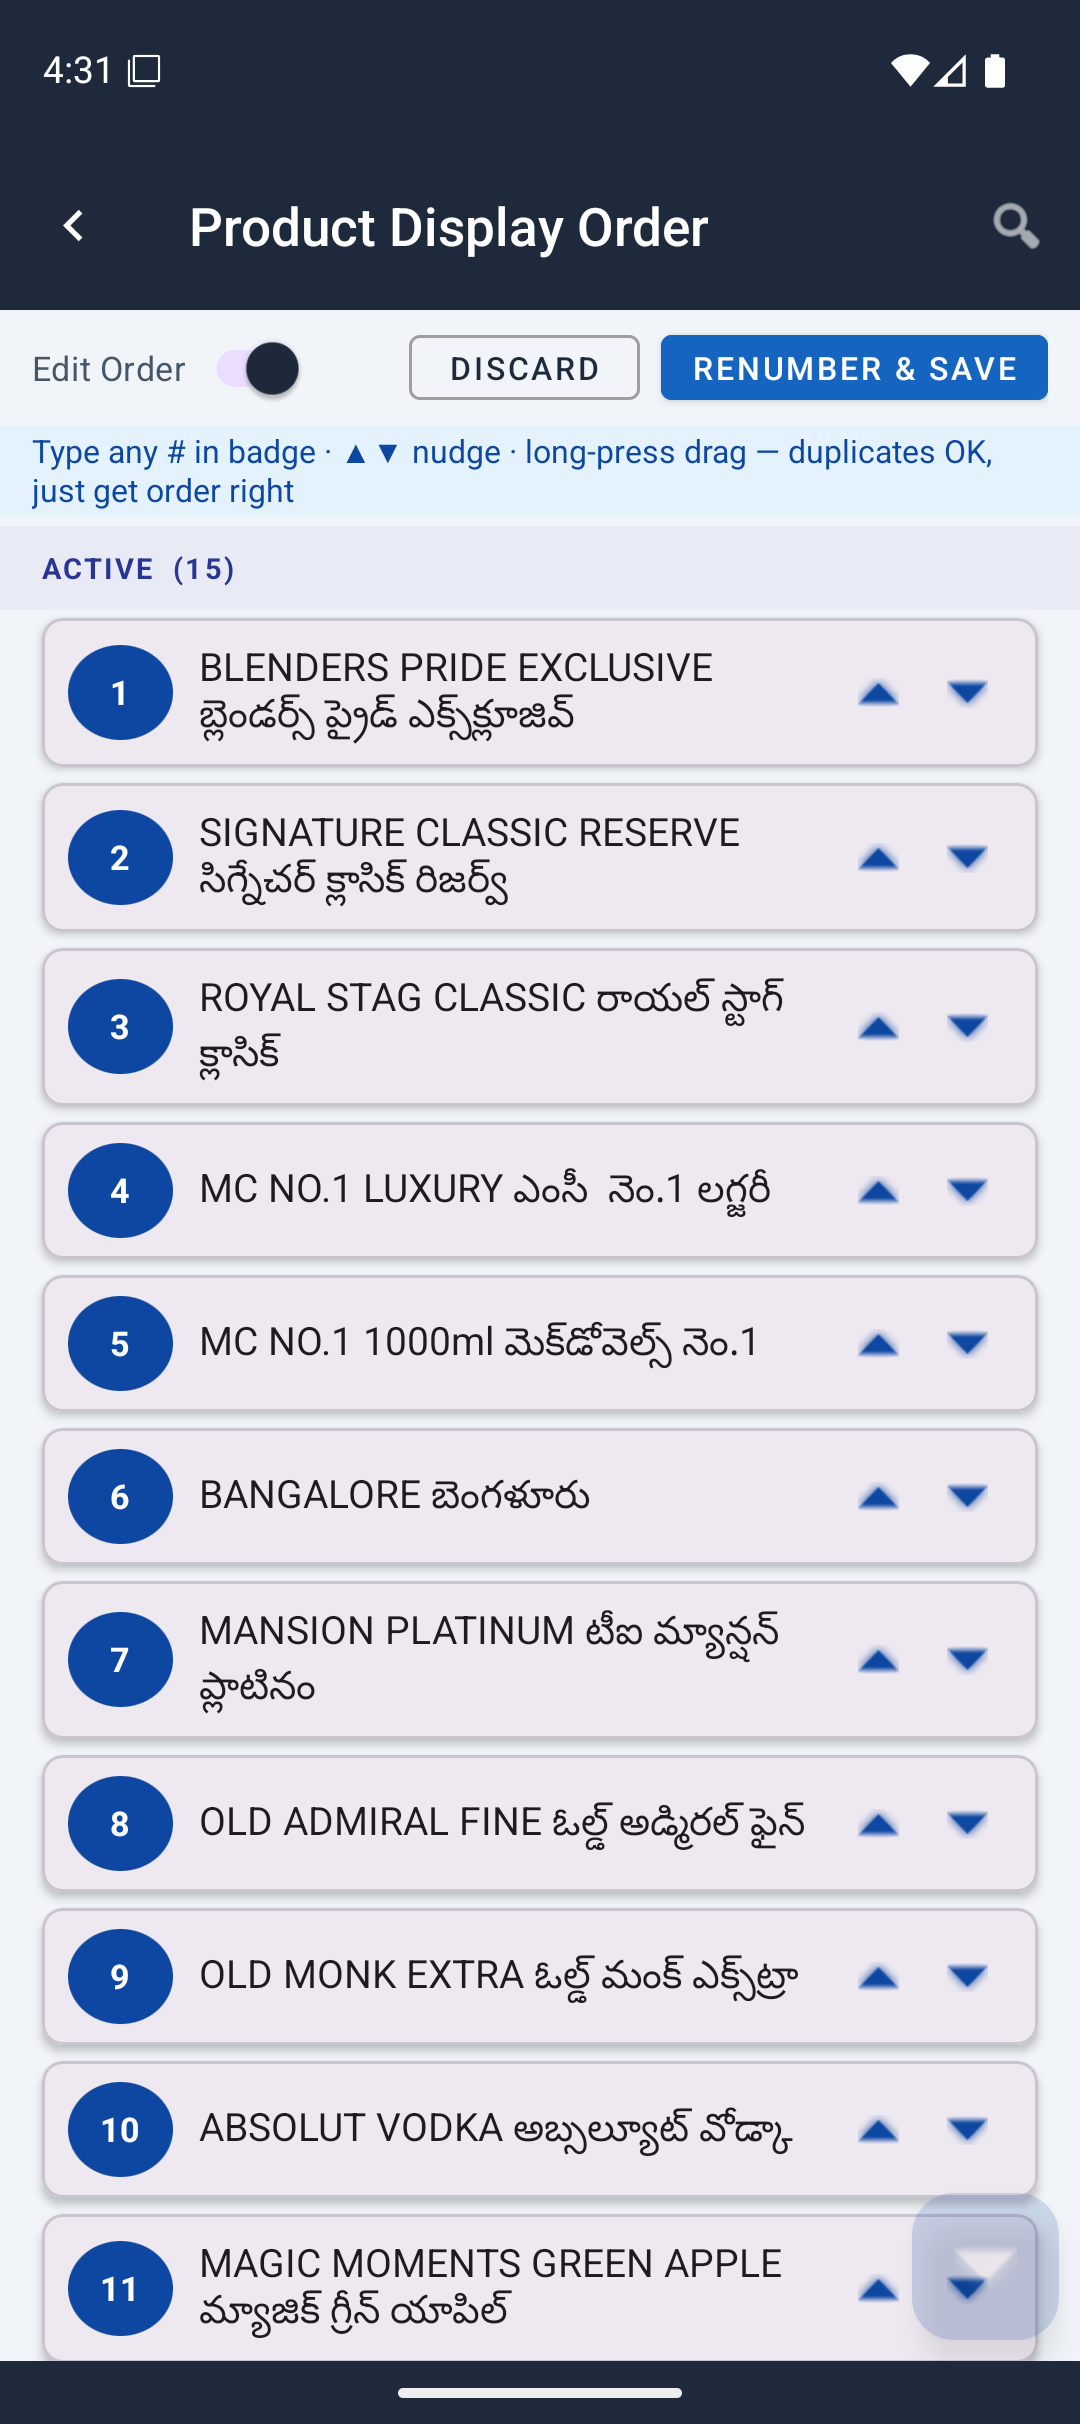
Used when starting a new period or correcting starting quantities. Opening stock can be entered manually or imported from Excel — see Section 4 — Step 4 for the full walkthrough of both methods.
See Section 4 — Step 4 for the complete step-by-step import walkthrough. The bottom bar shows sync status and buttons to Upload to Cloud or Restore from Cloud.
Displays your full product list — product codes, names and size variants — for reference.
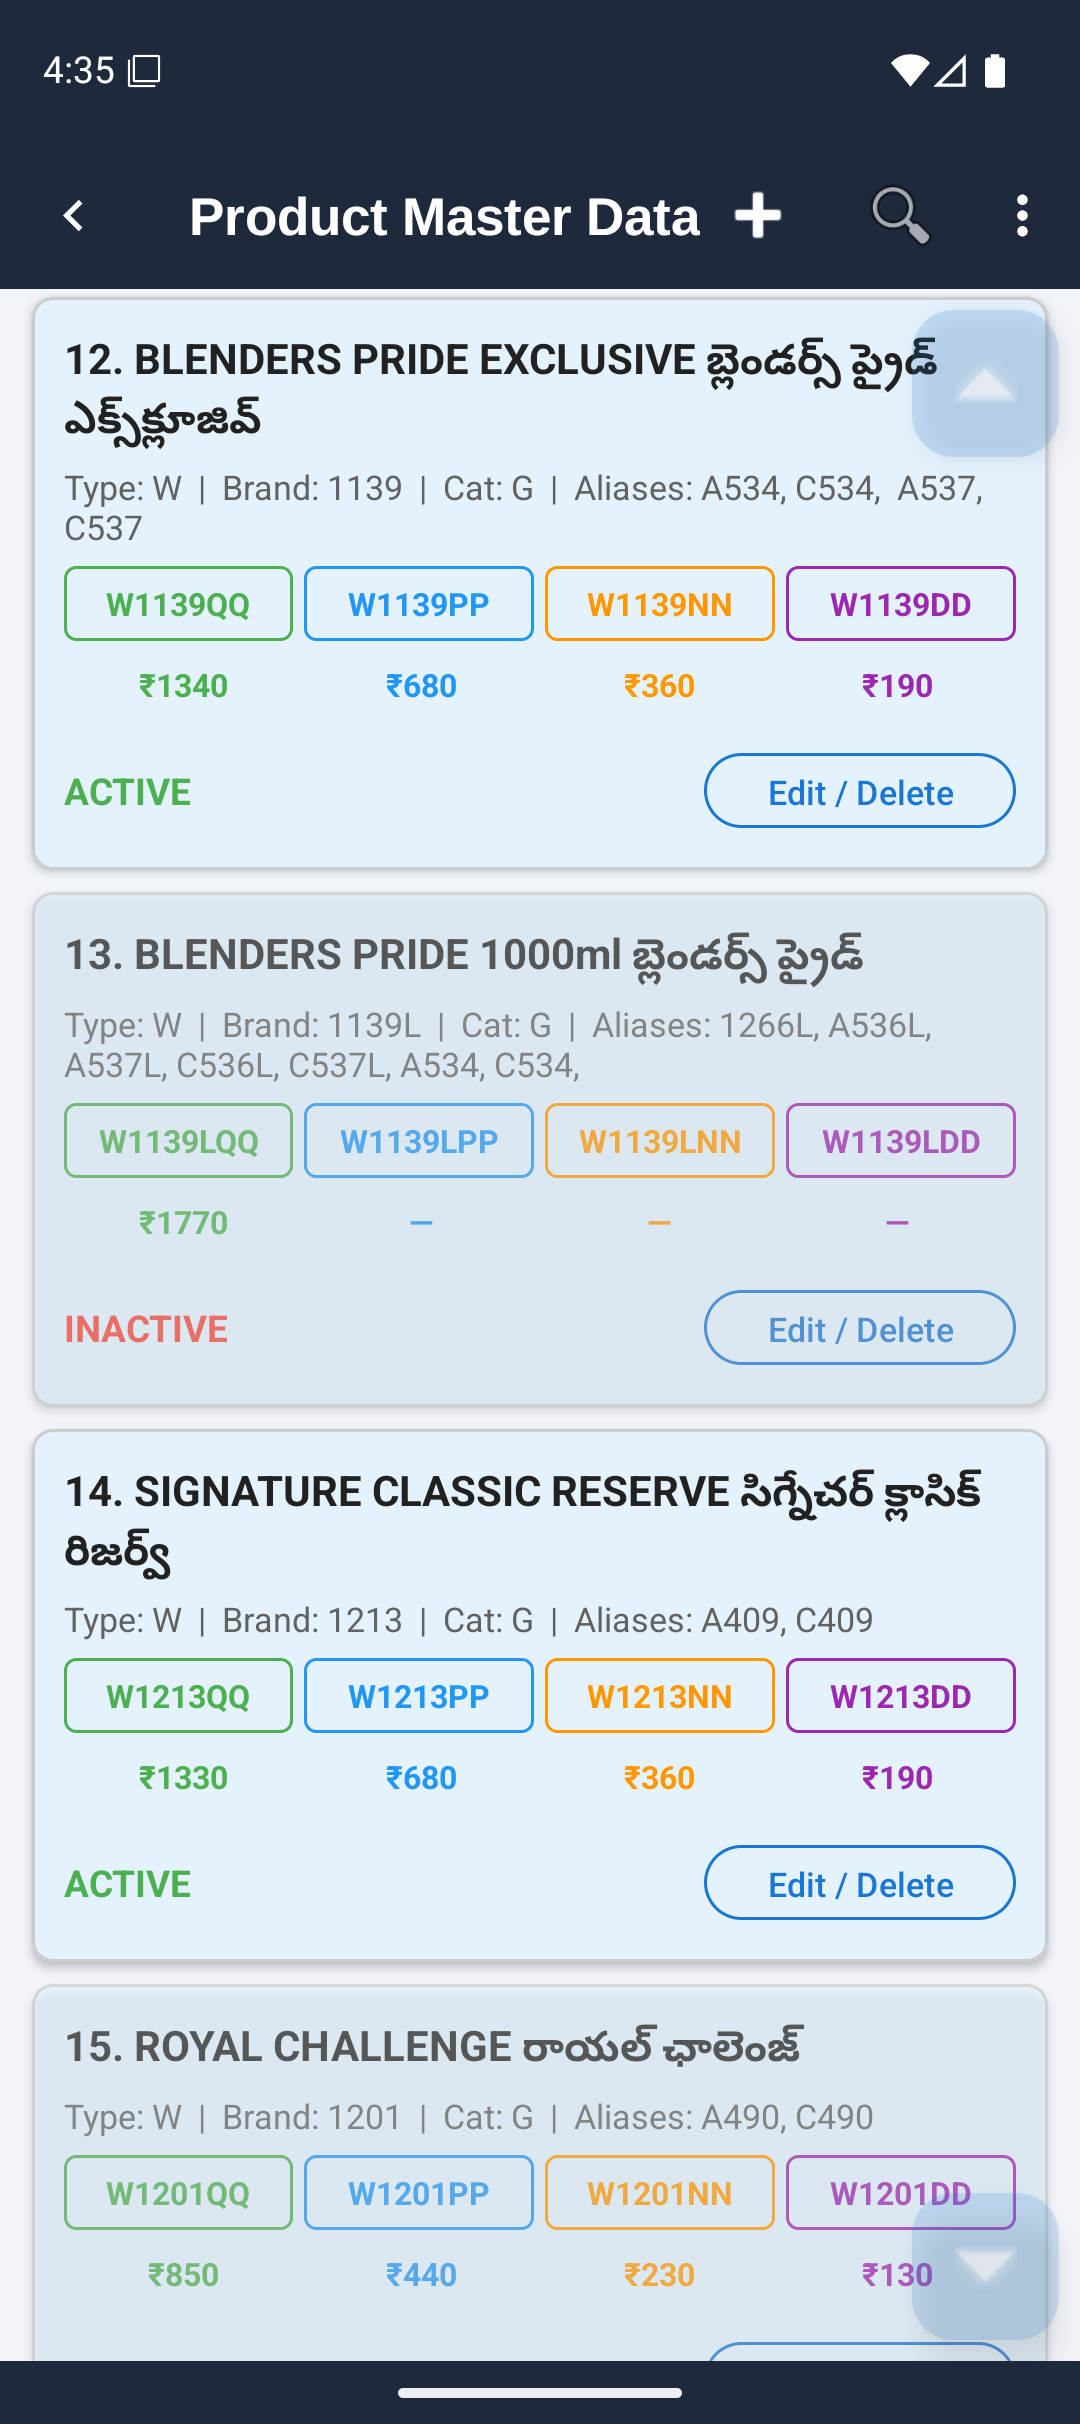
Downloads the latest product master from the admin's cloud workspace. Run this whenever the admin adds new products or updates prices.
Tap Settings from the Home screen.
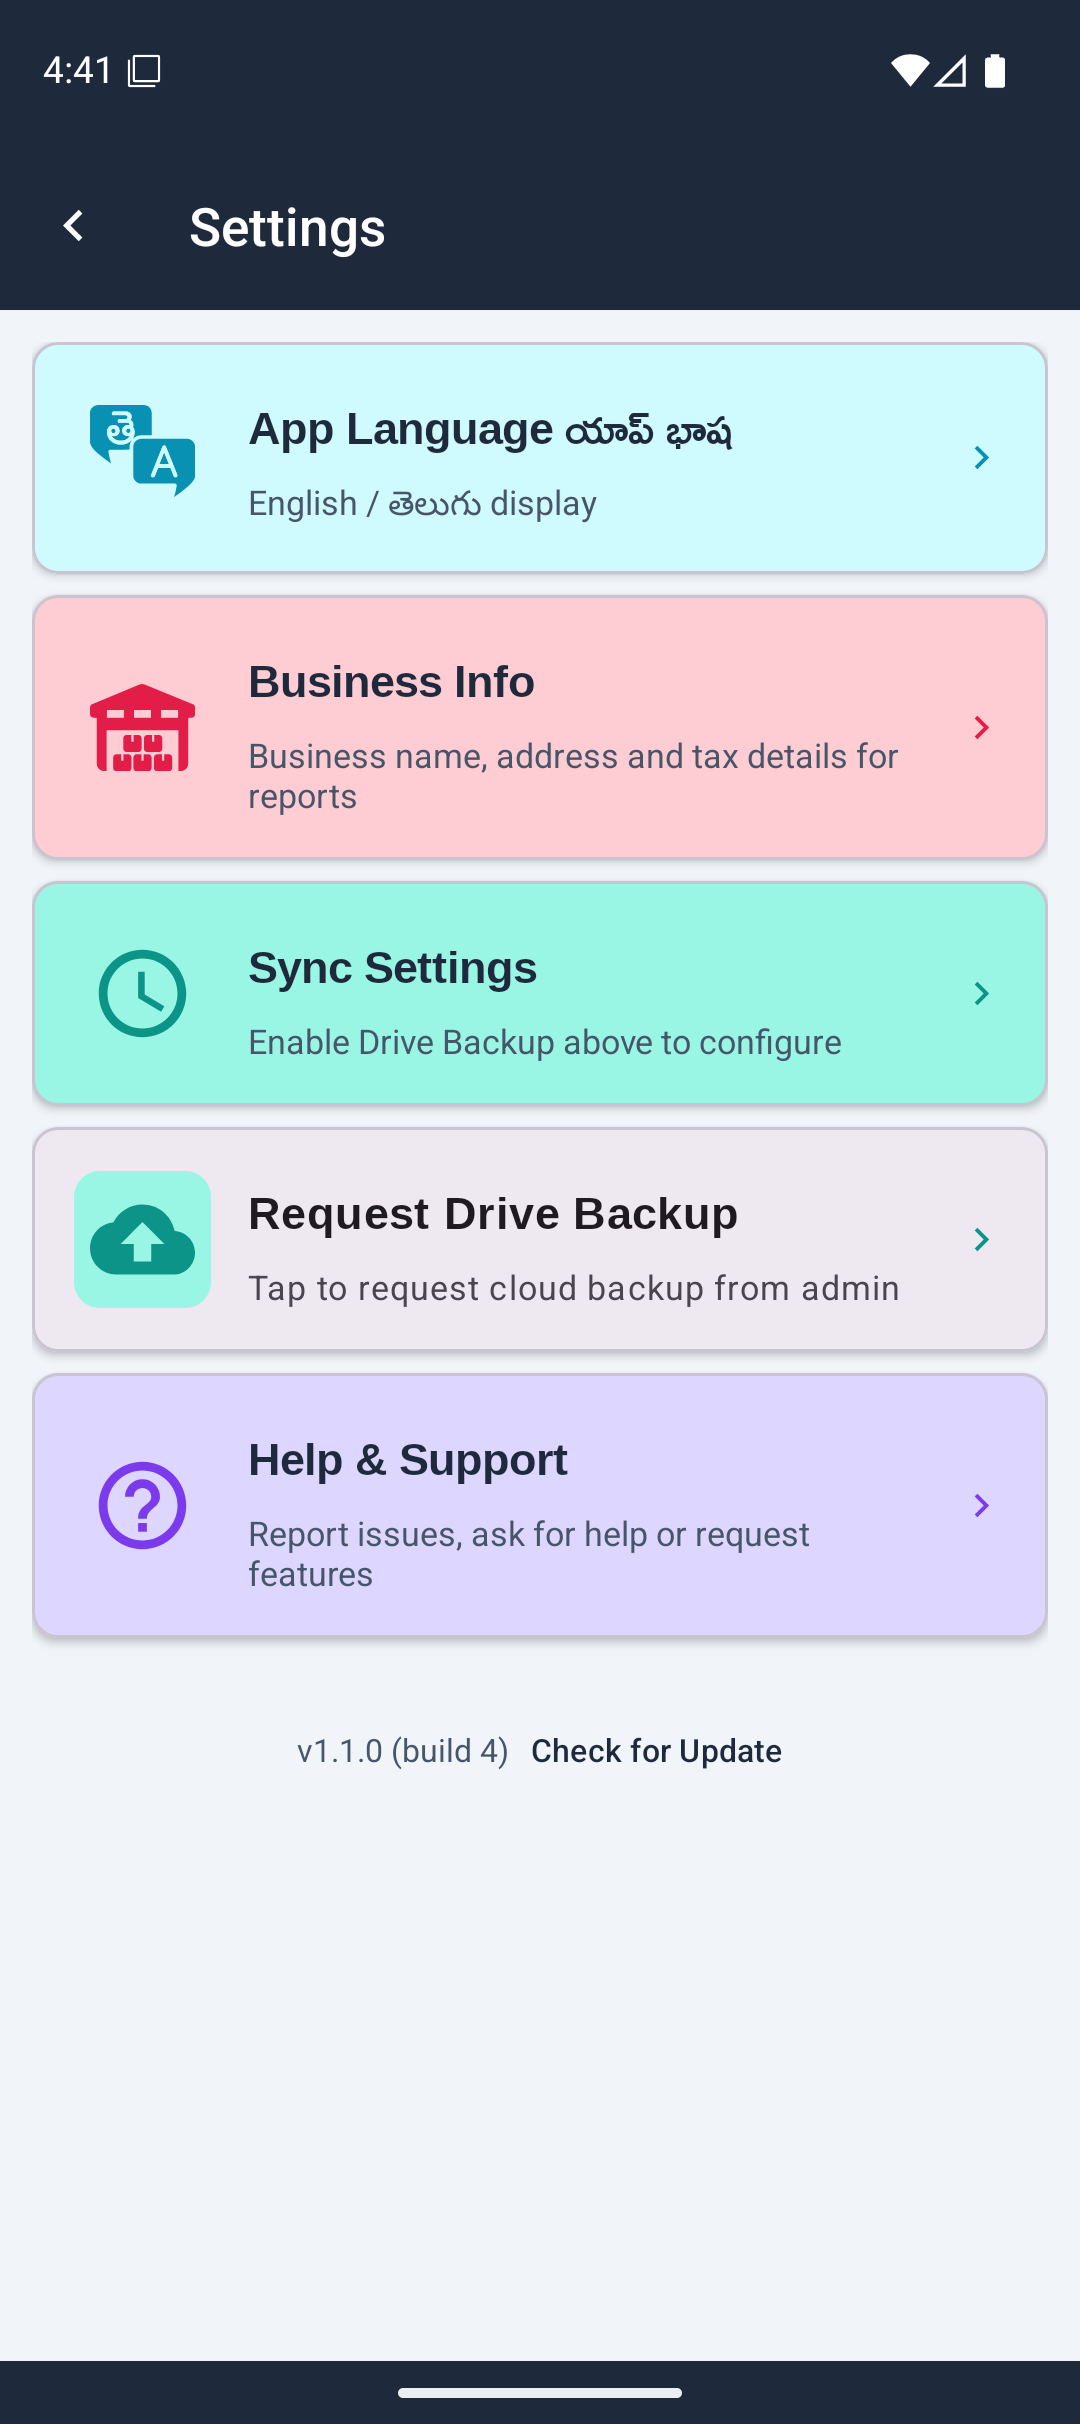
Tap App Language to switch between English and తెలుగు. The change applies immediately to all screens. You can also switch language from the Getting Started dialog's EN / తె toggle.
Update your business name, owner name, address and phone. All fields are the same as in Step 1 of the Getting Started setup.
| Your Status | Menu Option | What it does |
|---|---|---|
| Registered | Delete Account & Data | Removes all cloud data, registration and sign-in account permanently |
| Not registered | Clear Local Data | Deletes all inventory data from this device (exported Excel files are not affected) |
| Deletion pending | Complete Account Deletion | Finishes removing the sign-in account after re-login |
Shows the current state of cloud backup. See Section 11 for the full workflow.
Available only when Drive Backup is active. Configure whether the app syncs automatically every 6 hours or only when you tap the Sync button on the Home screen.
When the app encounters technical errors, a log is saved on the device. If errors exist, a Share Error Log button appears at the bottom of Settings. Share the log when contacting support, or tap Clear to remove it.
Shown at the bottom of Settings. Tap Check for Update to check for a newer version on the Play Store.
Cloud backup is optional. The app works fully offline without it. When enabled, your daily stock, purchases and day-end summaries are stored in a private Google Sheet in the admin's Drive workspace — separate from your personal Drive.
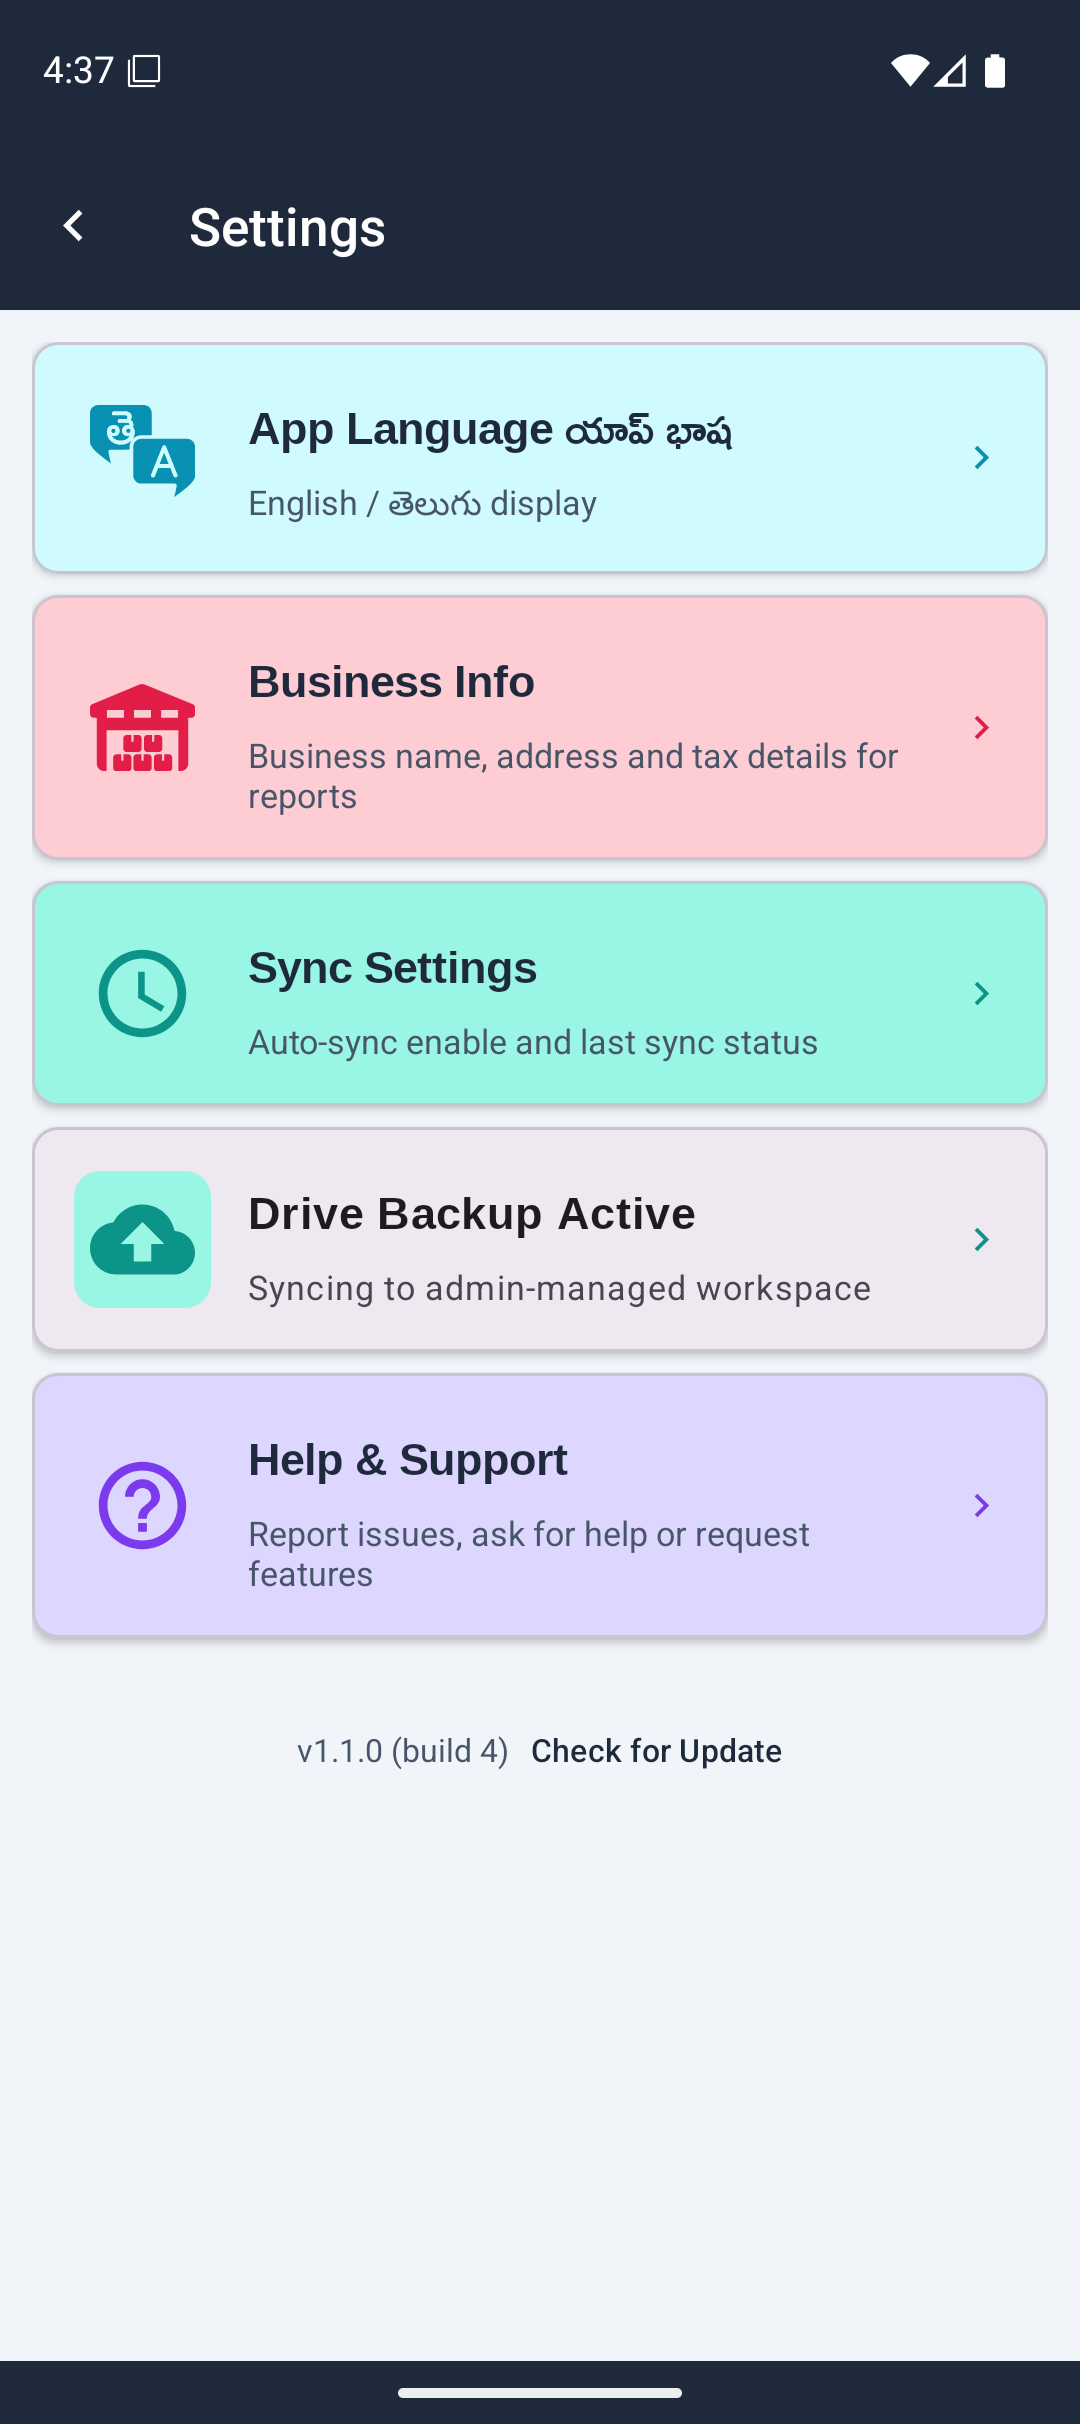
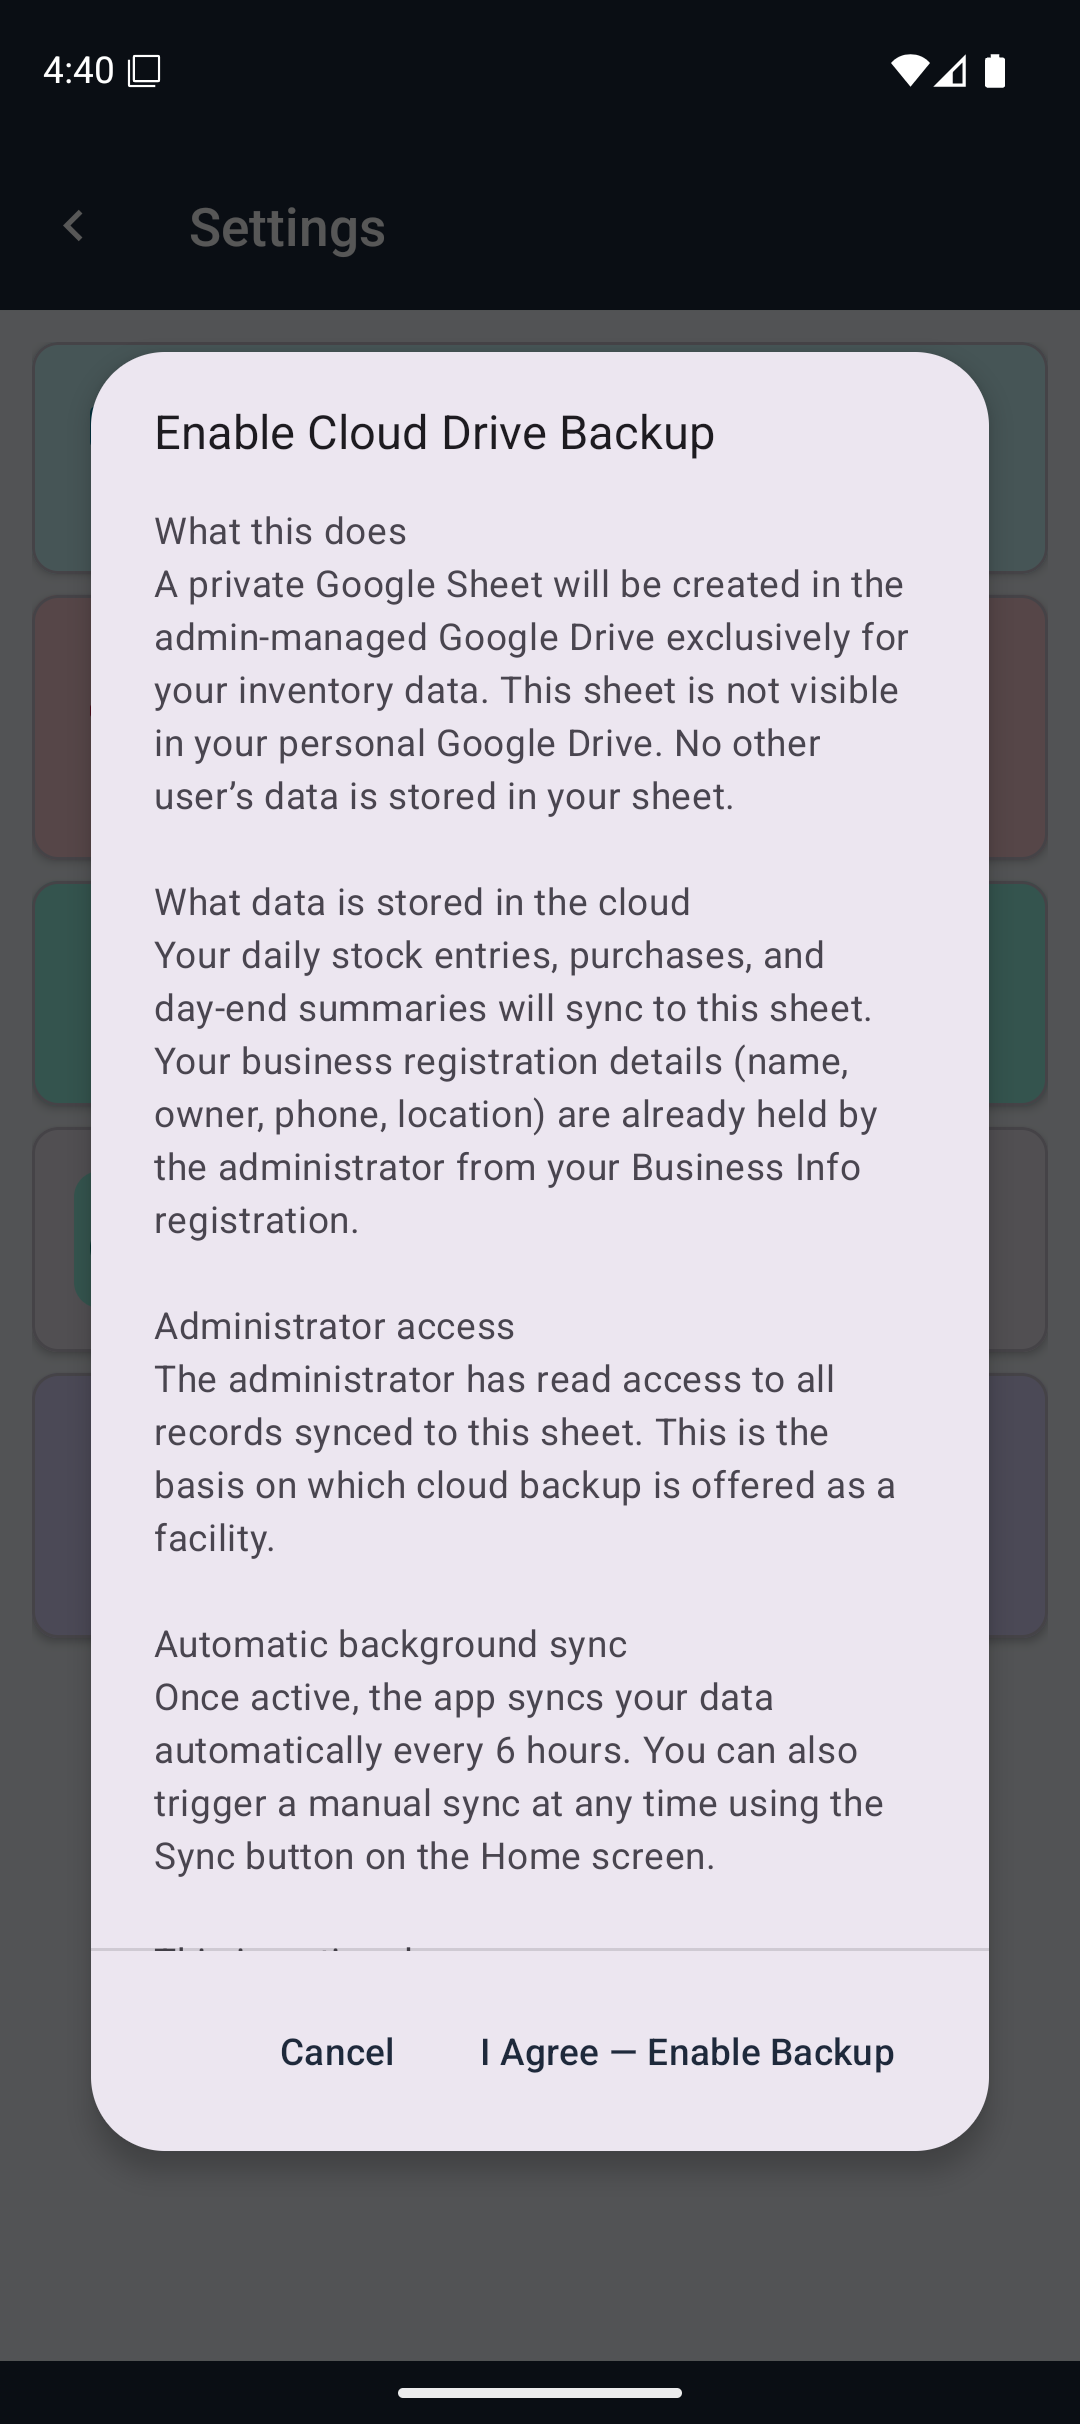
| Data | Synced? |
|---|---|
| Daily stock entries | Yes |
| Purchase records | Yes |
| Day-end reconciliation | Yes |
| Opening stock | Yes |
| Product list | Read-only download from admin |
| Licence/Reg. number, full address | Never — stays on device only |
| Icon Colour | Meaning |
|---|---|
| White | All records synced successfully |
| Red | One or more records failed — tap to retry |
| Amber / Yellow | Drive Backup not set up |
Tap the sync icon on the Home screen at any time to trigger an immediate manual sync.
The administrator assigns each account a role. Most users are Editors.
| Role | What you can do |
|---|---|
| Editor (default) | Full access — enter data, sync up and down, all buttons active |
| Viewer | Read-only — sync down from cloud only; data entry and save buttons are hidden |
Contact the admin if you need your role changed.
WinEntry can both export data to Excel for records and reports, and import data from Excel to avoid manual typing. All import and export operations use standard .xlsx files that open in Microsoft Excel, Google Sheets or any compatible spreadsheet app.
Exported files are saved to the phone's Downloads folder. After export, a Share button lets you send the file directly via WhatsApp, email or any other app.
| What to export | Where to find it | Notes |
|---|---|---|
| Daily stock full sheet | Daily Stock → ⋮ → Export Daily Stock | All products, all sizes, for a selected date |
| Closing balances (single date) | Daily Stock → ⋮ → Export Current Date | Useful for a snapshot of end-of-day stock |
| Daily stock (date range) | Daily Stock → ⋮ → Export Date Range | Select From and To dates |
| All purchases | Purchases → ⋮ → Export All | Every invoice ever recorded |
| Purchases (date range) | Purchases → ⋮ → Export Filtered | Select From and To dates |
| Monthly summary | Reports → Monthly Sale Data → ⋮ → Share | Colour-coded HTML or PDF via Print |
The import system follows the same three-step pattern for every data type:
Always start by downloading the template from within the app. The template is pre-filled with your product codes and column headings in the exact format the app expects. Never create an import file from scratch — use the template.
Open the template on a computer or phone (Google Sheets, Microsoft Excel). Enter your data in the quantity/value columns. Do not change product codes, column headings or sheet structure. Save as .xlsx.
Transfer the filled file back to your phone (WhatsApp, Google Drive, email attachment or USB cable). In the app, tap ⋮ → the relevant Import option, then select the file. The app validates each row before committing.
| What to import | Template location | Import location |
|---|---|---|
| Opening stock | Products → Opening Stock → ⋮ → Download Template | Products → Opening Stock → ⋮ → Import from Excel |
| Closing balances | Daily Stock → ⋮ → Download Closing Template | Daily Stock → ⋮ → Import Closing |
| Purchases | Purchases → ⋮ → Download Template | Purchases → ⋮ → Import from Excel |
After any import, the app shows a result dialog with a count for each outcome:
| Result | Meaning |
|---|---|
| New | Records imported successfully |
| Skipped | Already exist — same product + date, or same invoice + date. No change made. |
| Failed | Product code not found in your product list, or data format error |
Tap Copy List to copy the full list of skipped or failed rows to clipboard. Paste into a notes app or email to review and correct the figures before retrying.
Go to Settings → Help & Support
Support email: simhadrisystems@gmail.com
Tap Ask for Help or Report Issue. The app pre-fills a message template with your app version, Android version and device model — you choose what additional details to add. No data is sent automatically.
| Problem | What to do |
|---|---|
| "Request Access" appears instead of "Download" in onboarding | Your account needs to be activated by the admin — tap "Request Access" to send the request |
| "Drive Backup Pending" for more than a day | Tap the card → Send Reminder |
| Sync icon is red on Home screen | Check internet connection, then tap the sync icon to retry |
| Opening balance looks wrong | Check if the previous day was committed — open that date in Daily Stock and verify the closing balance was saved |
| Product missing from the daily stock list | Items/Products → Download Standard Product List to get the latest list from admin |
| "Account Not Activated" when downloading products | Admin needs to add your account — contact admin by email or WhatsApp |
| App shows "Sign in again to complete" after account deletion | Sign out, sign back in with the same account, then go to Business Info → ⋮ → Complete Account Deletion |
Go to Settings → Help & Support → Import Test Data. Loads a sample set of opening balances and dummy stock data for practice. Requires app registration (Step 1 in onboarding).
Select the date you want as the sample opening balance day, then confirm the import. Replace sample data with your real figures when you are ready to begin live trading.